Java
语法
hello world
1
2
3
4
5
|
public class Main {
    public static void main(String[] args) {
        System.out.println("Hello World");
    }
}
|
运行时会生成.class文件,就是类,可以用javac 1.java生成类文件然后再java Main执行helloworld
注释
单行//,多行/**/
还有javadoc的文档注释
1
2
3
4
|
//javadoc文档注释
/**
 * @Author gulu
 */
|
数据类型
 1
 2
 3
 4
 5
 6
 7
 8
 9
10
11
12
13
|
public class Main {
    public static void main(String[] args) {
        //System.out.println("Hello World");
        long a= 10L;
        float b=10f;
        double c=10d;
        boolean d=true;
        System.out.println(a);//10
        System.out.println(b);//10.0
        System.out.println(c);//10.0
        System.out.println(d);//true
    }
}
|
变量
 1
 2
 3
 4
 5
 6
 7
 8
 9
10
11
12
13
14
|
public class demo1 {
    static double a = 1.0;//类变量static
    String name;//实例变量
    int age;
    public static void main(String[] args) {
        int i=10;//局部变量
        System.out.println(i);
        demo1 obj = new demo1();//实例化类
        System.out.println(obj.age);
        System.out.println(obj.name);
        System.out.println(a);

    }
}
|
常量加final
运算符
幂运算,导入Math类
1
2
|
double a=Math.pow(2,3);
System.out.println(a);
|
包
package
引入别人包用import package xxx.xxx.xxx
JavaDoc生成文档
 1
 2
 3
 4
 5
 6
 7
 8
 9
10
11
12
13
|
public class Doc{
    String name;

    /**
     *
     * @param name
     * @return
     * @throws Exception
     */
    public String test(String name) throws Exception{
        return name;
    }
}
|
命令行
1
|
javadoc -encoding xxx -charset xxx xxx.java
|
Scanner
next和hasNext搭配,识别空格前的字符,输出不带空格
nextLine和hasNextLine搭配,识别回车前的字符,输出带空格
 1
 2
 3
 4
 5
 6
 7
 8
 9
10
11
12
13
14
|
import java.util.Scanner;

public class demo1 {
    public static void main(String[] args) {
        Scanner s=new Scanner(System.in);
        System.out.println("用next接收: ");
        if (s.hasNextLine()) {
            String s1=s.nextLine();
            System.out.println("输入的内容为:"+s1);
        }
        s.close();

    }
}
|
还有nextInt、nextFloat等,识别数据类型的
循环
增强for循环
1
2
3
4
5
6
7
8
|
public class Main {
    public static void main(String[] args) {
        int[]a={1,2,3,4,5};
        for(int x:a){
            System.out.println(x);
        }
    }
}
|
方法
像函数
 1
 2
 3
 4
 5
 6
 7
 8
 9
10
|
public class Main {
    public static void main(String[] args) {
        int sum=add(1,2);
        System.out.println(sum);

    }
    public static int add(int a,int b){
        return a+b;
    }
}
|
可变参数
 1
 2
 3
 4
 5
 6
 7
 8
 9
10
|
public class Main {
    public static void main(String[] args) {
        Main a=new Main();
        a.test(1,2,3);

    }
    public void test(int...a){
        System.out.println(a[0]);
    }
}
|
int...数据类型后面加...
数组
 1
 2
 3
 4
 5
 6
 7
 8
 9
10
|
public class Main {
    public static void main(String[] args) {
        int[] num;
        num=new int[10];
        for (int i = 0; i < num.length; i++) {
            num[i]=i;
            System.out.println(num[i]);
        }
    }
}
|
创建有两种方式
1
2
|
int[] num;
int num[];
|
对象
利用new关键字创建对象
1
2
3
4
5
6
7
|
public class Doc{
    String name;
    int age;
    public void study(){
        System.out.println(this.name);
    }
}
|
在main里面创建
 1
 2
 3
 4
 5
 6
 7
 8
 9
10
11
12
13
14
|
public class Main {
    public static void main(String[] args) {
        Doc xiaoming = new Doc();
        Doc xh = new Doc();
        xiaoming.name = "xiaoming";
        xh.name = "xh";
        xiaoming.age = 20;
        xh.age = 10;
        System.out.println(xiaoming.name);
        System.out.println(xh.age);
        System.out.println(xiaoming.age);
        System.out.println(xh.name);
    }
}
|
构造器
一个类什么都不写也会生成构造器,与类名相同
使用new关键字本质上是调用构造器,用来初始化值
有参构造:一旦定义有参构造,无参构造必须显示定义
IDEA的快捷键生成构造器AIt+insert
封装
 1
 2
 3
 4
 5
 6
 7
 8
 9
10
11
|
public class Doc{
    private String name;
    private int  age;
    private String gender;
    public String getName(){
        return this.name;
    }
    public void setName(String name){
        this.name = name;
    }
}
|
private属性就不能直接被访问了,要用public方法才能调用
main里面
1
2
3
4
5
6
7
8
9
|
public class Main {
    public static void main(String[] args) {
        Doc xiaoming = new Doc();
//        xiaoming.name = "xiaoming";
//        System.out.println(xiaoming.name);
        xiaoming.setName("xiaoming");
        System.out.println(xiaoming.getName());
    }
}
|
如果直接用.name会报错
关于生成封装也可以用前面快捷键AIt+insert
继承
extends关键字用于子类继承父类,所有类都继承父类Object类,跟ruby一样(
super关键字用于调用父类中的变量
父类
1
2
3
|
public class Doc{
    protected String name="aaa";
}
|
子类
1
2
3
4
5
6
7
8
|
public class Main extends Doc{
    public String name="bbb";
    public void test(String name){
        System.out.println(name);
        System.out.println(this.name);
        System.out.println(super.name);
    }
}
|
实例化子类
1
2
3
4
5
6
|
public class demo1 {
    public static void main(String[] args) {
        Main a=new Main();
        a.test("666");
    }
}
|
会依次输出666,bbb,aaa
如果父类的方法是private无法被继承
重写是父类与子类之间的,方法名一样,子类通过@Override注释来重写父类方法
不能是静态方法,就是没有static关键字
多态
子类型可以用父类型来创建
1
2
3
|
Student s1=new Student();
Person s2=new Student();
Object s3=new Student();
|
如果调用父类与子类相同方法,考虑子类的重写
父类调用子类子类方法要类型强转弱
子类有方法eat()
父类调用要
抽象类
abstract关键字只有方法名字没有方法实现
1
2
3
|
public abstract class aaa{
    public abstract void test();
}
|
他的子类必须重写他的方法,如果他的子类也是抽象类就不要了
抽象类也不能用new,必须要用子类来实现方法
接口
interface关键字
接口中不能写方法,需要有实现类
类实现接口要用implenments关键字
接口
1
2
3
4
5
6
|
public interface Usersevice {
    void add(String name);
    void remove(String name);
    void update(String name);
    void check(String name);
}
|
实现接口的类
 1
 2
 3
 4
 5
 6
 7
 8
 9
10
11
12
13
14
15
16
17
18
19
20
21
|
public class UserserviceImpl implements Usersevice{
    @Override
    public void remove(String name) {

    }

    @Override
    public void add(String name) {

    }

    @Override
    public void update(String name) {

    }

    @Override
    public void check(String name) {

    }
}
|
一个类可以多继承接口
内部类
 1
 2
 3
 4
 5
 6
 7
 8
 9
10
11
12
|
public class out {
    public int id =999;
    public  void outer(){
        System.out.println("outer method");
    }
    public class in{
        public void inner(){
            System.out.println("inner method");
        }
    }

}
|
调用
1
2
3
4
5
6
7
|
public class Doc{
    public static void main(String[] args) {
        out a = new out();
        out.in b = a.new in();
        b.inner();
    }
}
|
可以用这种方式来获取私有属性
1
2
3
4
5
6
7
8
9
|
public class out {
    private int id =999;
    public class in{
        public void getid(){
            System.out.println(id);
        }
    }

}
|
调用
1
2
3
4
5
6
7
|
public class Doc{
    public static void main(String[] args) {
        out a = new out();
        out.in b = a.new in();
        b.getid();
    }
}
|
会输出私有属性id999
异常
try关键字监控区域,catch捕获异常,finally无论结果都会执行
 1
 2
 3
 4
 5
 6
 7
 8
 9
10
11
12
13
14
|
public class Doc{
    public static void main(String[] args) {
         int a=1;
         int b=0;
         try{
             System.out.println(a/b);
         }catch(ArithmeticException e){
             System.out.println("Arithmetic Exception");
         }finally{
             System.out.println("finally");
         }

    }
}
|
catch里面填想要捕获的类型,最高的是Throwable
throw关键字在方法中主动抛出异常
1
|
throw new ArithmeticException();
|
throws关键字在类主动抛出异常
1
|
public void test(int a,int b) throws ArithmeticException{}
|
自定义异常
 1
 2
 3
 4
 5
 6
 7
 8
 9
10
11
12
13
|
public class myexception extends Exception{
    private int details;
    public myexception() {
        this.details = 0;
    }

    @Override
    public String toString() {
        return "myexception{" +
                "details=" + details +
                '}';
    }
}
|
多线程
继承Thread类
 1
 2
 3
 4
 5
 6
 7
 8
 9
10
11
12
13
14
15
16
17
18
19
20
21
22
23
|
package threaddemo;
//继承Thread类,重写run方法,调用start开启线程
public class thread1 extends Thread {
   @Override
   public void run() {
       //run方法线程体
       for (int i = 0; i < 10; i++) {
           System.out.println("aaa"+i);
       }

   }

   public static void main(String[] args) {
       thread1 t1 = new thread1();
       t1.start();//开启线程

       //main线程,主线程
       for (int i = 0; i < 10; i++) {
           System.out.println("main"+i);
       }

   }
}
|
两条线程同时执行,如果直接调用run方法会先执行run,调用start方法开启多线程,会交替执行
commons.io包的使用
官网下载包之后
新建一个目录叫lib,把包放进去,右键把目录添加为库就行了
练习用多线程下载图片
 1
 2
 3
 4
 5
 6
 7
 8
 9
10
11
12
13
14
15
16
17
18
19
20
21
22
23
24
25
26
27
28
29
30
31
32
33
34
35
36
37
38
39
40
41
42
43
44
|
package threaddemo;

import org.apache.commons.io.FileUtils;

import java.io.File;
import java.io.IOException;
import java.net.URL;

public class thread2 extends Thread {
    private String url;
    private String name;

    public thread2(String url, String name) {
        this.url = url;
        this.name = name;
    }
    @Override
    public void run() {
        webdownloader webdownloader = new webdownloader();
        webdownloader.download(url, name);
        System.out.println("Download complete,and filename: " + name);
    }

    public static void main(String[] args) {
        thread2 t1 = new thread2("https://haowallpaper.com/link/common/file/previewFileImg/15680526683050304", "1.png");
        thread2 t2 = new thread2("https://haowallpaper.com/link/common/file/getCroppingImg/15758357910360384", "2.png");
        thread2 t3 = new thread2("https://haowallpaper.com/link/common/file/getCroppingImg/16732268995923328", "3.png");
        t1.start();
        t2.start();
        t3.start();

    }
}

class webdownloader{
    public void download(String url,String name){
        try {
            FileUtils.copyURLToFile(new URL(url),new File(name));
        } catch (IOException e) {
            e.printStackTrace();
            System.out.println("io异常");
        }
    }
}
|
调用runnable接口
 1
 2
 3
 4
 5
 6
 7
 8
 9
10
11
12
13
14
15
16
17
18
19
20
21
22
23
24
25
|
package threaddemo;

public class thread3 implements Runnable {
    @Override
    public void run() {
        //run方法线程体
        for (int i = 0; i < 10; i++) {
            System.out.println("aaa"+i);
        }

    }

    public static void main(String[] args) {
        thread3 thread3 = new thread3();//创建runnable接口实现类对象
//        Thread thread1 = new Thread(thread3);//创建线程对象,通过线程对象开启线程,代理
//        thread1.start();
        new Thread(thread3).start();

        //main线程,主线程
        for (int i = 0; i < 10; i++) {
            System.out.println("main"+i);
        }

    }
}
|
感觉对后面学反序列化没有用,用到再学
反射
 1
 2
 3
 4
 5
 6
 7
 8
 9
10
11
12
13
14
15
16
17
18
19
20
21
22
23
24
25
26
27
28
29
30
31
32
33
34
35
36
37
38
39
40
41
42
43
44
45
46
47
48
49
50
51
52
53
54
55
56
57
58
59
|
package reflectiontest;

public class demo1 {
    public static void main(String[] args) throws ClassNotFoundException {
        //通过反射获取类的Class对象
        Class c1 = Class.forName("reflectiontest.User");
        System.out.println(c1);
        Class c2 = Class.forName("reflectiontest.User");
        //一个类在内存中只有一个Class对象
        System.out.println(c1.hashCode());
        System.out.println(c2.hashCode());
    }
}
class User{
    private String name;
    private int age;
    private int id;

    public User() {
    }
    public User(String name, int age, int id) {
        this.name = name;
        this.age = age;
        this.id = id;
    }

    public int getId() {
        return id;
    }

    public void setId(int id) {
        this.id = id;
    }

    public String getName() {
        return name;
    }

    public void setName(String name) {
        this.name = name;
    }

    public int getAge() {
        return age;
    }

    public void setAge(int age) {
        this.age = age;
    }

    @Override
    public String toString() {
        return "User{" +
                "name='" + name + '\'' +
                ", age=" + age +
                ", id=" + id +
                '}';
    }
}
|
获取Class类
 1
 2
 3
 4
 5
 6
 7
 8
 9
10
11
12
13
14
15
16
17
18
19
20
21
22
23
24
25
26
27
28
29
30
31
32
33
34
35
36
37
38
39
40
41
42
43
44
45
46
47
48
49
50
51
52
|
package reflectiontest;

public class demo2 {
    public static void main(String[] args) throws ClassNotFoundException {
        Person person = new Student();
        System.out.println(person.name);
        //方式一:通过对象获得
        Class c1 = person.getClass();
        System.out.println(c1.hashCode());
        //方式二:forname获得
        Class c2 = Class.forName("reflectiontest.Student");
        System.out.println(c2.hashCode());
        //方式三:通过类名.class获得
        Class c3 = Student.class;
        System.out.println(c3.hashCode());
        //方式四:基本内置类型的包装类都有一个Type属性
        Class c4 = Integer.TYPE;
        System.out.println(c4);//int
        //获得父类类型
        Class c5 = c1.getSuperclass();
        System.out.println(c5);

    }
}
class Person {
    public String name;

    public Person() {
    }

    public Person(String name) {
        this.name = name;
    }

    @Override
    public String toString() {
        return "Person{" +
                "name='" + name + '\'' +
                '}';
    }

}
class Student extends Person {
    public Student() {
        this.name = "Student";
    }
}
class Teacher extends Person {
    public Teacher() {
        this.name = "Teacher";
    }
}
|
所有类型的Class对象
 1
 2
 3
 4
 5
 6
 7
 8
 9
10
11
12
13
14
15
16
17
18
19
20
21
22
23
24
25
26
27
28
29
30
31
|
package reflectiontest;

import java.lang.annotation.ElementType;

public class demo3 {
    public static void main(String[] args) {
        Class c1 = Object.class;//类
        Class c2 = Comparable.class;//接口
        Class c3 = String[].class;//一维数组
        Class c4 = int[][].class;//二维数组
        Class c5 = Override.class;//注解
        Class c6 = ElementType.class;//枚举类型
        Class c7 = Integer.class;//基本数据类型
        Class c8 = void.class;//void
        Class c9 = Class.class;//Class
        System.out.println(c1);
        System.out.println(c2);
        System.out.println(c3);
        System.out.println(c4);
        System.out.println(c5);
        System.out.println(c6);
        System.out.println(c7);
        System.out.println(c8);
        System.out.println(c9);
        //只要元素类型和维度一样,就是同一个Class
        int [] a =new int[10];
        int [] b =new int[100];
        System.out.println(a.getClass().hashCode());
        System.out.println(b.getClass().hashCode());
    }
}
|
类的初始化
 1
 2
 3
 4
 5
 6
 7
 8
 9
10
11
12
13
14
15
16
17
18
19
20
21
22
23
24
25
26
27
28
29
30
31
32
33
|
package reflectiontest;

public class demo4 {
    static {
        System.out.println("Main");
    }
    public static void main(String[] args) throws ClassNotFoundException {
        //主动引用
        //Son son = new Son();
        //反射也会主动引用
        //Class.forName("reflectiontest.Son");
        //不会产生类的引用的方法
        //System.out.println(Son.b);
        //Son[] sons = new Son[10];
        System.out.println(Son.M);

    }
}
class Father {
    static int b=3;
    static {
        System.out.println("Father");
    }
}
class Son extends Father {
    static {
        System.out.println("Son");
        m=300;

    }
    static int m =100;
    static final int M=1;
}
|
类加载器
 1
 2
 3
 4
 5
 6
 7
 8
 9
10
11
12
13
14
15
16
|
package reflectiontest;

public class demo5 {
    public static void main(String[] args) {
        //获取系统类的加载器
        ClassLoader classLoader = ClassLoader.getSystemClassLoader();
        System.out.println(classLoader);
        //获取类加载器的父类加载器——>扩展类加载器
        ClassLoader parent = classLoader.getParent();
        System.out.println(parent);
        //获取扩展类加载器的父类加载器——>根加载器
        ClassLoader parent1 = parent.getParent();
        System.out.println(parent1);

    }
}
|
获得类名getName,getSimpleName只获得名字,获得类属性getFields,找到public属性,getDeclaredFields获得全部属性,getMethods获得本类和父类的public方法,getDeclaredMethods获取本类的所有方法,getConstructors获得构造器
利用反射动态创建对象
 1
 2
 3
 4
 5
 6
 7
 8
 9
10
11
12
13
14
15
16
17
18
19
20
21
22
23
24
25
26
27
|
package reflectiontest;

import java.lang.reflect.Constructor;
import java.lang.reflect.Field;
import java.lang.reflect.InvocationTargetException;
import java.lang.reflect.Method;

public class demo6 {
    public static void main(String[] args) throws ClassNotFoundException, InstantiationException, IllegalAccessException, NoSuchMethodException, InvocationTargetException, NoSuchFieldException {
        Class c1=Class.forName("reflectiontest.User");
//        User user=(User)c1.newInstance();//无参构造
//        System.out.println(user);
//        Constructor constructor=c1.getDeclaredConstructor(String.class,int.class,int.class);//有参构造
//        User c2=(User)constructor.newInstance("aaa",1,2);
//        System.out.println(c2);
        User c3 = (User)c1.newInstance();//通过反射调用普通方法
        Method setName = c1.getDeclaredMethod("setName", String.class);
        setName.invoke(c3, "test");
        System.out.println(c3.getName());

        User c4 = (User)c1.newInstance();
        Field name=c1.getDeclaredField("name");
        name.setAccessible(true);
        name.set(c4,"test2");
        System.out.println(c4.getName());//权限不够,元素是私有的,用setAccessible关闭安全检测
    }
}
|
Springboot
用maven创建springboot项目
本地端口可以在application.properties里面更改
接下来启动main,访问8080出现error界面就成功了
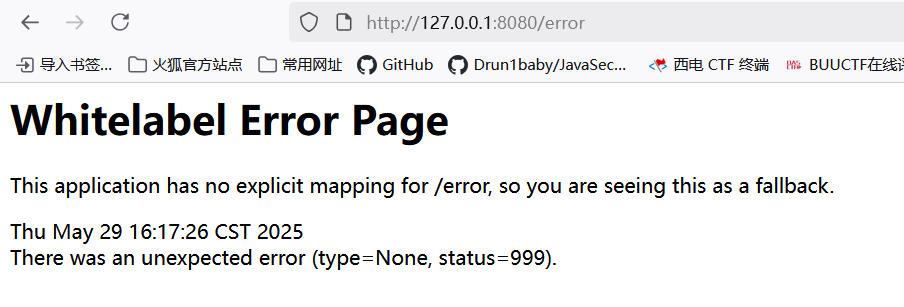
接下来输出hello,world
先在main.java的同级目录下面创接口
 1
 2
 3
 4
 5
 6
 7
 8
 9
10
11
12
|
package com.test.springtest.controller;

import org.springframework.web.bind.annotation.RequestMapping;
import org.springframework.web.bind.annotation.RestController;

@RestController
public class hellocontroller {
    @RequestMapping("/hello")
    public String hell(){
        return "hello,world";
    }
}
|
可以在IDEA右侧的maven控制台打包为jar,这样就可以不启动IDEA,就能在本机8080端口运行了
pom.xml
- spring-boot-dependencies:核心依赖在父工程中
启动器
-
1
2
3
4
|
<dependency>
            <groupId>org.springframework.boot</groupId>
            <artifactId>spring-boot-starter-web</artifactId>
</dependency>
|
主程序
 1
 2
 3
 4
 5
 6
 7
 8
 9
10
11
12
13
14
|
package com.test.springtest;

import org.springframework.boot.SpringApplication;
import org.springframework.boot.autoconfigure.SpringBootApplication;

@SpringBootApplication//标注这个类是一个springboot的应用
public class SpringtestApplication {

    public static void main(String[] args) {
        //启动springBoot应用
        SpringApplication.run(SpringtestApplication.class, args);
    }

}
|
yaml语法
前下的端口配置在yaml里是这样的
:后面一定要跟空格
1
2
3
4
5
6
7
8
9
10
11
12
13
14
|
# 普通的key-value
name: abc
# 对象
student:
name: abc
age: 111
# 行内写法
student: {name: abc,age: 111}
# 数组
pets:
- cat
- dog
- pig
pets: [cat,dog,pig]
|
yaml可以注入到配置类中
在实体类中用@ConfigurationProperties注解就能注入值,用prefix指定对象
1
2
3
4
5
6
7
8
9
10
11
12
13
14
15
16
17
18
19
20
21
22
23
24
25
26
27
28
29
30
31
32
33
34
35
36
37
38
39
40
41
42
43
44
45
46
47
48
49
50
51
52
53
54
55
56
57
58
59
60
61
62
63
64
65
66
67
68
69
70
71
72
73
74
75
76
77
78
79
80
81
82
83
84
85
86
87
88
89
90
91
92
|
package com.test.springtest.value;
import org.springframework.boot.context.properties.ConfigurationProperties;
import org.springframework.stereotype.Component;
import java.util.Date;
import java.util.List;
import java.util.Map;
@Component
@ConfigurationProperties(prefix="person")
public class person {
private String name;
private int age;
private Boolean happy;
private Date date;
private Map<String,Object> maps;
private List<Object> lists;
public person() {
}
public person(String name, int age, Boolean happy, Date date, Map<String, Object> maps, List<Object> lists) {
this.name = name;
this.age = age;
this.happy = happy;
this.date = date;
this.maps = maps;
this.lists = lists;
}
public String getName() {
return name;
}
public int getAge() {
return age;
}
public Boolean getHappy() {
return happy;
}
public Date getDate() {
return date;
}
public Map<String, Object> getMaps() {
return maps;
}
public List<Object> getLists() {
return lists;
}
public void setName(String name) {
this.name = name;
}
public void setAge(int age) {
this.age = age;
}
public void setHappy(Boolean happy) {
this.happy = happy;
}
public void setDate(Date date) {
this.date = date;
}
public void setMaps(Map<String, Object> maps) {
this.maps = maps;
}
public void setLists(List<Object> lists) {
this.lists = lists;
}
@Override
public String toString() {
return "person{" +
"name='" + name + '\'' +
", age=" + age +
", happy=" + happy +
", date=" + date +
", maps=" + maps +
", lists=" + lists +
'}';
}
}
|
定义完一个person类之后,用yaml来给对象赋值
1
2
3
4
5
6
7
8
9
10
11
12
|
person:
name: abc
age: 111
happy: true
date: 2022/01/11
maps:
k1: v1
k2: v2
lists:
- music
- abc
- code
|
最后在test里面执行,先引入person类
1
2
3
4
5
6
7
8
9
10
11
12
13
14
15
16
17
18
|
package com.test.springtest;
import com.test.springtest.value.person;
import org.junit.jupiter.api.Test;
import org.springframework.beans.factory.annotation.Autowired;
import org.springframework.boot.test.context.SpringBootTest;
@SpringBootTest
class SpringtestApplicationTests {
@Autowired
private person person;
@Test
void contextLoads() {
System.out.println(person);
}
}
|
还能指定加载配置文件
1
|
@PropertySource(value = "classpath:application.properties")
|
赋值就麻烦了
1
2
|
//SPEL表达式取值
@Value("${name}")
|
JSR303校验
下面的class可以指定格式来校验,比如邮箱格式
springboot的多环境配置:可以选择激活哪一个配置文件
比如我们新建了application-dev.properties,在application.properties里面这样激活
1
|
spring.profiles.active=dev
|
yaml更简单
1
2
3
4
5
6
7
8
9
10
11
12
13
14
15
16
|
server:
  port: 8080
spring:
profiles:
active: dev
---
server:
port: 8080
spring:
profiles: dev
---
server:
port: 8080
spring:
profiles: test
|
web开发
导入静态资源,去webjars官网下jquery,用maven引入
测试url
1
|
http://127.0.0.1:8080/webjars/jquery/3.7.1/jquery.js
|
读源码发现classpath有多个可以被解析
 1
 2
 3
 4
 5
 6
 7
 8
 9
10
11
12
13
14
15
|
public void addResourceHandlers(ResourceHandlerRegistry registry) {
if (!this.resourceProperties.isAddMappings()) {
logger.debug("Default resource handling disabled");
} else {
this.addResourceHandler(registry, this.mvcProperties.getWebjarsPathPattern(), "classpath:/META-INF/resources/webjars/");
this.addResourceHandler(registry, this.mvcProperties.getStaticPathPattern(), (Consumer)((registration) -> {
registration.addResourceLocations(this.resourceProperties.getStaticLocations());
if (this.servletContext != null) {
ServletContextResource resource = new ServletContextResource(this.servletContext, "/");
registration.addResourceLocations(new Resource[]{resource});
}
}));
}
}
|
跟进resourceProperties
1
2
3
4
5
6
7
|
public static class Resources {
private static final String[] CLASSPATH_RESOURCE_LOCATIONS = new String[]{"classpath:/META-INF/resources/", "classpath:/resources/", "classpath:/static/", "classpath:/public/"};
private String[] staticLocations;
private boolean addMappings;
private boolean customized;
private final Chain chain;
private final Cache cache;
|
- /resources/
- /static/
- /public/
- /META-INF/resources/
注意:不要轻易去该配置文件里面
1
2
3
|
spring:
mvc:
static-path-pattern: /**
|
如果把前端代码写到templates下面,要用controller来跳转,而且要模板引擎来渲染
这里用Thymeleaf,
 1
 2
 3
 4
 5
 6
 7
 8
 9
10
11
12
13
14
15
16
17
18
19
|
public class ThymeleafProperties {
private static final Charset DEFAULT_ENCODING;
public static final String DEFAULT_PREFIX = "classpath:/templates/";
public static final String DEFAULT_SUFFIX = ".html";
private boolean checkTemplate = true;
private boolean checkTemplateLocation = true;
private String prefix = "classpath:/templates/";
private String suffix = ".html";
private String mode = "HTML";
private Charset encoding;
private boolean cache;
private Integer templateResolverOrder;
private String[] viewNames;
private String[] excludedViewNames;
private boolean enableSpringElCompiler;
private boolean renderHiddenMarkersBeforeCheckboxes;
private boolean enabled;
private final Servlet servlet;
private final Reactive reactive;
|
可以看到在templates目录下以html为后缀的才被解析
controller
1
2
3
4
5
6
7
8
9
10
11
12
|
package com.test.springtest.controller;
import org.springframework.stereotype.Controller;
import org.springframework.web.bind.annotation.RequestMapping;
@Controller
public class index {
@RequestMapping("/test")
public String test(){
return "test";
}
}
|
只要在templates下写同名的html,就能被渲染
thymeleaf语法
跟着中文文档来教程:使用 Thymeleaf - 中文文档
controller
1
2
3
4
5
6
7
8
9
10
11
12
13
14
|
package com.test.springtest.controller;
import org.springframework.stereotype.Controller;
import org.springframework.ui.Model;
import org.springframework.web.bind.annotation.RequestMapping;
@Controller
public class index {
@RequestMapping("/test")
public String test(Model model) {
model.addAttribute("msg", "哈基米南北绿豆");
return "test";
}
}
|
test.html
1
2
3
4
5
6
7
8
9
10
11
12
13
|
<!DOCTYPE html>
<html lang="en" xmlns:th="http://www.thymeleaf.org">
<head>
<meta charset="UTF-8">
<title>Title</title>
</head>
<body>
<!--所有的html元素都能被thymeleaf替换 th:元素名-->
<div th:text="${msg}"></div>
</body>
</html>
|
总结
1
2
3
4
5
6
|
简单表达式:
变量表达式:${...}
选择变量表达式:*{...}
消息表达式:#{...}
链接URL表达式:@{...}
片段表达式:~{...}
|
数据库这里直接跳了
springsecurity
Spring Security 中文文档 :: Spring Security Reference
shiro
Apache Shiro | Java Security Framework
shiroconfig.java
 1
 2
 3
 4
 5
 6
 7
 8
 9
10
11
12
13
14
15
16
17
18
19
20
21
22
23
24
25
26
27
28
29
30
31
32
33
34
35
36
37
38
39
40
41
42
43
44
45
46
47
48
49
50
51
52
53
54
55
56
57
58
59
60
61
62
63
64
65
66
|
package com.test.springtest.config;
import org.apache.shiro.authc.AuthenticationException;
import org.apache.shiro.authc.AuthenticationInfo;
import org.apache.shiro.authc.AuthenticationToken;
import org.apache.shiro.authz.AuthorizationInfo;
import org.apache.shiro.spring.web.ShiroFilterFactoryBean;
import org.apache.shiro.subject.PrincipalCollection;
import org.apache.shiro.web.mgt.DefaultWebSecurityManager;
import org.springframework.beans.factory.annotation.Qualifier;
import org.springframework.context.annotation.Bean;
import org.springframework.context.annotation.Configuration;
import java.util.LinkedHashMap;
import java.util.Map;
@Configuration
public class shiroconfig {
@Bean
public ShiroFilterFactoryBean getShiroFilterFactoryBean(@Qualifier("securityManager") DefaultWebSecurityManager securityManager) {
ShiroFilterFactoryBean bean = new ShiroFilterFactoryBean();
bean.setSecurityManager(securityManager);
/*
* anno:无需认证
* authc:必须认证
* user:必须remeberme
* perms:拥有某个资源权限
* role:拥有某个角色权限
* */
Map<String, String> filterChainDefinitionMap = new LinkedHashMap<>();
filterChainDefinitionMap.put("/user/add", "anno");
filterChainDefinitionMap.put("/user/update", "anno");
bean.setFilterChainDefinitionMap(filterChainDefinitionMap);
bean.setLoginUrl("/login");
return bean;
}
@Bean
public DefaultWebSecurityManager securityManager(@Qualifier("userRealm") userrealm userRealm) {
DefaultWebSecurityManager manager = new DefaultWebSecurityManager();
manager.setRealm(userRealm);
return manager;
}
@Bean
public userrealm userRealm(){
return new userrealm() {
@Override
protected AuthorizationInfo doGetAuthorizationInfo(PrincipalCollection principalCollection) {
return super.doGetAuthorizationInfo(principalCollection);
}
@Override
protected AuthenticationInfo doGetAuthenticationInfo(AuthenticationToken authenticationToken) throws AuthenticationException {
return super.doGetAuthenticationInfo(authenticationToken);
}
};
}
}
|
userrealm.java
1
2
3
4
5
6
7
8
9
10
11
12
13
14
15
16
17
18
19
20
21
22
23
24
25
26
|
package com.test.springtest.config;
import org.apache.shiro.authc.AuthenticationException;
import org.apache.shiro.authc.AuthenticationInfo;
import org.apache.shiro.authc.AuthenticationToken;
import org.apache.shiro.authc.credential.CredentialsMatcher;
import org.apache.shiro.authz.AuthorizationInfo;
import org.apache.shiro.cache.CacheManager;
import org.apache.shiro.realm.AuthorizingRealm;
import org.apache.shiro.subject.PrincipalCollection;
public abstract class userrealm extends AuthorizingRealm {
//授权
@Override
protected AuthorizationInfo doGetAuthorizationInfo(PrincipalCollection principalCollection) {
System.out.println("授权doGetAuthorizationInfo");
return null;
}
//认证
@Override
protected AuthenticationInfo doGetAuthenticationInfo(AuthenticationToken authenticationToken) throws AuthenticationException {
System.out.println("认证doGetAuthenticationInfo");
return null;
}
}
|
index.java
 1
 2
 3
 4
 5
 6
 7
 8
 9
10
11
12
13
14
15
16
17
18
19
20
21
22
23
24
25
26
27
28
29
30
31
32
33
34
35
36
37
38
39
40
41
42
43
44
45
46
47
48
49
50
51
52
53
54
55
|
package com.test.springtest.controller;


import org.apache.shiro.SecurityUtils;
import org.apache.shiro.authc.IncorrectCredentialsException;
import org.apache.shiro.authc.UnknownAccountException;
import org.apache.shiro.authc.UsernamePasswordToken;
import org.apache.shiro.subject.Subject;
import org.springframework.stereotype.Controller;
import org.springframework.ui.Model;
import org.springframework.web.bind.annotation.RequestMapping;

import java.util.ArrayList;
import java.util.Arrays;

@Controller
public class index {
    @RequestMapping({"/index","/"})
    public String test(Model model) {
        model.addAttribute("msg", "哈基米南北绿豆");
        model.addAttribute("users", Arrays.asList("哈基米","曼波"));
        return "index";
    }
    @RequestMapping("/user/add")
    public String add(){
        return "user/add";
    }
    @RequestMapping("/user/update")
    public String update(){
        return "user/update";
    }
    @RequestMapping("/toLogin")
    public String toLogin(){
        return "login";
    }
    @RequestMapping("/login")
    public String login(String username, String password, Model model){
        //获取当前用户
        Subject subject = SecurityUtils.getSubject();
        //封装用户登入数据
        UsernamePasswordToken Token = new UsernamePasswordToken(username, password, true);
        try{
            subject.login(Token);
            return "redirect:/index";
        }catch (UnknownAccountException e){
            model.addAttribute("msg", "用户名错误");
            return "login";
        }catch (IncorrectCredentialsException e){
            model.addAttribute("msg", "密码错误");
            return "login";
        }

    }

}
|
